









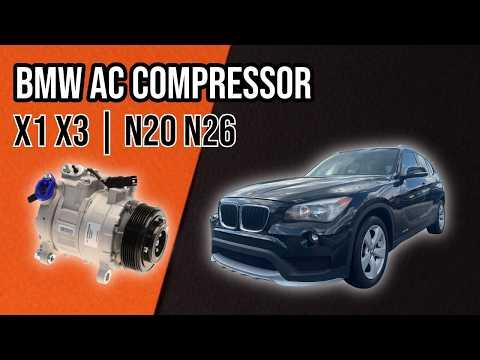







How to Replace the A/C Compressor on a 2016 BMW X1 (R-1234yf System) (Engine: Inline 4 2.0L)
Step-by-step compressor swap with tools/parts list, safety tips, vacuum/evacuate steps, and proper recharge guidance
How to Replace the A/C Compressor on a 2016 BMW X1 (R-1234yf System) (Engine: Inline 4 2.0L)
Step-by-step compressor swap with tools/parts list, safety tips, vacuum/evacuate steps, and proper recharge guidance for 2016


🔧 X1 - A/C Compressor Replacement
Replacing the A/C compressor on your X1 is a bigger job because the refrigerant must be safely recovered, the compressor is mounted low on the engine, and the system must be vacuumed and recharged to an exact amount.
Assumption: Your X1 uses R-1234yf refrigerant and a clutchless (always-driven) compressor—verify the refrigerant type/charge weight on the under-hood A/C label.
Difficulty Level: Advanced | Estimated Time: 3-6 hours
⚠️ Safety & Precautions
- ⚠️ Do not vent refrigerant to the air—have the system recovered with proper equipment (legal + safety requirement).
- ⚠️ If your system is R-1234yf, it is mildly flammable; keep away from sparks, smoking, and hot work.
- ⚠️ Wear safety glasses and nitrile gloves; liquid refrigerant can cause frostbite.
- ⚠️ Support the vehicle with jack stands on a level surface; never rely on a jack.
- ⚠️ Disconnect the negative battery terminal before unplugging the compressor to prevent accidental shorting.
🔧 Required Tools
You'll need the following tools for this repair:
- Floor jack (rated 3-ton minimum)
- Jack stands (rated 3-ton minimum)
- Wheel chocks
- Safety glasses
- Nitrile gloves
- 8mm socket
- 10mm socket
- 13mm socket
- 16mm socket
- E10 external Torx socket
- E12 external Torx socket
- 3/8" ratchet
- 3/8" torque wrench (10–60 Nm range)
- Flat trim tool
- Serpentine belt tool (specialty)
- A/C manifold gauge set for R-1234yf (specialty)
- R-1234yf recovery/recharge machine (specialty)
- Vacuum pump (specialty)
- Refrigerant scale (specialty)
- O-ring pick set
- Shop rags
- Line caps/plugs assortment
🔩 Required Parts
HowToo sells all the parts you need for this repair:
- A/C compressor - Qty: 1
- A/C compressor O-ring set - Qty: 1
- R-1234yf refrigerant - Qty: As specified on under-hood label
- PAG A/C compressor oil (R-1234yf compatible) - Qty: As required
- Serpentine belt - Qty: 1 Optional but smart if worn
- A/C receiver/drier or condenser drier element - Qty: 1 Recommended if compressor failed
📋 Before You Begin
- Park on level ground, set the parking brake, and place wheel chocks behind the rear wheels.
- Let the engine cool down fully; the compressor sits near hot components.
- Have the A/C system professionally recovered (or use proper recovery equipment). Do not continue until system pressure is at zero.
- Disconnect the negative battery terminal using a 10mm socket. (On the X1, the battery is in the rear cargo area under the floor panel.)
🔨 Step-by-Step Instructions
Follow these steps in order:
Step 1: Raise and secure the vehicle
- Use a floor jack to lift the front of the vehicle at the proper front jacking point.
- Set the vehicle onto jack stands and confirm it is stable before going underneath.
Step 2: Remove the lower engine splash shield
- Use an 8mm socket and 10mm socket to remove the underbody fasteners.
- Use a flat trim tool to release any plastic clips without breaking them.
Step 3: Remove the serpentine belt from the A/C compressor
- Use a serpentine belt tool (specialty) with a 16mm socket to rotate the belt tensioner. (A serpentine belt tool is a long handled wrench made for tight spaces.)
- Slip the belt off the A/C compressor pulley first, then slowly release the tensioner.
- Take a quick photo of belt routing.
Step 4: Unplug the A/C compressor electrical connector
- Use a flat trim tool to gently release the connector lock tab.
- Pull the connector straight off; do not yank on the wires.
Step 5: Remove the A/C refrigerant lines from the compressor
- Place shop rags under the compressor to catch any oil drips.
- Use an E10 external Torx socket (external Torx = star-shaped bolt head on the outside) to remove the line retaining bolts (varies by build).
- Carefully wiggle the lines free—do not bend them.
- Immediately cap the open lines and compressor ports using line caps/plugs assortment to keep moisture out.
Step 6: Remove the A/C compressor from the engine
- Support the compressor with one hand.
- Use an E12 external Torx socket to remove the compressor mounting bolts.
- Lower the compressor out from underneath.
- Torque note: Bolt sizes can vary by compressor supplier; torque the mounting bolts to the BMW spec for your exact compressor/bolt set (do not guess).
Step 7: Prepare the new compressor (oil + seals)
- Remove the shipping caps only when ready to install.
- Use an O-ring pick set to remove old O-rings from the line ends (if they stayed on the lines).
- Install new O-rings from the A/C compressor O-ring set.
- Lightly coat the new O-rings with the correct PAG A/C compressor oil (R-1234yf compatible) so they don’t pinch.
- If the old compressor failed internally, replace the receiver/drier as well to prevent repeat failure.
Step 8: Install the new compressor
- Position the compressor and start all mounting bolts by hand to avoid cross-threading.
- Use an E12 external Torx socket to snug the bolts evenly.
- Final tighten with a 3/8" torque wrench to the BMW spec for your bolt set.
Step 9: Reconnect the A/C lines
- Remove the caps/plugs right before assembly.
- Seat the lines squarely into the compressor ports.
- Install the retaining bolts using an E10 external Torx socket.
- Final tighten with a 3/8" torque wrench to the BMW spec for your line bolts.
Step 10: Reinstall the belt and underbody shield
- Route the belt correctly, then use the serpentine belt tool (specialty) with a 16mm socket to rotate the tensioner and slip the belt onto the compressor pulley.
- Reinstall the splash shield using the 8mm socket and 10mm socket.
Step 11: Evacuate and recharge the A/C system
- Reconnect the negative battery terminal using a 10mm socket.
- Connect the A/C manifold gauge set for R-1234yf (specialty) and pull vacuum with a vacuum pump (specialty) per equipment instructions.
- Verify it holds vacuum (a quick leak check).
- Recharge with R-1234yf using a refrigerant scale (specialty) to the exact weight on the under-hood label.
✅ After Repair
- Start the engine and turn A/C on MAX; confirm the center vents blow cold and the compressor runs smoothly (no squeal/grind).
- Check underneath for any oily residue at the compressor line connections (a sign of a leak).
- If you have an A/C machine, run an electronic leak check/dye check per the equipment procedure.
- If cooling is weak, stop and re-check charge amount.
💰 DIY vs Shop Cost
Shop Cost: $1,200-$2,200 (parts + labor + recover/recharge)
DIY Cost: $450-$1,200 (parts only, assuming you have access to A/C equipment)
You Save: $500-$1,400 by doing it yourself!
Shop labor rates vary but typically run $100-$150/hour. This repair takes a shop approximately 3-5 hours.
🎯 Ready to get started?
HowToo makes it easy: same-day/2-day shipping on every part, plus all the tools and specialty tools you need! Check out the parts and tools sections below to add everything to your cart.
Guide for A/C Compressor replace for these BMW vehicles
| Year Make Model | Sub Model | Engine | Body Style |
|---|---|---|---|
| 2016 BMW X1 | - | Inline 4 2.0L | - |