









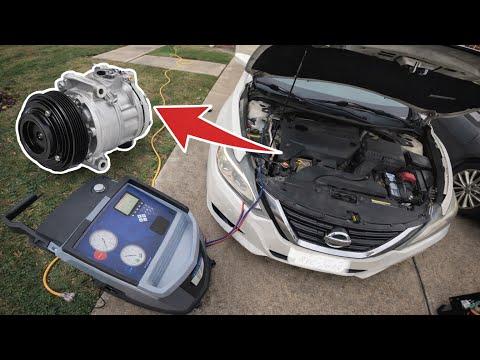





How to Replace the A/C Compressor on a 2016-2018 Nissan Altima 2.5L (Trim: Base | Engine: Inline 4 2.5L)
Step-by-step DIY guide with tools, parts, safety tips, torque specs, and recharge steps for 2016, 2017
How to Replace the A/C Compressor on a 2016-2018 Nissan Altima 2.5L (Trim: Base | Engine: Inline 4 2.5L)
Step-by-step DIY guide with tools, parts, safety tips, torque specs, and recharge steps for 2016, 2017


🔧 Altima - A/C Compressor Replacement
Replacing the A/C compressor on your Altima requires removing the refrigerant, taking off the drive belt, disconnecting the refrigerant lines, and installing the new compressor with fresh seals and the correct amount of oil. The A/C system must be evacuated and recharged after installation so it cools properly and does not damage the new compressor.
Difficulty Level: Advanced | Estimated Time: 3-5 hours
Assumption: This is for the 2.5L inline-4 Altima with factory-style A/C system.
⚠️ Safety & Precautions
- ⚠️ A/C refrigerant is under high pressure and can cause frostbite or eye injury. Do not vent refrigerant into the air.
- ⚠️ Have the refrigerant professionally recovered before opening any A/C line.
- ⚠️ Wear safety glasses and gloves any time you work near A/C fittings.
- ⚠️ Disconnect the negative battery cable before unplugging the compressor clutch connector.
- ⚠️ Support your Altima with jack stands only. Never work under a car held by a jack alone.
- ⚠️ If the old compressor failed internally, the condenser, expansion valve, and lines may need flushing or replacement to prevent repeat failure.
🔧 Required Tools
You'll need the following tools for this repair:
- 10mm socket
- 12mm socket
- 14mm socket
- 3/8-inch ratchet
- 3/8-inch extension set
- 14mm wrench
- Serpentine belt tool (specialty)
- Trim clip removal tool
- Flat-blade screwdriver
- Torque wrench 5-80 Nm
- A/C manifold gauge set R-134a (specialty)
- A/C vacuum pump 2-stage (specialty)
- Refrigerant scale 0-50 lb (specialty)
- Oil measuring cup 8 oz
- Floor jack rated 2-ton minimum
- Jack stands rated 2-ton minimum
- Wheel chocks
- Nitrile gloves
- Safety glasses
🔩 Required Parts
HowToo sells all the parts you need for this repair:
- A/C compressor - Qty: 1
- A/C compressor O-ring seal kit - Qty: 1
- PAG A/C compressor oil - Qty: As specified by compressor instructions
- R-134a refrigerant - Qty: Factory charge amount by under-hood label
- Serpentine drive belt - Qty: 1
- A/C receiver/drier or desiccant service part - Qty: 1
- A/C condenser - Qty: 1 if compressor failed internally
- A/C expansion valve - Qty: 1 if contamination is found
📋 Before You Begin
- Park your Altima on level ground and set the parking brake.
- Place wheel chocks behind the rear wheels.
- Have the A/C refrigerant professionally recovered before loosening any A/C line.
- Open the hood and let the engine cool completely.
- Write down the radio presets if needed before disconnecting the battery.
- Disconnect the negative battery cable with a 10mm socket.
- A manifold gauge set measures A/C system pressure. A vacuum pump removes air and moisture before recharging.
🔨 Step-by-Step Instructions
Follow these steps in order:
Step 1: Recover the Refrigerant
- Use an A/C manifold gauge set R-134a and approved recovery equipment to recover the refrigerant.
- If you do not have recovery equipment, have a shop recover it first, then bring your Altima home for the mechanical work.
- Do not loosen A/C hoses until the system pressure is confirmed at zero on the gauge set.
Step 2: Raise the Front of the Vehicle
- Use a floor jack rated 2-ton minimum to lift the front of your Altima at the front center jacking point.
- Place jack stands rated 2-ton minimum under the front side pinch welds.
- Gently lower the vehicle onto the stands and shake the car lightly to confirm it is stable.
- Never trust the jack alone.
Step 3: Remove the Lower Splash Shield
- Use a trim clip removal tool to remove the plastic push clips from the lower engine splash shield.
- Use a 10mm socket to remove any small bolts holding the shield.
- Lower the splash shield and set it aside.
Step 4: Remove the Serpentine Drive Belt
- Before removal, look at the belt routing sticker under the hood or take a photo with your phone.
- Use a serpentine belt tool or 14mm wrench on the belt tensioner to rotate the tensioner and release belt tension.
- Slide the belt off the A/C compressor pulley first, then remove it from the other pulleys.
- A belt tensioner is a spring-loaded arm that keeps the belt tight.
Step 5: Disconnect the Compressor Electrical Connector
- Use your fingers or a flat-blade screwdriver to release the locking tab on the A/C compressor clutch connector.
- Pull the connector straight off. Do not pull on the wires.
- Move the harness aside so it will not be pinched during removal.
Step 6: Disconnect the A/C Lines from the Compressor
- Put on safety glasses and nitrile gloves.
- Confirm the A/C gauge pressure is zero before opening the lines.
- Use a 10mm socket or 12mm socket to remove the refrigerant line retaining bolt at the compressor.
- Carefully pull the suction and discharge line block away from the compressor.
- Remove and discard the old O-rings from the line fittings.
- Cap or cover the open lines to keep dirt and moisture out.
- During installation, tighten the A/C line retaining bolt to Torque to 8-12 Nm (71-106 in-lbs).
Step 7: Remove the A/C Compressor
- Support the compressor with one hand from below.
- Use a 12mm socket or 14mm socket with a 3/8-inch ratchet and 3/8-inch extension to remove the compressor mounting bolts.
- Lower the compressor out through the bottom of the engine bay.
- Keep the old compressor upright so you can measure the oil later.
- During installation, tighten the compressor mounting bolts to Torque to 22-28 Nm (16-21 ft-lbs).
Step 8: Measure and Set Compressor Oil
- Drain the old compressor oil into an oil measuring cup 8 oz by turning the compressor hub by hand while draining.
- Compare the drained amount with the instructions included with the new compressor.
- Add the correct amount of PAG A/C compressor oil to the new compressor using the oil measuring cup 8 oz.
- Rotate the new compressor clutch plate by hand 10 turns to spread oil inside.
- If the old compressor came apart internally or has metal debris, do not reuse contaminated parts without flushing or replacing affected components.
Step 9: Install the New Compressor
- Lift the new compressor into position from underneath.
- Start all compressor mounting bolts by hand first to avoid cross-threading.
- Use a 12mm socket or 14mm socket to snug the bolts evenly.
- Use a torque wrench 5-80 Nm to tighten the mounting bolts to Torque to 22-28 Nm (16-21 ft-lbs).
- Start bolts by hand first.
Step 10: Reconnect the A/C Lines
- Lightly coat the new O-rings with clean PAG A/C compressor oil.
- Install the new O-rings onto the suction and discharge line fittings.
- Push the line block squarely into the compressor.
- Use a 10mm socket or 12mm socket to install the retaining bolt.
- Use a torque wrench 5-80 Nm to tighten the line retaining bolt to Torque to 8-12 Nm (71-106 in-lbs).
Step 11: Reconnect the Electrical Connector
- Push the compressor electrical connector on until it clicks.
- Use a flat-blade screwdriver only if needed to guide the locking tab gently.
- Make sure the wiring is clipped away from the belt path.
Step 12: Install the Serpentine Belt
- Route the new serpentine belt around all pulleys except the easiest smooth pulley to access.
- Use the serpentine belt tool or 14mm wrench to rotate the belt tensioner.
- Slip the belt over the final pulley, then slowly release the tensioner.
- Check every pulley groove to make sure the belt is fully seated.
- Misrouted belts can destroy components.
Step 13: Reinstall the Lower Splash Shield
- Raise the splash shield into place.
- Use a 10mm socket to reinstall the small bolts.
- Use a trim clip removal tool or your fingers to reinstall the plastic push clips.
- Tighten small splash shield bolts snug only, about Torque to 3-5 Nm (27-44 in-lbs).
Step 14: Evacuate the A/C System
- Connect the A/C manifold gauge set R-134a to the high-side and low-side service ports.
- Connect the center hose to the A/C vacuum pump 2-stage.
- Open both manifold valves and run the vacuum pump for at least 30-45 minutes.
- Close the valves and turn off the pump.
- Watch the gauges for 10-15 minutes. Vacuum loss means there is a leak that must be fixed before charging.
Step 15: Recharge the A/C System
- Use a refrigerant scale 0-50 lb to charge the exact factory amount listed on the under-hood A/C label.
- Use the A/C manifold gauge set R-134a to charge through the low-side service port.
- Start the engine only when the charging procedure calls for it and keep hands clear of the belt and fans.
- Set A/C to maximum cool, blower high, and doors open while finishing the charge.
- Do not overcharge. Too much refrigerant can damage the compressor.
Step 16: Reconnect the Battery and Final Check
- Use a 10mm socket to reconnect the negative battery cable.
- Start your Altima and let it idle.
- Watch the compressor clutch operation and listen for abnormal noise.
- Use the A/C manifold gauge set R-134a to confirm pressures are stable.
✅ After Repair
- Check that the A/C blows cold from the center vents after several minutes of operation.
- Inspect the compressor line fittings for oily residue, which can indicate a refrigerant leak.
- Listen for belt squeal or grinding. Shut the engine off immediately if you hear either one.
- Confirm the serpentine belt tracks straight on every pulley.
- If cooling is weak, recover and weigh the refrigerant charge. Guessing by pressure alone is not accurate.
- If the battery was disconnected, reset the clock and one-touch window operation if needed.
💰 DIY vs Shop Cost
Shop Cost: $950-$1,650 (parts + labor)
DIY Cost: $350-$750 (parts only, plus any tool rental or refrigerant recovery/recharge service)
You Save: $400-$900 by doing it yourself!
Shop labor rates vary but typically run $100-$150/hour. This repair takes a shop approximately 3-5 hours.
🎯 Ready to get started?
HowToo makes it easy: same-day/2-day shipping on every part, plus all the tools and specialty tools you need! Check out the parts and tools sections below to add everything to your cart.