









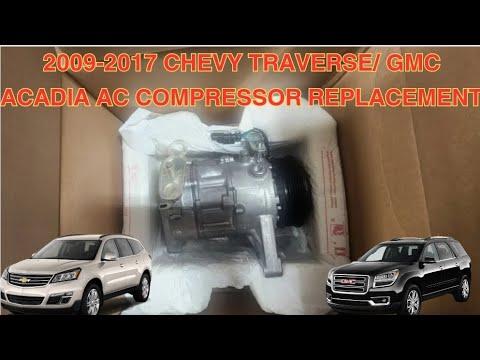







How to Replace the A/C Compressor on a 2013-2017 Chevrolet Traverse (R-134a System) (Trim: LT | Engine: V6 3.6L | Body: Sport Utility)
Step-by-step removal and install with tools, parts list, O-rings, oil balancing, and evac/recharge tips
How to Replace the A/C Compressor on a 2013-2017 Chevrolet Traverse (R-134a System) (Trim: LT | Engine: V6 3.6L | Body: Sport Utility)
Step-by-step removal and install with tools, parts list, O-rings, oil balancing, and evac/recharge tips for 2013, 2014, 2015, 2016, 2017


🔧 Traverse - A/C Compressor Replacement
The A/C compressor is the pump that circulates refrigerant and oil through your A/C system. Replacing it is mostly a bolt-on job, but the refrigerant must be safely recovered and the system must be vacuumed and recharged to the exact amount afterward.
Assumption: Torque specs and exact refrigerant charge can vary by A/C option; use the under-hood A/C label and a service manual for exact values.
Difficulty Level: Advanced | Estimated Time: 3-6 hours (plus evac/recharge time)
⚠️ Safety & Precautions
- ⚠️ Refrigerant must be recovered with proper equipment—do not vent to atmosphere.
- ⚠️ Wear safety glasses and nitrile gloves; refrigerant/oil can cause frostbite and eye injury.
- ⚠️ Keep hands/tools clear of the belt drive; never work near a running engine.
- ⚠️ Disconnect the negative battery cable before unplugging the compressor connector.
- ⚠️ If the old compressor failed noisily or seized, the system may be contaminated; flushing and extra parts may be required.
🔧 Required Tools
You'll need the following tools for this repair:
- Safety glasses
- Nitrile gloves
- Floor jack (rated 3-ton minimum)
- Jack stands (rated 3-ton minimum)
- Wheel chocks
- 3/8" drive ratchet
- 1/2" drive ratchet
- Socket set 8mm-18mm
- Wrench set 10mm-18mm
- Serpentine belt tool 3/8" drive
- Torque wrench (10-200 Nm range)
- Trim clip remover
- Flat-blade screwdriver
- Catch pan
- Shop towels
- A/C line plug kit (specialty)
- A/C manifold gauge set (specialty)
- A/C vacuum pump (specialty)
- Refrigerant recovery machine (specialty)
- Refrigerant scale (specialty)
🔩 Required Parts
HowToo sells all the parts you need for this repair:
- A/C compressor - Qty: 1
- A/C compressor oil (PAG, correct viscosity for your A/C system) - Qty: 1
- A/C line O-ring kit - Qty: 1
- Receiver drier / desiccant service part - Qty: 1
- Serpentine belt - Qty: 1
- Refrigerant (R-134a) - Qty: As specified on under-hood label
📋 Before You Begin
- Park on level ground, set the parking brake, and place wheel chocks.
- Have a shop recover the refrigerant first using a recovery machine (this pulls refrigerant into a storage tank).
- Disconnect the negative battery cable using a 10mm socket.
- Raise the front safely using a floor jack and support with jack stands.
- Take photos before unplugging anything.
🔨 Step-by-Step Instructions
Follow these steps in order:
Step 1: Remove lower shields for access
- Use a trim clip remover and socket set 8mm-10mm to remove the lower splash shield/undertray fasteners.
- Set fasteners aside in a tray so they don’t get lost.
Step 2: Release serpentine belt tension
- Use a serpentine belt tool 3/8" drive to rotate the belt tensioner and slip the belt off the A/C compressor pulley.
- Sketch the belt routing before removal.
Step 3: Unplug the A/C compressor electrical connector
- Use a flat-blade screwdriver gently if needed to release the locking tab.
- This connector controls the compressor clutch/valve (depending on design), so don’t pull on the wires.
Step 4: Disconnect the A/C lines from the compressor
- Place a catch pan under the compressor; a little oil may drip out.
- Use the correct socket set 10mm-13mm to remove the A/C line manifold bolt(s).
- Immediately cap/plug the open lines using an A/C line plug kit (specialty) to keep moisture and dirt out.
- Remove and discard the old O-rings; wipe the sealing surfaces with shop towels.
Step 5: Remove the A/C compressor
- Support the compressor with one hand while removing the mounting bolts using a socket set 13mm-15mm and a ratchet.
- Lower and remove the compressor from underneath.
Step 6: Set up the new compressor (oil balancing)
- Drain the oil from the old compressor into a measuring cup (use a catch pan and shop towels).
- Add the same amount of fresh A/C compressor oil (PAG) to the new compressor unless the new unit’s instructions say it’s pre-filled.
- “Oil balancing” means matching oil quantity so the system isn’t overfilled or starved.
Step 7: Install the new compressor
- Position the compressor and hand-start all mounting bolts.
- Tighten mounting bolts with a torque wrench to the factory specification for your A/C compressor bracket bolts.
Step 8: Install new O-rings and reconnect A/C lines
- Install new O-rings from the A/C line O-ring kit.
- Lightly lubricate O-rings with a drop of PAG oil so they don’t tear during assembly.
- Reconnect the lines and tighten the line manifold bolt(s) using a torque wrench to factory specification.
Step 9: Reinstall belt and shields
- Route the belt and rotate the tensioner using the serpentine belt tool 3/8" drive.
- Reinstall the undertray/splash shield using the socket set 8mm-10mm and trim clip remover.
Step 10: Evacuate and recharge the A/C system
- Connect an A/C manifold gauge set (specialty) (this reads high/low system pressures).
- Pull vacuum using an A/C vacuum pump (specialty) to remove air/moisture; verify it holds vacuum to confirm no leaks.
- Recharge with R-134a using a refrigerant scale (specialty) to the exact weight listed on the under-hood A/C label.
- Charging by pressure alone is inaccurate.
Step 11: Restore power and final checks
- Reconnect the negative battery cable using a 10mm socket.
- Start the engine and turn A/C on Max; watch for normal compressor engagement and stable gauge readings.
- Inspect all fittings for oil residue that could indicate a leak.
✅ After Repair
- Verify vent temperature gets cold and stays cold at idle.
- Check for belt noise and confirm the belt is centered on all pulleys.
- If cooling is weak or pressures are abnormal, stop and re-check charge amount and look for leaks.
- If the old compressor failed internally (metal debris), plan for additional service (system flush and component replacement) to prevent repeat failure.
💰 DIY vs Shop Cost
Shop Cost: ₹35,000-₹85,000 (parts + labor + evac/recharge)
DIY Cost: ₹18,000-₹55,000 (parts only, assuming you pay a shop for evac/recharge)
You Save: ₹10,000-₹30,000 by doing it yourself!
Shop labor rates vary but typically run ₹1,000-₹3,000/hour. This repair takes a shop approximately 2-4 hours.
🎯 Ready to get started?
HowToo makes it easy: same-day/2-day shipping on every part, plus all the tools and specialty tools you need! Check out the parts and tools sections below to add everything to your cart.
Guide for A/C Compressor replace for these Chevrolet vehicles
| Year Make Model | Sub Model | Engine | Body Style |
|---|---|---|---|
| 2017 Chevrolet Traverse | LS | V6 3.6L | Sport Utility |
| 2017 Chevrolet Traverse | LT | V6 3.6L | Sport Utility |
| 2017 Chevrolet Traverse | Premier | V6 3.6L | Sport Utility |
| 2016 Chevrolet Traverse | LS | V6 3.6L | Sport Utility |
| 2016 Chevrolet Traverse | LT | V6 3.6L | Sport Utility |
| 2016 Chevrolet Traverse | LTZ | V6 3.6L | Sport Utility |
| 2015 Chevrolet Traverse | LS | V6 3.6L | Sport Utility |
| 2015 Chevrolet Traverse | LT | V6 3.6L | Sport Utility |
| 2015 Chevrolet Traverse | LTZ | V6 3.6L | Sport Utility |
| 2014 Chevrolet Traverse | LS | V6 3.6L | Sport Utility |
| 2014 Chevrolet Traverse | LT | V6 3.6L | Sport Utility |
| 2014 Chevrolet Traverse | LTZ | V6 3.6L | Sport Utility |
| 2013 Chevrolet Traverse | LS | V6 3.6L | Sport Utility |
| 2013 Chevrolet Traverse | LT | V6 3.6L | Sport Utility |
| 2013 Chevrolet Traverse | LTZ | V6 3.6L | Sport Utility |