









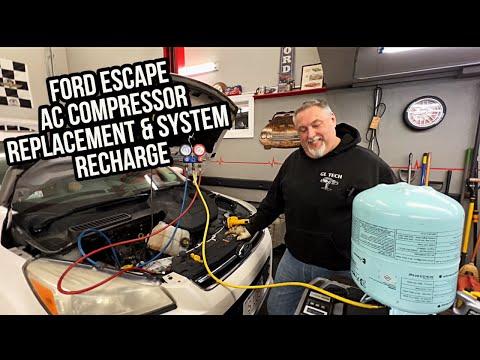




How to Replace the A/C Compressor on a 2013-2016 Ford Escape (Trim: SE | Engine: Inline 4 2.0L)
Step-by-step guide with tools, parts, refrigerant recovery, torque specs, and safety tips
How to Replace the A/C Compressor on a 2013-2016 Ford Escape (Trim: SE | Engine: Inline 4 2.0L)
Step-by-step guide with tools, parts, refrigerant recovery, torque specs, and safety tips for 2013, 2014, 2015, 2016


🔧 Escape - A/C Compressor Replacement
Replacing the A/C compressor on your Escape requires safely recovering the refrigerant, removing the drive belt and refrigerant lines, replacing the compressor, then vacuuming and recharging the system. This job is more advanced because the A/C system is pressurized and requires dedicated refrigerant service equipment.
Difficulty Level: Advanced | Estimated Time: 3-5 hours
⚠️ Safety & Precautions
- ⚠️ Refrigerant must be recovered with an approved A/C recovery machine before any A/C line is opened. Do not vent refrigerant.
- ⚠️ A/C refrigerant can cause frostbite and eye injury. Wear safety glasses and gloves.
- ⚠️ Disconnect the negative battery cable before working near the compressor wiring and belt area.
- ⚠️ The engine, turbocharger area, radiator fan, and A/C lines may be hot. Let the engine cool fully before starting.
- ⚠️ Replace the receiver/drier or desiccant element if the compressor failed internally or the system was open for an extended time.
- ⚠️ If the old compressor sent metal debris into the system, the condenser and expansion valve may also need replacement. Many modern condensers cannot be reliably flushed.
🔧 Required Tools
You'll need the following tools for this repair:
- A/C refrigerant recovery machine (specialty)
- R-134a manifold gauge set (specialty)
- A/C vacuum pump (specialty)
- Refrigerant scale 0-50 lb range (specialty)
- Electronic leak detector R-134a compatible (specialty)
- A/C line disconnect tool set (specialty)
- Serpentine belt tool 3/8-inch drive (specialty)
- 8mm socket
- 10mm socket
- 13mm socket
- 15mm socket
- 3/8-inch drive ratchet
- 3/8-inch drive 6-inch extension
- Torque wrench 10-80 Nm range
- Pick tool set
- Flat-blade screwdriver
- Plastic trim removal tool set
- Drain pan 2-quart minimum
- Fender cover
- Nitrile gloves
- Safety glasses
🔩 Required Parts
HowToo sells all the parts you need for this repair:
- A/C compressor assembly - Qty: 1
- A/C compressor manifold seal kit - Qty: 1
- R-134a refrigerant - Qty: Factory-specified charge amount by underhood label
- PAG refrigerant oil - Qty: As specified by compressor supplier and oil balance procedure
- Serpentine belt - Qty: 1, recommended if worn, cracked, or oil-soaked
- Receiver/drier or desiccant element - Qty: 1, required if compressor failed internally or system stayed open
- A/C condenser - Qty: 1, required if metal debris is found
- Expansion valve - Qty: 1, required if metal debris is found or restriction is suspected
📋 Before You Begin
- Park your Escape on level ground, set the parking brake, and let the engine cool completely.
- Have the refrigerant recovered by a qualified shop or use an approved A/C refrigerant recovery machine.
- Read the underhood A/C charge label before recharging. Your Escape uses R-134a refrigerant.
- Disconnect the negative battery cable using a 10mm socket.
- A manifold gauge set is a tool with hoses and gauges used to measure and service A/C system pressure.
- A vacuum pump removes air and moisture from the A/C system before refrigerant is installed.
- Keep all A/C line openings capped after removal. Moisture in the system can damage the new compressor.
🔨 Step-by-Step Instructions
Follow these steps in order:
Step 1: Recover the Refrigerant
- Connect the R-134a manifold gauge set to the high-side and low-side service ports.
- Use the A/C refrigerant recovery machine to recover the refrigerant until the system is empty.
- Verify both gauges show 0 psi before opening any A/C line.
- Never loosen lines under pressure.
Step 2: Disconnect the Battery
- Open the hood and install a fender cover.
- Use a 10mm socket and 3/8-inch drive ratchet to loosen the negative battery cable clamp.
- Move the cable aside so it cannot spring back onto the battery post.
Step 3: Raise Access at the Front Right Area
- Use a plastic trim removal tool set and 8mm socket to remove the lower splash shield fasteners as needed for access.
- Use a flat-blade screwdriver to release any plastic retainers carefully.
- Place the removed fasteners in a cup so none are lost.
Step 4: Remove the Serpentine Belt from the Compressor Pulley
- Locate the belt tensioner on the front of the engine.
- Use the serpentine belt tool 3/8-inch drive to rotate the tensioner and remove tension from the belt.
- Slide the belt off the A/C compressor pulley only, or remove the belt fully if replacing it.
- Release the tensioner slowly by hand pressure on the tool.
- Take a belt routing photo first.
Step 5: Disconnect the Compressor Electrical Connector
- Locate the electrical connector on the A/C compressor.
- Press the connector lock by hand and unplug it.
- If the lock is tight, use a pick tool set gently to lift the tab.
- Do not pull on the wires.
Step 6: Remove the A/C Lines from the Compressor
- Place a drain pan 2-quart minimum under the compressor area.
- Use a 10mm socket, 3/8-inch drive ratchet, and 6-inch extension to remove the compressor manifold retaining bolt.
- Carefully pull the A/C line manifold straight off the compressor.
- Use a pick tool set to remove the old sealing washers or O-rings from the line block.
- Cap or tape the open A/C lines immediately to keep moisture and dirt out.
Step 7: Remove the Compressor Mounting Bolts
- Support the compressor with one hand.
- Use a 13mm socket, 15mm socket, 3/8-inch drive ratchet, and 6-inch extension to remove the compressor mounting bolts.
- Lower the compressor carefully out of the engine bay.
- Keep the old compressor upright so oil does not spill unexpectedly.
Step 8: Balance the Compressor Oil
- Drain oil from the old compressor into a clean measuring container by rotating the clutch plate by hand.
- Drain shipping oil from the new compressor into a second clean container.
- Add the correct amount of PAG refrigerant oil to the new compressor based on the compressor supplier instructions and the amount removed from the old compressor.
- Use the pick tool set only to remove shipping plugs after you are ready to install the compressor.
- Oil amount matters for compressor life.
Step 9: Install the New Compressor
- Lift the new compressor into position by hand.
- Start all mounting bolts by hand first.
- Use a 13mm socket, 15mm socket, 3/8-inch drive ratchet, and 6-inch extension to snug the bolts evenly.
- Use a torque wrench 10-80 Nm range to tighten the compressor mounting bolts to Torque to 25 Nm (18 ft-lbs).
Step 10: Reinstall the A/C Line Manifold
- Lightly coat the new compressor manifold seals with clean PAG refrigerant oil.
- Install the new seals onto the A/C line manifold by hand.
- Push the manifold straight onto the compressor port.
- Use a 10mm socket and torque wrench 10-80 Nm range to tighten the manifold retaining bolt to Torque to 10 Nm (89 in-lbs).
Step 11: Reconnect the Compressor Connector
- Plug the compressor electrical connector in by hand until it clicks.
- Use a pick tool set only if needed to guide the locking tab gently.
- Confirm the wiring is away from the belt and pulley.
Step 12: Reinstall the Serpentine Belt
- Route the belt over the pulleys using your photo as a guide.
- Use the serpentine belt tool 3/8-inch drive to rotate the tensioner.
- Slide the belt over the compressor pulley and release the tensioner slowly.
- Check every pulley groove to confirm the belt is seated correctly.
Step 13: Reinstall the Splash Shield
- Position the lower splash shield by hand.
- Use a plastic trim removal tool set to align plastic retainers.
- Use an 8mm socket and 3/8-inch drive ratchet to reinstall the fasteners snugly.
Step 14: Evacuate the A/C System
- Connect the R-134a manifold gauge set to the high-side and low-side service ports.
- Connect the center hose to the A/C vacuum pump.
- Run the vacuum pump for at least 30-45 minutes.
- Close the manifold valves and confirm the system holds vacuum for 10-15 minutes.
- If vacuum drops, use the electronic leak detector R-134a compatible after adding a small initial refrigerant charge.
Step 15: Recharge the A/C System
- Use the refrigerant scale 0-50 lb range to charge the exact amount listed on the underhood A/C label.
- Charge through the low-side port using the R-134a manifold gauge set.
- Start the engine after the initial charge is accepted, then set A/C to MAX and blower to high.
- Continue charging until the specified refrigerant weight is installed.
- Do not charge by pressure alone. Charge by weight.
Step 16: Reconnect the Battery and Final Check
- Use a 10mm socket to reconnect and snug the negative battery cable.
- Start the engine and turn the A/C on.
- Use the electronic leak detector R-134a compatible around the compressor line fitting and service ports.
- Listen for belt squeal, rattles, or abnormal compressor noise.
✅ After Repair
- ✅ Confirm the center vent air becomes cold after several minutes of running.
- ✅ Check that the radiator cooling fan runs when A/C is commanded on.
- ✅ Recheck for leaks at the compressor manifold, service ports, and any opened A/C connections.
- ✅ If the compressor failed internally, replace the condenser, receiver/drier or desiccant element, and expansion valve before final recharge.
- ✅ If the battery was disconnected, reset the clock and auto window functions if needed.
💰 DIY vs Shop Cost
Shop Cost: $900-$1,600 parts + labor, depending on compressor failure type and extra A/C components needed
DIY Cost: $300-$800 parts only, plus A/C recovery/recharge equipment or service
You Save: $400-$800 by doing it yourself!
Shop labor rates vary but typically run $100-$150/hour. This repair takes a shop approximately 3-5 hours.
🎯 Ready to get started?
HowToo makes it easy: same-day/2-day shipping on every part, plus all the tools and specialty tools you need! Check out the parts and tools sections below to add everything to your cart.
Guide for A/C Compressor replace for these Ford vehicles
| Year Make Model | Sub Model | Engine | Body Style |
|---|---|---|---|
| 2016 Ford Escape | S | Inline 4 2.5L | - |
| 2016 Ford Escape | SE | Inline 4 1.6L | - |
| 2016 Ford Escape | Titanium | Inline 4 1.6L | - |
| 2016 Ford Escape | SE | Inline 4 2.5L | - |
| 2015 Ford Escape | S | Inline 4 2.5L | - |
| 2015 Ford Escape | SE | Inline 4 1.6L | - |
| 2015 Ford Escape | Titanium | Inline 4 1.6L | - |
| 2015 Ford Escape | SE | Inline 4 2.5L | - |
| 2014 Ford Escape | S | Inline 4 2.5L | - |
| 2014 Ford Escape | SE | Inline 4 1.6L | - |
| 2014 Ford Escape | Titanium | Inline 4 1.6L | - |
| 2013 Ford Escape | S | Inline 4 2.5L | - |
| 2013 Ford Escape | SE | Inline 4 1.6L | - |
| 2013 Ford Escape | SEL | Inline 4 1.6L | - |