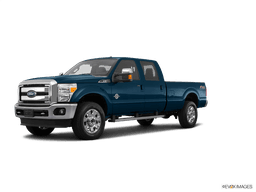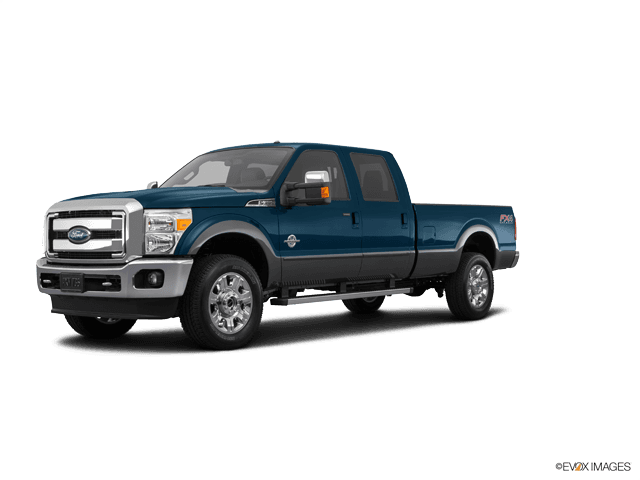









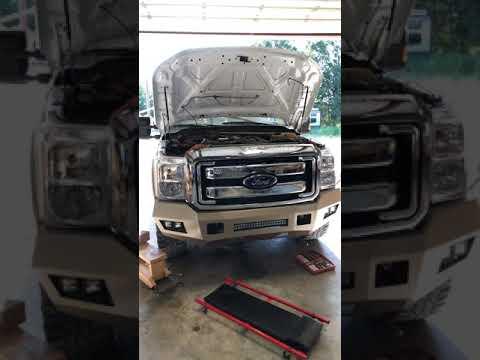







How to Replace the A/C Compressor on a 2011-2016 Ford F-350 Super Duty (R-134a) (Trim: King Ranch | Engine: V8 6.2L)
Step-by-step removal and install with required tools/parts, O-rings, vacuum/evacuation, and recharge tips
How to Replace the A/C Compressor on a 2011-2016 Ford F-350 Super Duty (R-134a) (Trim: King Ranch | Engine: V8 6.2L)
Step-by-step removal and install with required tools/parts, O-rings, vacuum/evacuation, and recharge tips for 2011, 2012, 2013, 2014, 2015, 2016


🔧 F-350 Super Duty - A/C Compressor Replacement
Replacing the A/C compressor involves safely recovering the refrigerant, removing the drive belt and A/C lines, swapping the compressor (and related “wear” parts), then pulling a deep vacuum and recharging to the exact factory refrigerant amount. This is critical because any air/moisture or incorrect charge can quickly ruin the new compressor and reduce cooling.
Difficulty Level: Advanced | Estimated Time: 3-6 hours
Assumption: your A/C uses R-134a (verify underhood label).
⚠️ Safety & Precautions
- ⚠️ Do not vent refrigerant: it can cause frostbite/blindness and is illegal in many areas; have refrigerant professionally recovered first.
- ⚠️ Wear eye protection and gloves: liquid refrigerant and PAG oil can irritate skin/eyes.
- ⚠️ Keep dirt out of A/C lines: cap/plug every open line immediately to prevent moisture contamination.
- ⚠️ Work on a cool engine: the belt drive and front engine area can burn you when hot.
- ⚠️ Battery safety: disconnect the negative cable before unplugging compressor wiring.
🔧 Required Tools
You'll need the following tools for this repair:
- Safety glasses
- Nitrile gloves
- Wheel chocks
- Floor jack (rated 3-ton minimum)
- Jack stands (rated 3-ton minimum)
- Metric socket set (8mm-18mm)
- 3/8" drive ratchet
- 1/2" drive breaker bar
- Torque wrench (10-150 ft-lbs)
- Serpentine belt tool (specialty)
- A/C line disconnect tool set (spring-lock) (specialty)
- Pick set
- Trim clip remover
- Flathead screwdriver
- Shop rags
- Caps/plugs kit for A/C lines (specialty)
- A/C manifold gauge set for R-134a (specialty)
- Vacuum pump (A/C) (specialty)
- Refrigerant scale (specialty)
- UV leak detection light (specialty)
🔩 Required Parts
HowToo sells all the parts you need for this repair:
- A/C compressor - Qty: 1
- A/C compressor clutch (if not included with compressor) - Qty: 1
- A/C receiver/drier or accumulator (system-specific) - Qty: 1
- A/C orifice tube (fixed orifice) - Qty: 1
- A/C O-ring kit (R-134a compatible) - Qty: 1
- PAG A/C oil (correct viscosity per underhood label/service info) - Qty: 1
- R-134a refrigerant (charge amount per underhood label) - Qty: 1
- Serpentine belt (optional if worn/cracked) - Qty: 1
📋 Before You Begin
- Park on level ground, set the parking brake, and place wheel chocks behind the rear tires.
- Have the refrigerant recovered by a shop first, or use proper recovery equipment (not listed here). Your system must be at 0 psi before opening any A/C fitting.
- Disconnect the battery: use a 10mm socket to remove the negative cable and isolate it so it can’t spring back.
- Know these specialty items:
- A vacuum pump pulls air/moisture out of the A/C system after repairs.
- A refrigerant scale measures the exact charge by weight (the only accurate way).
- Spring-lock disconnect tools release Ford A/C line fittings without damage.
- Find the underhood A/C label (usually near the radiator support) and note the refrigerant weight and oil spec.
🔨 Step-by-Step Instructions
Follow these steps in order:
Step 1: Confirm the A/C system is empty (refrigerant recovered)
- Connect the A/C manifold gauge set for R-134a (specialty) to the low and high service ports.
- Verify both gauges read 0 psi before you loosen any A/C line.
Step 2: Remove intake/upper covers for access (as equipped)
- Remove any engine cover or intake ducting using a flathead screwdriver and trim clip remover.
- Set all clips/fasteners aside in a tray. Bag bolts by step to stay organized.
Step 3: Relieve serpentine belt tension and remove the belt from the compressor
- Use a serpentine belt tool (specialty) to rotate the belt tensioner and relieve tension.
- Slip the belt off the A/C compressor pulley only (you don’t always need to remove the belt completely).
- If the belt is cracked/glazed, plan to replace it.
Step 4: Unplug the compressor electrical connector
- Use a pick set to gently release the lock tab (don’t break it).
- Unplug the connector and move the harness aside.
Step 5: Disconnect the A/C lines from the compressor
- Place shop rags under the compressor area to catch residual oil.
- Remove the compressor manifold/block fitting bolt(s) using a metric socket set (8mm-13mm) (size varies by fitting).
- If your truck uses spring-lock connections, use the A/C line disconnect tool set (spring-lock) (specialty) to separate the line.
- Immediately cap the open lines using a caps/plugs kit for A/C lines (specialty).
- Remove and discard old O-rings with a pick set.
Step 6: Remove the A/C compressor mounting bolts and compressor
- Support the compressor by hand.
- Remove the compressor mounting bolts using a metric socket set (10mm-15mm) and 3/8" drive ratchet.
- Carefully lower and remove the compressor from the bracket.
- Reinstall later with a torque wrench (10-150 ft-lbs) and Torque to 25 Nm (18 ft-lbs) for compressor mounting bolts unless your compressor/bracket hardware specifies otherwise.
Step 7: Replace the receiver/drier (or accumulator) and orifice tube
- Locate the receiver/drier or accumulator and remove the retaining fasteners using a metric socket set (8mm-13mm).
- Disconnect the lines using the A/C line disconnect tool set (spring-lock) (specialty) if applicable.
- Replace the orifice tube (usually in a liquid line). Use a pick set to pull it out if it’s stuck.
- Install new O-rings (lightly coat with clean PAG oil using nitrile gloves).
- Line fasteners vary; tighten with a torque wrench and Torque to 10 Nm (89 in-lbs) for small line/manifold bolts as a typical spec.
Step 8: Prepare the new compressor (oil balance)
- Drain and measure oil from the old compressor into a container (use shop rags to keep it clean).
- Check the new compressor shipping oil amount (many arrive pre-oiled). Match the total system oil requirement per underhood label/service info.
- Add the correct PAG oil amount into the new compressor as needed (rotate the compressor hub by hand a few turns to distribute oil).
Step 9: Install the new compressor and reconnect A/C lines
- Position the compressor and hand-start all mounting bolts using your fingers first.
- Tighten mounting bolts using a torque wrench (10-150 ft-lbs) and Torque to 25 Nm (18 ft-lbs).
- Install new lubricated O-rings on the line fittings, then connect lines.
- Tighten the line/manifold bolt(s) using a torque wrench and Torque to 10 Nm (89 in-lbs) unless your fitting design specifies otherwise.
- Reconnect the compressor electrical connector until it clicks.
Step 10: Reinstall the serpentine belt
- Route the belt according to the underhood belt diagram.
- Use the serpentine belt tool (specialty) to move the tensioner and slip the belt onto the A/C compressor pulley.
- Double-check every pulley groove is fully seated.
Step 11: Evacuate (vacuum) the A/C system
- Connect the A/C manifold gauge set for R-134a (specialty) and vacuum pump (A/C) (specialty).
- Run the vacuum pump for at least 30-45 minutes (longer is better if the system was open).
- Close the manifold valves, turn off the pump, and verify it holds vacuum for 10-15 minutes. If vacuum rises, you still have a leak.
Step 12: Recharge with R-134a by weight
- Place the refrigerant can/tank on a refrigerant scale (specialty).
- Charge the system with the exact amount listed on the underhood label using the A/C manifold gauge set for R-134a (specialty).
- Start the engine, set MAX A/C, and continue charging as required (follow safe manifold procedures).
- Do not “charge by pressure” alone—temperature and airflow change the readings.
✅ After Repair
- Start the engine and run A/C on MAX; confirm the compressor engages and the center vents blow cold.
- Check for leaks: use a UV leak detection light (specialty) if dye is present, and visually inspect every fitting for oil residue.
- Listen for abnormal noises (squeal/grind). Shut off and recheck belt routing if you hear anything unusual.
- Recheck gauge readings and vent temperature after a 10-15 minute drive.
💰 DIY vs Shop Cost
Shop Cost: ₹35,000-₹85,000 (parts + labor, includes evac/recharge)
DIY Cost: ₹18,000-₹55,000 (parts only; specialty tools can add more)
You Save: ₹17,000-₹30,000 by doing it yourself!
Shop labor rates vary but typically run ₹1,500-₹3,000/hour. This repair takes a shop approximately 3-5 hours.
🎯 Ready to get started?
HowToo makes it easy: same-day/2-day shipping on every part, plus all the tools and specialty tools you need! Check out the parts and tools sections below to add everything to your cart.
Guide for A/C Compressor replace for these Ford vehicles
| Year Make Model | Sub Model | Engine | Body Style |
|---|---|---|---|
| 2016 Ford F-350 Super Duty | King Ranch | V8 6.2L | - |
| 2016 Ford F-350 Super Duty | King Ranch | V8 6.7L | - |
| 2016 Ford F-350 Super Duty | Lariat | V8 6.2L | - |
| 2016 Ford F-350 Super Duty | Lariat | V8 6.7L | - |
| 2016 Ford F-350 Super Duty | XL | V8 6.2L | - |
| 2016 Ford F-350 Super Duty | XL | V8 6.7L | - |
| 2016 Ford F-350 Super Duty | XLT | V8 6.2L | - |
| 2016 Ford F-350 Super Duty | XLT | V8 6.7L | - |
| 2016 Ford F-350 Super Duty | Platinum | V8 6.2L | - |
| 2016 Ford F-350 Super Duty | Platinum | V8 6.7L | - |
| 2015 Ford F-350 Super Duty | King Ranch | V8 6.2L | - |
| 2015 Ford F-350 Super Duty | King Ranch | V8 6.7L | - |
| 2015 Ford F-350 Super Duty | Lariat | V8 6.2L | - |
| 2015 Ford F-350 Super Duty | Lariat | V8 6.7L | - |
| 2015 Ford F-350 Super Duty | XL | V8 6.2L | - |
| 2015 Ford F-350 Super Duty | XL | V8 6.7L | - |
| 2015 Ford F-350 Super Duty | XLT | V8 6.2L | - |
| 2015 Ford F-350 Super Duty | XLT | V8 6.7L | - |
| 2015 Ford F-350 Super Duty | Platinum | V8 6.2L | - |
| 2015 Ford F-350 Super Duty | Platinum | V8 6.7L | - |
| 2014 Ford F-350 Super Duty | King Ranch | V8 6.2L | - |
| 2014 Ford F-350 Super Duty | King Ranch | V8 6.7L | - |
| 2014 Ford F-350 Super Duty | Lariat | V8 6.2L | - |
| 2014 Ford F-350 Super Duty | Lariat | V8 6.7L | - |
| 2014 Ford F-350 Super Duty | XL | V8 6.2L | - |
| 2014 Ford F-350 Super Duty | XL | V8 6.7L | - |
| 2014 Ford F-350 Super Duty | XLT | V8 6.2L | - |
| 2014 Ford F-350 Super Duty | XLT | V8 6.7L | - |
| 2014 Ford F-350 Super Duty | Platinum | V8 6.2L | - |
| 2014 Ford F-350 Super Duty | Platinum | V8 6.7L | - |
| 2013 Ford F-350 Super Duty | King Ranch | V8 6.2L | - |
| 2013 Ford F-350 Super Duty | King Ranch | V8 6.7L | - |
| 2013 Ford F-350 Super Duty | Lariat | V8 6.2L | - |
| 2013 Ford F-350 Super Duty | Lariat | V8 6.7L | - |
| 2013 Ford F-350 Super Duty | XL | V8 6.2L | - |
| 2013 Ford F-350 Super Duty | XL | V8 6.7L | - |
| 2013 Ford F-350 Super Duty | XLT | V8 6.2L | - |
| 2013 Ford F-350 Super Duty | XLT | V8 6.7L | - |
| 2013 Ford F-350 Super Duty | Platinum | V8 6.2L | - |
| 2013 Ford F-350 Super Duty | Platinum | V8 6.7L | - |
| 2012 Ford F-350 Super Duty | King Ranch | V8 6.2L | - |
| 2012 Ford F-350 Super Duty | King Ranch | V8 6.7L | - |
| 2012 Ford F-350 Super Duty | Lariat | V8 6.2L | - |
| 2012 Ford F-350 Super Duty | Lariat | V8 6.7L | - |
| 2012 Ford F-350 Super Duty | XL | V8 6.2L | - |
| 2012 Ford F-350 Super Duty | XL | V8 6.7L | - |
| 2012 Ford F-350 Super Duty | XLT | V8 6.2L | - |
| 2012 Ford F-350 Super Duty | XLT | V8 6.7L | - |
| 2011 Ford F-350 Super Duty | King Ranch | V8 6.2L | - |
| 2011 Ford F-350 Super Duty | King Ranch | V8 6.7L | - |
| 2011 Ford F-350 Super Duty | Lariat | V8 6.2L | - |
| 2011 Ford F-350 Super Duty | Lariat | V8 6.7L | - |
| 2011 Ford F-350 Super Duty | XL | V8 6.2L | - |
| 2011 Ford F-350 Super Duty | XL | V8 6.7L | - |
| 2011 Ford F-350 Super Duty | XLT | V8 6.2L | - |
| 2011 Ford F-350 Super Duty | XLT | V8 6.7L | - |