


How to Replace the 12V Battery on a 2022 Subaru Forester (Group 35)
Step-by-step battery swap with required tools/parts, safety tips, and terminal/hold-down torque specs
How to Replace the 12V Battery on a 2022 Subaru Forester (Group 35)
Step-by-step battery swap with required tools/parts, safety tips, and terminal/hold-down torque specs
🔧 Forester - 12V Battery Replacement
Replacing the 12V battery on your Forester is a straightforward job: remove the old battery, clean the connections, and install the new one. This fixes slow cranking, warning lights caused by low voltage, and random electrical glitches.
Difficulty Level: Beginner | Estimated Time: 0.5-1.0 hours
⚠️ Safety & Precautions
- ⚠️ Turn the vehicle OFF and keep the key fob at least 10 feet away.
- ⚠️ Remove the negative (-) cable first and install it last to reduce short-circuit risk.
- ⚠️ Do not let a tool touch the positive terminal and any metal body part at the same time.
- ⚠️ Batteries can vent explosive gas; no sparks, flames, or smoking nearby.
- ⚠️ Wear gloves and eye protection; battery corrosion is acidic.
🔧 Required Tools
You'll need the following tools for this repair:
- 10mm socket
- 1/4" drive ratchet
- 6" extension (1/4" drive)
- 10mm combination wrench
- Battery terminal cleaning brush
- Small wire brush
- Shop rags
- Nitrile gloves
- Safety glasses
- Memory saver (OBD-II) (specialty)
- Digital multimeter
🔩 Required Parts
HowToo sells all the parts you need for this repair:
- 12V battery (Group Size 35) - Qty: 1
- Battery terminal anti-corrosion pads - Qty: 2
- Battery terminal protectant spray - Qty: 1
- Dielectric grease - Qty: 1
📋 Before You Begin
- Park on level ground, shift to Park, and set the parking brake.
- Open the hood and make sure you have good lighting.
- If you want to preserve presets, plug in a memory saver (OBD-II) (specialty) (it keeps power while you swap the battery).
- If unsure, skip memory saver and reset later.
- Confirm your replacement battery matches what’s on the label (Group 35). If your Forester has Auto Start-Stop, use the correct Start-Stop-rated battery your parts supplier specifies.
🔨 Step-by-Step Instructions
Follow these steps in order:
Step 1: Check voltage (quick health check)
- Use a digital multimeter to measure voltage at the battery posts with the vehicle OFF.
- About 12.6V is fully charged; around 12.2V is low; under 12.0V is very low.
Step 2: Disconnect the negative terminal
- Use a 10mm socket and 1/4" drive ratchet to loosen the negative (-) terminal clamp nut.
- Wiggle and lift the clamp off the post (don’t pry hard).
- Move the cable aside so it cannot spring back onto the battery.
- Torque to 5.4 Nm (48 in-lbs) when reinstalling later.
Step 3: Disconnect the positive terminal
- Use a 10mm socket and 1/4" drive ratchet to loosen the positive (+) terminal clamp nut.
- Lift the clamp off and keep it from touching metal parts.
- Torque to 5.4 Nm (48 in-lbs) when reinstalling later.
Step 4: Remove the battery hold-down
- Locate the hold-down bracket across the top of the battery.
- Use a 10mm socket, 1/4" drive ratchet, and 6" extension (1/4" drive) to remove the two hold-down nuts.
- Lift off the bracket and set it aside.
- Torque to 18 Nm (13 ft-lbs) when reinstalling.
Step 5: Remove the old battery
- Use nitrile gloves and lift the battery straight up and out (it’s heavy).
- Set it on the ground upright (don’t tip it).
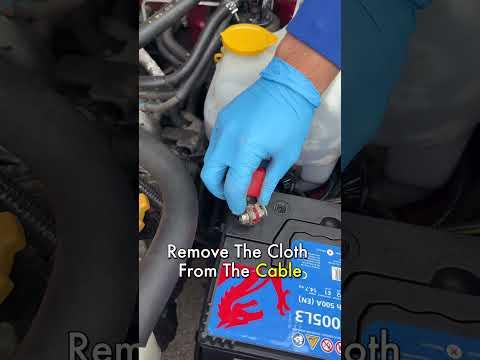
Step 6: Clean the terminals and tray
- Use a battery terminal cleaning brush to clean the inside of both cable clamps.
- Use a small wire brush and shop rags to clean corrosion from the battery tray area.
- Clean metal = better charging and starting.
Step 7: Install the new battery
- Place the new battery into the tray in the same orientation as the old one.
- Install the hold-down bracket and hand-start both nuts.
- Use a 10mm socket and 1/4" drive ratchet to tighten the nuts evenly.
- Torque to 18 Nm (13 ft-lbs).
Step 8: Reconnect terminals (positive first)
- Install anti-corrosion pads on the posts (if included) and apply a light film of dielectric grease to the posts.
- Reconnect the positive (+) clamp first and tighten using a 10mm socket.
- Torque to 5.4 Nm (48 in-lbs).
- Reconnect the negative (-) clamp last and tighten using a 10mm socket.
- Torque to 5.4 Nm (48 in-lbs).
- Spray battery terminal protectant spray on both terminals after tightening.
Step 9: Final check
- Gently tug each terminal by hand to confirm it’s fully seated and not rotating.
- Use a digital multimeter to confirm voltage is healthy.
✅ After Repair
- Start the engine and confirm normal cranking and no unusual warning messages.
- Reset the clock and radio presets if they were lost.
- If the auto up/down window function doesn’t work, relearn it: close the window fully and hold the switch up for 3-5 seconds.
- Expect the idle/shift feel to normalize after a short drive while systems relearn.
💰 DIY vs Shop Cost
Shop Cost: $250-$450 (parts + labor)
DIY Cost: $160-$300 (parts only)
You Save: $90-$150 by doing it yourself!
Shop labor rates vary but typically run $100-$150/hour. This repair takes a shop approximately 0.5-1.0 hours.
🎯 Ready to get started?
HowToo makes it easy: same-day/2-day shipping on every part, plus all the tools and specialty tools you need! Check out the parts and tools sections below to add everything to your cart.
