















How to Replace the 12V Battery on a 2020 Nissan Altima
Step-by-step DIY battery change guide with tools, safety tips, torque specs, and cost savings for 2019, 2020, 2021, 2022, 2023, 2024
How to Replace the 12V Battery on a 2020 Nissan Altima
Step-by-step DIY battery change guide with tools, safety tips, torque specs, and cost savings for 2019, 2020, 2021, 2022, 2023, 2024


🔧 Altima - 12V Battery Replacement
You’ll be replacing the 12-volt battery under the hood of your Altima. This restores proper starting power and prevents electrical issues like dim lights or slow cranking.
Difficulty Level: Beginner | Estimated Time: 0.5–1 hour
⚠️ Safety & Precautions
- ⚠️ Always turn the engine off and remove the key from the vehicle before working on the battery.
- ⚠️ Do not smoke or create sparks near the battery; battery gas is flammable.
- ⚠️ Wear eye protection and gloves; battery acid can burn skin and eyes.
- ⚠️ Always disconnect the negative (–) terminal first and reconnect it last to avoid short circuits.
- ⚠️ Do not let metal tools touch both battery terminals or the terminal and body metal at the same time.
- ⚠️ Your Altima may lose radio presets, clock, and window auto-up/down settings when the battery is disconnected.
🔧 Required Tools
You'll need the following tools for this repair:
- 🛠️ 10mm socket
- 🛠️ 12mm socket
- 🛠️ 1/4" or 3/8" drive ratchet
- 🛠️ 3" socket extension
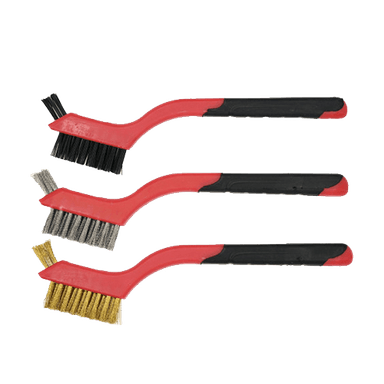
- 🛠️ Battery terminal brush
- 🛠️ Small flathead screwdriver
- 🛠️ Work gloves
- 🛠️ Safety glasses
- 🛠️ Memory saver device (OBD or 12V outlet type) (specialty)
- 🛠️ Shop towel or rag
🔩 Required Parts
HowToo sells all the parts you need for this repair:
- 🔩 12V replacement battery (correct group size for Altima) - Qty: 1
- 🔩 Battery terminal protector spray - Qty: 1
- 🔩 Battery anti-corrosion pads - Qty: 2
📋 Before You Begin
- Park your Altima on level ground, shift to Park, and set the parking brake.
- Turn off all electrical accessories (lights, radio, HVAC, phone chargers).
- If you have a memory saver, plug it into the OBD port under the dash before disconnecting the battery.
- Open the hood using the release inside the cabin, then lift the hood and secure the prop rod.
🔨 Step-by-Step Instructions
Follow these steps in order:
Step 1: Locate the battery
- Open the hood and look near the front left side (driver side) of the engine bay; the battery is a rectangular box with two thick cables attached.
- If there is a plastic battery cover, gently lift it off by hand or pry its clips with the small flathead screwdriver.
Step 2: Identify positive and negative terminals
- The positive (+) terminal usually has a red cover and a plus sign.
- The negative (–) terminal usually has a black cable and a minus sign, and is connected to the metal body.
- Double-check before loosening anything.
Step 3: Disconnect the negative (–) terminal
- Use the 10mm socket and ratchet to loosen the nut on the negative terminal clamp.
- Once loose, twist the clamp gently and lift it off the battery post.
- Wrap the loose negative clamp with a shop towel and tuck it aside so it cannot spring back and touch the terminal.
Step 4: Disconnect the positive (+) terminal
- Flip open or remove the red plastic cover on the positive terminal with your hand or small flathead screwdriver.
- Use the 10mm socket and ratchet to loosen the positive terminal clamp nut.
- Lift the positive clamp straight up off the post and move it aside carefully.
- Do not let the positive clamp touch any bare metal.
Step 5: Remove the battery hold-down bracket
- Locate the metal or plastic bar or bracket holding the battery at the base or top.
- Use the 12mm socket, extension, and ratchet to remove the hold-down bolt(s).
- Lift the hold-down bracket out and set it aside.
- Keep bolts and bracket together so you don't lose them.
Step 6: Lift out the old battery
- Stand directly in front of the battery, keep your back straight, and bend your knees.
- Grip the battery by the built-in handle or by its sides and lift it straight up and out. It is heavy, so take your time.
- Place the old battery upright on the ground; do not tip it over.
Step 7: Clean the battery tray and terminals
- Inspect the battery tray for dirt or corrosion (white or blue powder).
- Wipe the tray clean with a shop towel.
- Use the battery terminal brush to clean the inside of the positive and negative cable clamps until shiny metal is visible.
- If corrosion is heavy, wear gloves and avoid breathing dust.
Step 8: Place the new battery in the tray
- Carefully lower the new battery into the tray in the same orientation as the old one: positive and negative posts in the same positions.
- Make sure it sits flat and fully in the tray.
- Place battery anti-corrosion pads over the posts if you’re using them.
Step 9: Reinstall the hold-down bracket
- Position the hold-down bracket over or in front of the battery exactly as it was before.
- Install the bolt(s) by hand to avoid cross-threading.
- Use the 12mm socket, extension, and ratchet to tighten the hold-down bolt(s) to secure the battery.
- Tighten to 7 Nm (62 in-lbs). Do not overtighten; the battery should not move but the case should not be crushed.
Step 10: Connect the positive (+) terminal
- Place the positive cable clamp straight down onto the positive post.
- Press it down so it sits fully on the post.
- Use the 10mm socket and ratchet to tighten the clamp nut.
- Tighten to about 5 Nm (44 in-lbs) — snug but not so hard that the clamp spreads or breaks.
- Close the red plastic cover over the positive terminal.
Step 11: Connect the negative (–) terminal
- Remove the rag from the negative cable clamp.
- Place the negative clamp onto the negative post.
- Use the 10mm socket and ratchet to tighten the clamp nut.
- Tighten to about 5 Nm (44 in-lbs), same as the positive clamp.
- Spray a light coat of battery terminal protector spray on both terminals.
Step 12: Reinstall any battery cover
- If your Altima has a plastic battery cover, place it back over the battery and press it down until the clips lock.
✅ After Repair
- Start your Altima and make sure it cranks quickly and runs smoothly.
- Check that the battery warning light on the dash is off.
- Set the clock and re-enter radio presets as needed.
- Test power windows: if auto-up/down doesn’t work, hold the switch to fully lower, then hold to fully raise and keep holding for 2–3 seconds to relearn.
- Make sure the battery is secure by gently pushing it; it should not slide in the tray.
💰 DIY vs Shop Cost
Shop Cost: $260–$380 (parts + labor)
DIY Cost: $140–$220 (parts only)
You Save: $120–$160 by doing it yourself!
Shop labor rates typically run $100–$150/hour. This repair takes a shop approximately 0.5 hours.
🎯 Ready to get started?
HowToo makes it easy: same-day/2-day shipping on every part, plus all the tools and specialty tools you need! Check out the parts and tools sections above to add everything to your cart.