










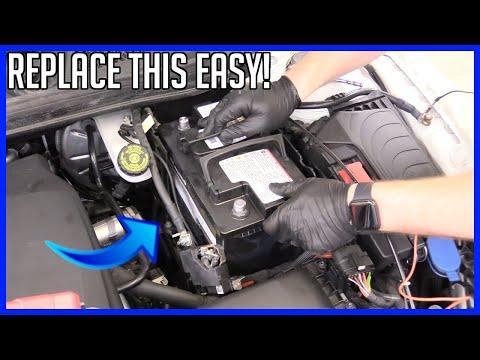







How to Replace the 12V Battery on a 2019-2025 Cadillac XT4 (Step-by-Step Guide) (Engine: Inline 4 2.0L)
Tools, AGM battery tips, terminal disconnect order, torque specs, and BMS reset notes
How to Replace the 12V Battery on a 2019-2025 Cadillac XT4 (Step-by-Step Guide) (Engine: Inline 4 2.0L)
Tools, AGM battery tips, terminal disconnect order, torque specs, and BMS reset notes for 2019, 2020, 2021, 2022, 2023, 2024, 2025


🔧 XT4 - 12V Battery Replacement
Replacing the 12V battery restores reliable starting and keeps your XT4’s electronics (like stop/start and charging control) working correctly. The battery is under the hood, and the key is disconnecting and reconnecting the terminals in the correct order to avoid electrical issues.
Difficulty Level: Beginner | Estimated Time: 0.5-1.0 hours
⚠️ Safety & Precautions
- ⚠️ Keep the key fob at least 10 feet away and make sure the ignition is OFF before starting.
- ⚠️ Wear safety glasses and gloves—battery acid is corrosive and batteries can spark.
- ⚠️ Disconnect the negative (-) terminal first and reconnect it last to reduce short-circuit risk.
- ⚠️ Don’t let a tool touch both the battery terminal and metal body parts at the same time.
- ⚠️ Batteries are heavy—lift with your legs, not your back.
🔧 Required Tools
You'll need the following tools for this repair:
- 10mm socket
- 1/4" ratchet
- 6" extension (1/4")
- Trim clip tool
- Battery terminal puller (specialty)
- Torque wrench (inch-pound or small ft-lb range)
- Battery carrying strap
- Nitrile gloves
- Safety glasses
🔩 Required Parts
HowToo sells all the parts you need for this repair:
- 12V battery (AGM, correct group size for XT4) - Qty: 1
- Battery terminal anti-corrosion spray - Qty: 1
- Battery terminal felt washers - Qty: 1
📋 Before You Begin
- Park on level ground, shift to Park, and set the parking brake.
- Open the hood and make sure all lights/accessories are OFF.
- If you want to preserve radio presets/settings, use a 12V memory saver (a device that maintains power through the OBD port or accessory socket). If you don’t have one, it’s okay—your XT4 will relearn most settings.
- Wait 2–3 minutes after shutting the vehicle off so modules can go to sleep before disconnecting the battery.
🔨 Step-by-Step Instructions
Follow these steps in order:
Step 1: Access the battery
- Open the hood and locate the battery in the engine bay.
- Remove any battery cover or intake ducting that blocks access using a trim clip tool and 10mm socket.
Step 2: Disconnect the negative (-) cable
- Use a 10mm socket to loosen the negative terminal clamp on the - post.
- Lift the clamp straight up and off the post.
- Tuck the cable aside so it can’t spring back.
- Torque to 15 Nm (11 ft-lbs) during reassembly.
Step 3: Disconnect the positive (+) cable
- Use a 10mm socket to loosen the positive terminal clamp on the + post.
- Remove the clamp and position it safely away from the battery.
- Torque to 15 Nm (11 ft-lbs) during reassembly.
Step 4: Remove the battery hold-down
- Locate the battery hold-down at the base of the battery.
- Use a 10mm socket, 1/4" ratchet, and 6" extension to remove the hold-down bolt(s) and the clamp.
- Torque to 10 Nm (89 in-lbs) during reassembly.
Step 5: Lift out the old battery
- Attach a battery carrying strap and lift the battery straight up and out.
- Set the battery on the ground (upright). Don’t tip it.
Step 6: Clean and prep the terminals
- Inspect the cable ends for white/green corrosion.
- If the clamps are stuck on the posts, use a battery terminal puller (specialty) (a small tool that presses the clamp off without damage).
- Install battery terminal felt washers if you’re using them, then apply battery terminal anti-corrosion spray.
Step 7: Install the new battery
- Place the new battery into the tray in the same orientation as the old one.
- Reinstall the hold-down clamp and tighten using a 10mm socket and torque wrench.
- Torque to 10 Nm (89 in-lbs).
Step 8: Reconnect the terminals (positive first)
- Install the positive (+) clamp first and tighten with a 10mm socket.
- Torque to 15 Nm (11 ft-lbs).
- Install the negative (-) clamp last and tighten with a 10mm socket.
- Torque to 15 Nm (11 ft-lbs).
Step 9: Reinstall covers and recheck your work
- Reinstall any battery cover/ducting you removed using a trim clip tool and 10mm socket.
- Gently try to move the battery by hand—there should be no movement.
- Visually confirm: cables are fully seated and not rubbing any moving parts.
✅ After Repair
- Start your XT4 and confirm normal cranking and no warning lights.
- Set the clock and check radio presets (they may reset without a memory saver).
- If stop/start or charging behavior seems odd for the first day, drive normally—many GM systems relearn battery state over several drive cycles.
- If you have access to a scan tool, run a Battery Monitor/BMS reset so the charging system knows a new battery was installed.
💰 DIY vs Shop Cost
Shop Cost: $300-$520 (parts + labor)
DIY Cost: $180-$350 (parts only)
You Save: $120-$170 by doing it yourself!
Shop labor rates vary but typically run $100-$150/hour. This repair takes a shop approximately 0.5-1.0 hours.
🎯 Ready to get started?
HowToo makes it easy: same-day/2-day shipping on every part, plus all the tools and specialty tools you need! Check out the parts and tools sections below to add everything to your cart.
Guide for Vehicle Battery replace for these Cadillac vehicles
| Year Make Model | Sub Model | Engine | Body Style |
|---|---|---|---|
| 2025 Cadillac XT4 | - | Inline 4 2.0L | - |
| 2024 Cadillac XT4 | - | Inline 4 2.0L | - |
| 2023 Cadillac XT4 | - | Inline 4 2.0L | - |
| 2022 Cadillac XT4 | - | Inline 4 2.0L | - |
| 2021 Cadillac XT4 | - | Inline 4 2.0L | - |
| 2020 Cadillac XT4 | - | Inline 4 2.0L | - |
| 2019 Cadillac XT4 | - | Inline 4 2.0L | - |
