









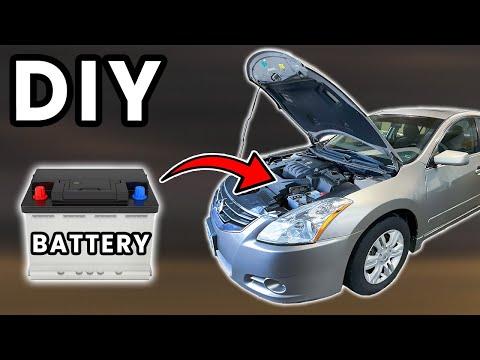







How to Replace the 12V Battery on a 2009 Nissan Altima (Group 35)
Step-by-step DIY instructions with tools, parts list, safety tips, and terminal/hold-down torque specs for 1993, 1994, 1995
How to Replace the 12V Battery on a 2009 Nissan Altima (Group 35)
Step-by-step DIY instructions with tools, parts list, safety tips, and terminal/hold-down torque specs for 1993, 1994, 1995


🔧 Altima - Battery Replacement
Replacing the 12V battery restores reliable starting and prevents random electrical issues. On your Altima, the battery sits in the engine bay and is held down with a small bracket.
Difficulty Level: Beginner | Estimated Time: 0.5-1.0 hours
⚠️ Safety & Precautions
- ⚠️ Turn the ignition OFF and remove the key before starting.
- ⚠️ Disconnect the negative (-) cable first to reduce short-circuit risk.
- ⚠️ Do not let a metal tool touch the battery + terminal and any metal body part at the same time.
- ⚠️ Batteries can vent gas: keep sparks/flames away and work in a ventilated area.
- ⚠️ Wear eye protection and gloves; battery acid is corrosive.
- Battery disconnect is required for this repair.
🔧 Required Tools
You'll need the following tools for this repair:
- 10mm socket
- 3/8" ratchet
- 6" extension
- 10mm combination wrench
- Torque wrench (in-lb/ft-lb capable)
- Battery terminal brush (specialty)
- Trim/flat screwdriver
- Shop rags
- Nitrile gloves
- Safety glasses
🔩 Required Parts
HowToo sells all the parts you need for this repair:
- 12V battery (Group Size 35) - Qty: 1
- Battery terminal anti-corrosion spray - Qty: 1
- Battery terminal felt washers - Qty: 2
📋 Before You Begin
- Park on level ground, shift to P, and set the parking brake.
- Open the hood and let the engine bay cool if it’s hot.
- Note: Disconnecting the battery may reset the clock and radio presets.
🔨 Step-by-Step Instructions
Follow these steps in order:
Step 1: Access the battery
- Open the hood and locate the battery at the front side of the engine bay.
- If there’s a plastic cover or intake duct in the way, remove it using a trim/flat screwdriver as needed.
Step 2: Disconnect the negative (-) terminal first
- Use a 10mm wrench to loosen the negative terminal clamp nut.
- Twist and lift the clamp off the post, then tuck the cable aside so it can’t spring back.
- The “negative” cable is usually black.
- Torque on install: Torque to 5.4 Nm (48 in-lbs)
Step 3: Disconnect the positive (+) terminal
- Use a 10mm wrench to loosen the positive terminal clamp nut.
- Remove the clamp from the post and position it away from the battery.
- Cover the + clamp with a rag.
- Torque on install: Torque to 5.4 Nm (48 in-lbs)
Step 4: Remove the battery hold-down bracket
- Use a 10mm socket, ratchet, and extension to remove the hold-down nuts/bolts.
- Lift off the bracket and set it aside with the hardware.
- Torque on install: Torque to 18 Nm (13 ft-lbs)
Step 5: Remove the old battery
- Wiggle the battery free and lift it straight up using both hands.
- Set it on the ground upright. Batteries are heavy—lift with your legs.
Step 6: Clean the terminals and tray
- Use a battery terminal brush (specialty) to clean corrosion from the inside of the cable clamps.
- Wipe the tray area with shop rags so the new battery sits flat.
- Clean metal helps charging and starting.
Step 7: Install the new battery
- Place the new Group Size 35 battery into the tray in the same orientation as the old one.
- Reinstall the hold-down bracket using the 10mm socket, ratchet, and extension.
- Torque: Torque to 18 Nm (13 ft-lbs)
Step 8: Reconnect terminals (positive first, negative last)
- Install the felt washers (one on each post), then reconnect the positive (+) clamp first using a 10mm wrench.
- Torque: Torque to 5.4 Nm (48 in-lbs)
- Reconnect the negative (-) clamp last using a 10mm wrench.
- Torque: Torque to 5.4 Nm (48 in-lbs)
- Spray both terminals with battery terminal anti-corrosion spray.
Step 9: Final check
- Confirm the battery does not move by hand (hold-down tight).
- Confirm both clamps are fully seated and not able to rotate on the posts.
- Reinstall any cover/duct removed earlier using the trim/flat screwdriver.
✅ After Repair
- Start the engine and verify it cranks normally.
- Check that the battery warning light is OFF.
- Reset the clock and radio presets if needed.
- Drive 15–20 minutes to help the charging system stabilize.
💰 DIY vs Shop Cost
Shop Cost: ₹6,500-₹11,000 (parts + labor)
DIY Cost: ₹5,500-₹10,000 (parts only)
You Save: ₹1,000-₹2,500 by doing it yourself!
Shop labor rates vary but typically run ₹500-₹1,500/hour. This repair takes a shop approximately 0.5-1.0 hours.
🎯 Ready to get started?
HowToo makes it easy: same-day/2-day shipping on every part, plus all the tools and specialty tools you need! Check out the parts and tools sections below to add everything to your cart.