









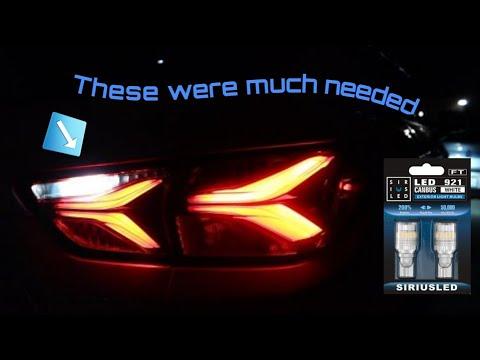







How to Replace Taillight Bulbs (or LED Taillamp) on a 2019-2022 Chevrolet Blazer
Step-by-step removal, bulb vs LED identification, required tools/parts, and taillamp torque specs (22 in-lbs)
How to Replace Taillight Bulbs (or LED Taillamp) on a 2019-2022 Chevrolet Blazer
Step-by-step removal, bulb vs LED identification, required tools/parts, and taillamp torque specs (22 in-lbs) for 2019, 2020, 2021, 2022


🔧 Blazer - Taillight Bulb Replacement
On your Blazer, some rear lights are serviceable bulbs, while others may be LED and not replaceable as a “bulb” (the whole lamp assembly is replaced instead). The process starts the same: access the rear lamp, remove the lamp, then either swap the bulb or confirm it’s an LED module.
Difficulty Level: Beginner | Estimated Time: 0.5-1.0 hours
⚠️ Safety & Precautions
- ⚠️ Turn the lights off and let bulbs cool before touching them.
- ⚠️ Wear gloves; skin oils can shorten halogen bulb life.
- ⚠️ Support the lamp so it doesn’t scratch paint when it comes loose.
- Battery disconnect is not required for this job.
🔧 Required Tools
You'll need the following tools for this repair:
- 10mm socket
- 1/4" ratchet
- 3" socket extension
- Trim clip removal tool
- Small flat-blade screwdriver
- Nitrile gloves
- Safety glasses
- Flashlight
🔩 Required Parts
HowToo sells all the parts you need for this repair:
- Rear lamp bulb(s) (match the type printed on the old bulb) - Qty: 2
- Rear lamp assembly (if your “bulb” is LED/non-serviceable) - Qty: 1-2
📋 Before You Begin
- Park on level ground, shift to Park, and set the parking brake.
- Open the liftgate for easier access and better lighting.
- If you’re not sure which rear light is out, have a helper press the brake / use turn signals while you watch.
🔨 Step-by-Step Instructions
Follow these steps in order:
Step 1: Confirm which rear light is out
- Use a helper to operate brakes/turn signals, or set hazards.
- Use a flashlight to verify which side and which function is not working (tail, brake, turn, or reverse).
Step 2: Access the taillamp fasteners
- Open the liftgate.
- On the side you’re working on, remove the rear interior access cover (if equipped) using a trim clip removal tool and/or small flat-blade screwdriver.
Step 3: Remove the taillamp assembly
- Use a 10mm socket, 1/4" ratchet, and 3" socket extension to remove the taillamp retaining nuts/bolts.
- Gently pull the taillamp straight rearward to release the locating pins.
- Tip: Pull straight back, don’t pry sideways.
Step 4: Disconnect the electrical connector
- Support the lamp with one hand.
- Press the connector lock tab and unplug the harness by hand (use the small flat-blade screwdriver only if the lock tab is stubborn).
Step 5: Identify whether you have replaceable bulbs or LED (no bulb)
- Look at the back of the taillamp for round twist-in bulb sockets.
- If you see twist sockets, continue to Step 6 (bulb replacement).
- If there are no twist sockets and it’s a sealed unit, that function is LED and the fix is replacing the taillamp assembly (skip to Step 8).
Step 6: Remove the bulb socket and replace the bulb (if equipped)
- Rotate the bulb socket counterclockwise by hand and pull it out of the lamp.
- Pull the old bulb straight out (or un-twist if it’s a twist-lock style).
- Install the new bulb (same type as removed). Use nitrile gloves to avoid touching the glass.
- Reinstall the socket into the housing and twist clockwise to lock.
- Tip: If it doesn’t seat, don’t force it.
Step 7: Quick function test before reassembly
- Reconnect the electrical connector by hand.
- Turn the lights on / use hazards and verify the new bulb works.
- Turn lights back off before final assembly.
Step 8: Reinstall the taillamp assembly
- Reconnect the harness (if not already connected).
- Align the locating pins and push the taillamp straight into place.
- Install the retaining nuts/bolts using the 10mm socket, 1/4" ratchet, and 3" socket extension.
- Torque to 2.5 Nm (22 in-lbs).
- Reinstall the access cover using the trim clip removal tool.
✅ After Repair
- Verify tail lights, brake lights, turn signals, reverse lights, and hazards all work on both sides.
- If the new bulb still doesn’t light, swap it side-to-side to rule out a bad bulb, then check the fuse and the connector pins for corrosion.
- If the failed function is LED (no bulb socket), plan on replacing the taillamp assembly on that side.
💰 DIY vs Shop Cost
Shop Cost: $120-$300 (parts + labor)
DIY Cost: $10-$80 (parts only)
You Save: $110-$220 by doing it yourself!
Shop labor rates vary but typically run $100-$150/hour. This repair takes a shop approximately 0.5-1.0 hours.
🎯 Ready to get started?
HowToo makes it easy: same-day/2-day shipping on every part, plus all the tools and specialty tools you need! Check out the parts and tools sections below to add everything to your cart.
Guide for Tail Light Bulb replace for these Chevrolet vehicles
| Year Make Model | Sub Model | Engine | Body Style |
|---|---|---|---|
| 2022 Chevrolet Blazer | - | - | - |
| 2021 Chevrolet Blazer | - | - | - |
| 2020 Chevrolet Blazer | - | - | - |
| 2019 Chevrolet Blazer | - | - | - |