








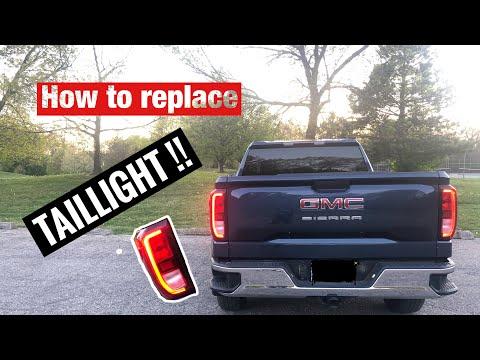







How to Replace Taillight Bulbs on a 2019 GMC Sierra 1500
Step-by-step DIY guide with tools, parts, torque specs, and safety tips for rear tail, brake, and reverse lights
How to Replace Taillight Bulbs on a 2019 GMC Sierra 1500
Step-by-step DIY guide with tools, parts, torque specs, and safety tips for rear tail, brake, and reverse lights


🔧 Sierra 1500 - Taillight Bulb Replacement
On your 2019 Sierra 1500, the taillights can be either LED (no replaceable bulbs for tail/stop/turn) or conventional bulbs (all are replaceable). The reverse (backup) lamp is usually a replaceable bulb on both types.
Difficulty Level: Beginner | Estimated Time: 0.5–1 hour
⚠️ Safety & Precautions
- 🔹Always switch the ignition OFF and remove the key before working near lights.
- 🔹Do not press the brake pedal or use the turn signals while a lamp is removed.
- 🔹Avoid touching glass bulbs with bare fingers; oil can shorten bulb life.
- 🔹Work on level ground and keep the truck in Park with the parking brake set.
🔧 Required Tools
You'll need the following tools for this repair:
- 🔹T15 Torx screwdriver
- 🔹Ratchet handle 1/4"
- 🔹T15 Torx bit 1/4" drive
- 🔹Flat trim tool (plastic)
- 🔹Clean nitrile gloves
- 🔹Safety glasses
🔩 Required Parts
HowToo sells all the parts you need for this repair:
- 🔹Tail/stop/turn bulb (if halogen tail lamp, 7443 or equivalent) - Qty: 2 (replace in pairs)
- 🔹Reverse (backup) light bulb 921 or equivalent - Qty: 2 (replace in pairs)
- 🔹Taillamp mounting screws (if originals are corroded) - Qty: 4
- 🔹Dielectric grease (for bulb contacts) - Qty: 1 tube
📋 Before You Begin
- 🔹Park the Sierra on level ground, shift to Park, and set the parking brake.
- 🔹Turn off all exterior lights and remove the key from the ignition.
- 🔹Open the tailgate fully for easier access to the lamp screws in the bed side.
🔨 Step-by-Step Instructions
Follow these steps in order:
Step 1: Confirm your taillight type
- 🔹Look closely at the red taillight lens with lights on at night: if the main red light looks like a smooth “light bar” with no visible bulb shape, you likely have LED tails (only reverse bulbs are replaceable).
- 🔹If you can clearly see a bulb shape and filament inside, you have halogen tails (tail/stop/turn bulbs are replaceable).
- 🔹The removal steps are the same; the difference is what bulbs you can replace once the lamp is out.
Step 2: Remove the taillight mounting screws
- 🔹Lower the tailgate to expose the vertical edge of the taillight inside the bed opening.
- 🔹Use the T15 Torx screwdriver or T15 Torx bit with 1/4" ratchet to remove the two vertical screws holding the taillight to the bed side.
- 🔹Set the screws aside in a safe place so they don't fall into the bed gaps.
Step 3: Release and remove the taillight assembly
- 🔹Place one hand on the outer (painted) side of the taillight and one near the inner edge.
- 🔹Pull the taillight straight rearward, away from the truck. There are plastic locating pins that will “pop” free.
- 🔹If it feels stuck, gently wiggle while pulling; you can use a flat trim tool between the lamp and bed to help, but do not pry hard on the painted surface.
- 🔹Support the taillight so it does not hang by the wiring harness.
Step 4: Disconnect the wiring connector
- 🔹On the back of the taillight, locate the main electrical connector.
- 🔹Press the small locking tab with your thumb and pull the connector straight out of the lamp. If needed, use the flat trim tool gently on the tab.
- 🔹Now you can place the lamp on a soft surface (like a towel) to avoid scratching it.
Step 5: Remove the bulb holders
- 🔹Each bulb sits in a round plastic socket that twists out of the taillight housing.
- 🔹For each socket you need to service (tail/stop/turn and reverse), grasp the socket firmly and twist it about 1/4 turn counterclockwise by hand.
- 🔹Pull the socket straight out of the housing.
- Do one bulb at a time to avoid mixing locations.
Step 6: Replace the bulbs
- 🔹For halogen tail/stop/turn bulbs: pull the old bulb straight out of its socket. Install the new tail/stop/turn bulb by pushing it straight in until fully seated.
- 🔹For reverse bulbs: pull out the old bulb and install the new 921 reverse bulb the same way.
- 🔹If your main red functions are LED, you will only see and replace the reverse bulb; the others will be part of a sealed LED module.
- 🔹Apply a tiny amount of dielectric grease to the metal contacts if available to help prevent corrosion.
- Do not touch glass with bare fingers; use gloves.
Step 7: Reinstall bulb holders into the taillight
- 🔹Align each bulb socket with its opening in the taillight housing so the tabs line up.
- 🔹Insert the socket fully, then twist it 1/4 turn clockwise by hand until it stops.
- 🔹Make sure each socket is locked in place; it should not wiggle.
Step 8: Reconnect wiring and test the lights
- 🔹Reconnect the main electrical connector to the back of the taillight until it clicks.
- 🔹Before bolting the lamp back in, have a helper turn on the parking lights, press the brake, use the turn signal, and shift to Reverse (with foot on brake and wheels chocked) to confirm all functions work.
- 🔹If a new bulb does not light, turn ignition and lights off, remove that socket, rotate the bulb 180°, reinstall, and test again (some bulbs are polarity sensitive).
Step 9: Reinstall the taillight assembly
- 🔹Align the locating pins on the taillight with the holes in the bed side.
- 🔹Push the lamp straight forward into the bed side until it seats flush.
- 🔹Install the two T15 screws with the T15 Torx screwdriver or T15 Torx bit and ratchet.
- 🔹Snug them firmly; do not overtighten. Torque to 3–4 Nm (27–35 in-lbs) if you have a small torque wrench.
Step 10: Repeat on the other side
- 🔹Repeat Steps 2–9 on the opposite taillight so both sides have fresh bulbs.
- Always replace bulbs in pairs for even brightness.
✅ After Repair
- 🔹Do a final walk-around with the lights on: parking lights, brake lights, turn signals, hazard lights, and reverse lights.
- 🔹Check from a distance at night to confirm brightness and color match on both sides.
- 🔹Listen for any rattles from the taillight area over bumps; if you hear any, recheck that the lamp and screws are tight.
💰 DIY vs Shop Cost
Shop Cost: $120–$200 (parts + labor)
DIY Cost: $15–$40 (bulbs + small supplies)
You Save: $80–$160 by doing it yourself!
Shop labor rates vary but typically run $100–$150/hour. This repair takes a shop approximately 0.5–1.0 hours.
🎯 Ready to get started?
HowToo makes it easy: same-day/2-day shipping on every part, plus all the tools and specialty tools you need! Check out the parts and tools sections above to add everything to your cart.
Guide for replace for these GMC vehicles
| Year Make Model | Sub Model | Engine | Body Style |
|---|