








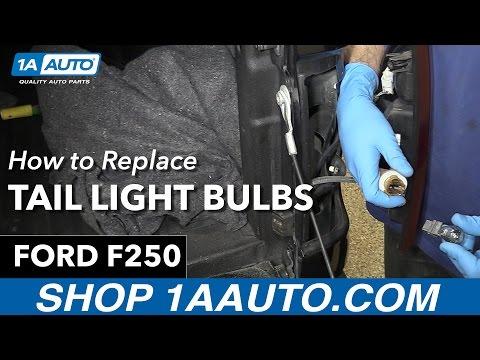







How to Replace Taillight Bulbs on a 2011-2023 Ford F-250 Super Duty (3157)
Step-by-step taillight assembly removal, tools/parts list, and torque specs for both sides
How to Replace Taillight Bulbs on a 2011-2023 Ford F-250 Super Duty (3157)
Step-by-step taillight assembly removal, tools/parts list, and torque specs for both sides for 2011, 2012, 2013, 2014, 2015, 2016, 2017, 2018, 2020, 2021, 2022, 2023


🔧 F-250 Super Duty - Taillight Bulb Replacement
You’ll remove each taillight assembly, twist out the bulb socket, and swap the bulb(s). This restores proper tail/running lights, brake lights, and turn signals so you stay visible and legal.
Difficulty Level: Beginner | Estimated Time: 0.5-1.0 hours
Assumption: You mean the main rear stop/turn/tail bulbs on both left and right taillights.
⚠️ Safety & Precautions
- ⚠️ Park on level ground, shift to Park, and set the parking brake.
- ⚠️ Turn the headlight switch OFF and remove the key before unplugging bulbs.
- ⚠️ Let bulbs cool before touching; they can be hot.
- ⚠️ Don’t touch new glass bulbs with bare fingers; oil can shorten bulb life.
🔧 Required Tools
You'll need the following tools for this repair:
- 8mm socket
- 1/4" drive ratchet
- 6" 1/4" drive extension
- Plastic trim removal tool
- Nitrile gloves
- Safety glasses
- Clean shop towel
🔩 Required Parts
HowToo sells all the parts you need for this repair:
- Rear stop/turn/tail bulb (3157 type) - Qty: 2
- Dielectric grease - Qty: 1
📋 Before You Begin
- Park the truck on a flat surface with room behind it.
- Open the tailgate to access the taillight fasteners.
- Lay a clean shop towel where you’ll set the taillight to avoid scratches.
🔨 Step-by-Step Instructions
Follow these steps in order:
Step 1: Remove the left taillight screws
- Open the tailgate.
- Use a 8mm socket, 1/4" drive ratchet, and 6" extension to remove the two taillight screws on the inner edge (tailgate side).
- Set the screws aside where they won’t get lost.
Step 2: Pull the taillight assembly out
- Grip the taillight and pull it straight rearward to release the alignment pins.
- If it’s stuck, use a plastic trim removal tool to gently help it start moving. (A trim tool is a plastic pry tool that helps you pry without scratching paint.)
- Pull straight back—don’t twist.
Step 3: Remove the bulb socket
- Find the main bulb socket for the stop/turn/tail function (usually the larger socket).
- Twist the socket counterclockwise by hand to unlock it, then pull it out of the housing.
- Wear nitrile gloves and use a clean shop towel to keep things clean.
Step 4: Replace the bulb
- Pull the old bulb straight out of the socket (wiggle gently if needed).
- Install the new 3157 type bulb by pushing it straight in until fully seated.
- Apply a very thin wipe of dielectric grease to the socket seal area (not on the bulb glass).
Step 5: Reinstall the socket and taillight
- Insert the socket into the taillight and twist clockwise to lock.
- Line up the taillight alignment pins and push the assembly straight in until it sits flush.
- Reinstall the two screws using a 8mm socket, ratchet, and extension.
- Torque to 2-3 Nm (18-27 in-lbs) (snug only—do not overtighten).
Step 6: Repeat on the right side
- Repeat Steps 1-5 on the right taillight using the same 8mm socket setup and plastic trim removal tool as needed.
✅ After Repair
- Turn the headlights on and confirm both rear running lights work.
- Press the brake pedal and confirm both brake lights are bright.
- Turn on left and right turn signals and confirm normal flash speed.
- If a bulb doesn’t work, remove the socket and re-seat the bulb fully.
💰 DIY vs Shop Cost
Shop Cost: $60-$150 (parts + labor)
DIY Cost: $10-$30 (parts only)
You Save: $50-$120 by doing it yourself!
Shop labor rates vary but typically run $100-$150/hour. This repair takes a shop approximately 0.5-1.0 hours.
🎯 Ready to get started?
HowToo makes it easy: same-day/2-day shipping on every part, plus all the tools and specialty tools you need! Check out the parts and tools sections below to add everything to your cart.
Guide for Tail Light Bulb replace for these Ford vehicles
| Year Make Model | Sub Model | Engine | Body Style |
|---|---|---|---|
| 2023 Ford F-250 Super Duty | - | - | - |
| 2022 Ford F-250 Super Duty | - | - | - |
| 2021 Ford F-250 Super Duty | - | - | - |
| 2020 Ford F-250 Super Duty | - | - | - |
| 2018 Ford F-250 Super Duty | - | - | - |
| 2017 Ford F-250 Super Duty | - | - | - |
| 2016 Ford F-250 Super Duty | - | - | - |
| 2015 Ford F-250 Super Duty | - | - | - |
| 2014 Ford F-250 Super Duty | - | - | - |
| 2013 Ford F-250 Super Duty | - | - | - |
| 2012 Ford F-250 Super Duty | - | - | - |
| 2011 Ford F-250 Super Duty | - | - | - |