










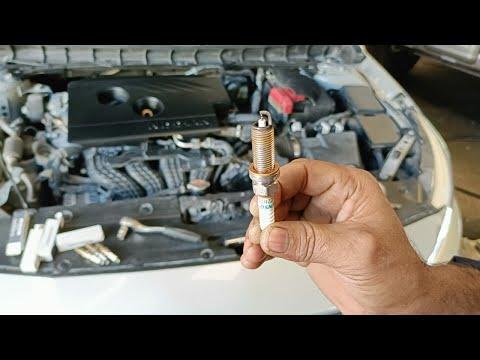






How to Replace Spark Plugs on a 2019 Nissan Altima 2.5L
Step-by-step DIY spark plug change with tools, parts list, torque specs, safety tips, and post-repair checks for 2019, 2020, 2021
How to Replace Spark Plugs on a 2019 Nissan Altima 2.5L
Step-by-step DIY spark plug change with tools, parts list, torque specs, safety tips, and post-repair checks for 2019, 2020, 2021


🔧 Altima - Spark Plug Replacement
You’ll be removing the engine cover, unplugging the ignition coils, and replacing all four spark plugs on your Altima. This keeps the engine running smoothly, improves fuel economy, and prevents misfires.
Difficulty Level: Beginner | Estimated Time: 1-1.5 hours
⚠️ Safety & Precautions
- 🔹Let the engine cool completely; hot engine parts can burn you.
- 🔹Turn ignition OFF and keep the key at least a few meters away so the engine cannot crank.
- 🔹Work in a well-ventilated area with good lighting.
- 🔹Do not pull on ignition coil or wiring by the wires; only pull on connectors and housings.
- 🔹Avoid dropping tools or objects into the spark plug holes; it can cause engine damage.
- 🔹Battery disconnect is not required, but you may remove the negative terminal if you prefer extra safety.
🔧 Required Tools
You'll need the following tools for this repair:
- 🔹3/8" drive ratchet
- 🔹10mm socket
- 🔹14mm or 9/16" spark plug socket (with rubber insert)
- 🔹3/8" drive extension (6")
- 🔹Torque wrench (inch-lb and ft-lb capable)
- 🔹Small flathead screwdriver
- 🔹Needle-nose pliers
- 🔹Clean rag
- 🔹Compressed air can or air blower
- 🔹Dielectric grease
- 🔹Mechanic gloves
- 🔹Safety glasses
🔩 Required Parts
HowToo sells all the parts you need for this repair:
- 🔹Iridium spark plugs (correct for 2.5L) - Qty: 4
- 🔹Throttle body/intake cleaner spray - Qty: 1 (optional, for light cleaning)
- 🔹Dielectric grease packet - Qty: 1
- 🔹Shop towels or paper towels - Qty: 1 pack
📋 Before You Begin
- Park the Altima on level ground, shift to P, and set the parking brake.
- Turn the engine OFF and remove the key from the vehicle.
- Open the hood and secure it with the hood prop rod.
- If you choose to disconnect the battery: use a 10mm socket to loosen the negative terminal and move it aside.
- Make sure the new spark plugs are the correct type and pre-gapped from the factory. Do not adjust iridium tips.
🔨 Step-by-Step Instructions
Follow these steps in order:
Step 1: Remove the engine cover
- Put on your mechanic gloves and safety glasses.
- Grasp the plastic engine cover on top of the engine with both hands.
- Pull straight up firmly; it is held by rubber grommets, no bolts.
- Set the cover aside in a clean area.
Step 2: Locate the ignition coils
- The ignition coils are the black rectangular units sitting on top of the engine, one per cylinder in a row.
- Each coil has an electrical connector and is held in place with a small bolt.
- Take a picture so you remember layout.
Step 3: Disconnect the ignition coil connectors
- Use a small flathead screwdriver to gently lift the locking tab on the first coil connector.
- While holding the tab up, pull the connector rearward by hand to unplug it.
- Repeat for all four ignition coils.
- Do not yank by the wires.
Step 4: Remove the ignition coils
- Use a 10mm socket and 3/8" ratchet to remove the single bolt holding the first coil.
- Lift the coil straight up and out; twist gently if it feels stuck.
- Place the coil somewhere clean.
- Repeat for the remaining three coils.
- When reinstalling later, the ignition coil bolts are tightened to 9 Nm (80 in-lbs).
Step 5: Clean around the spark plug wells
- Use a compressed air can or air blower to blow out any dust or debris around and inside the spark plug tubes.
- Hold a clean rag loosely over the area to control debris.
- Cleaning prevents dirt entering engine.
Step 6: Remove the old spark plugs
- Attach the spark plug socket to the 6" extension and then to the 3/8" ratchet.
- Carefully lower the socket into the first spark plug well until it seats on the plug.
- Turn the ratchet counterclockwise to loosen the spark plug.
- Once loose, spin it out by hand using the extension.
- Lift the plug out; the rubber insert in the spark plug socket should hold it.
- Repeat for all four spark plugs.
Step 7: Inspect the old spark plugs
- Check for heavy oil, white deposits, or a cracked insulator.
- If one plug looks very different from the others, note its cylinder location for future diagnostics.
- Normal wear: light tan or gray tip.
Step 8: Prepare the new spark plugs
- Remove new plugs from their boxes and keep them clean.
- Verify the part number matches what the parts supplier specified for your 2.5L Altima.
- Check the gap using a spark plug gap gauge if available, but do not bend the fine iridium center electrode.
- Do not apply anti-seize to the threads; Nissan’s iridium plugs are designed to be installed dry.
Step 9: Install the new spark plugs
- Place the first new plug into the spark plug socket so the rubber insert holds it.
- Carefully lower it into the spark plug well without dropping it.
- Turn the extension by hand clockwise to start the threads. It should turn smoothly.
- If you feel any resistance or cross-threading, stop, back it out, and start again.
- Once finger tight, attach the torque wrench to the extension.
- Tighten to 18 Nm (13 ft-lbs). Do not overtighten.
- Repeat for all remaining spark plugs.
Step 10: Reinstall the ignition coils
- Apply a small amount of dielectric grease inside each coil boot opening. This helps prevent moisture and sticking.
- Insert each ignition coil straight down onto its spark plug until fully seated.
- Install the 10mm coil bolt using the 10mm socket and snug by hand.
- Then torque each coil bolt to 9 Nm (80 in-lbs) with the torque wrench.
Step 11: Reconnect the ignition coil connectors
- Push each connector onto its coil until you hear or feel a click.
- Gently tug each connector to confirm it is locked in place.
Step 12: Reinstall the engine cover
- Align the engine cover over the mounting posts.
- Press down firmly at each corner until it snaps into the rubber grommets.
Step 13: Final checks before starting
- Make sure no tools or rags are left in the engine bay.
- If you disconnected the battery, reconnect the negative terminal using the 10mm socket and tighten snugly.
✅ After Repair
- 🔹Start the engine and let it idle. It should run smoothly without shaking or warning lights.
- 🔹Listen for any unusual ticking or misfire sounds. If heard, turn off the engine and recheck coil connectors and plug torque.
- 🔹Take a short test drive, checking for smooth acceleration and normal power.
- 🔹If a check engine light appears, have the code read; it could indicate a loose connector or coil issue.
💰 DIY vs Shop Cost
Shop Cost: $250-$400 (parts + labor)
DIY Cost: $60-$120 (parts only)
You Save: $190-$280 by doing it yourself!
Shop labor rates typically run $100-$150/hour. This repair takes a shop approximately 0.8-1.0 hours.
🎯 Ready to get started?
HowToo makes it easy: same-day/2-day shipping on every part, plus all the tools and specialty tools you need! Check out the parts and tools sections above to add everything to your cart.
