


How to Replace Spark Plugs on a 2016 Jeep Cherokee (Step-by-Step DIY Guide)
Tools, parts, plug gap tips, and torque specs for a smooth idle and fewer misfires
How to Replace Spark Plugs on a 2016 Jeep Cherokee (Step-by-Step DIY Guide)
Tools, parts, plug gap tips, and torque specs for a smooth idle and fewer misfires


🔧 Cherokee - Spark Plug Replacement
On your Cherokee, the spark plugs ignite the air/fuel mix. Worn plugs can cause rough idle, misfires, poor MPG, and hard starts. This job is mostly careful disassembly and reinstalling parts to the correct torque.
Difficulty Level: Intermediate | Estimated Time: 1.5-3 hours
⚠️ Safety & Precautions
- ⚠️ Work on a cold engine; plugs thread into aluminum and can strip when hot.
- ⚠️ Disconnect the negative battery cable if you’ll be unplugging many connectors near the engine.
- ⚠️ Do not pull on wiring; press the connector lock tab and pull the plastic body.
- ⚠️ Keep dirt out of plug wells; blow debris out before removing any plug.
- ⚠️ Avoid anti-seize on modern plated plugs unless the plug maker requires it.
🔧 Required Tools
You'll need the following tools for this repair:
- Safety glasses
- Nitrile gloves
- 10mm socket
- 8mm socket
- 3/8" ratchet
- 3/8" torque wrench (10–30 ft-lbs range)
- 6" socket extension (3/8")
- 12" socket extension (3/8")
- 5/8" spark plug socket
- Trim clip remover
- Small flathead screwdriver
- Feeler gauge set (for spark plug gap)
- Compressed air nozzle
- Flashlight
- Magnetic pickup tool
🔩 Required Parts
HowToo sells all the parts you need for this repair:
- Spark plugs (OEM-equivalent iridium) - Qty: 4
- Dielectric grease - Qty: 1
📋 Before You Begin
- Park on level ground, shift to Park, and set the parking brake.
- Open the hood and let the engine cool fully (at least 1 hour).
- If disconnecting the battery: use a 10mm socket to remove the negative terminal and isolate it so it can’t spring back.
- Assumption: Spark plugs are accessed from the top after removing the engine cover and intake ducting; some builds may require moving the upper intake/air resonator slightly for clearance.
🔨 Step-by-Step Instructions
Follow these steps in order:
Step 1: Remove the engine cover
- Grip the cover firmly and pull upward to release the rubber grommets (no tools on most covers).
- Set it aside where it won’t get stepped on.
Step 2: Remove the air intake duct (for working room)
- Use an 8mm socket to loosen the hose clamp(s) on the intake duct.
- Unclip any attached breather/PCV hose using a small flathead screwdriver to gently lift the lock (if equipped).
- Lift the duct out and set it aside.
Step 3: Unplug and remove ignition coils (one cylinder at a time)
- Each cylinder has an ignition coil on top of the plug. (The coil is the pencil-shaped unit that snaps onto the spark plug.)
- Press the electrical connector lock tab and unplug the coil connector.
- Use a 10mm socket with a 6" extension to remove the coil hold-down bolt.
- Twist the coil slightly and pull straight up to remove it. Don’t pry on the plastic.
Step 4: Clean the spark plug well
- Use a compressed air nozzle to blow out dirt around the plug before loosening it.
- Use a flashlight to confirm the well looks clean and dry.
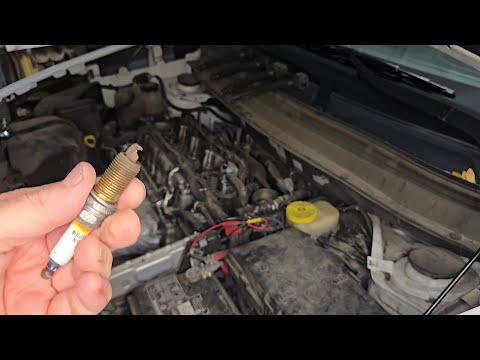
Step 5: Remove the old spark plug
- Install a 5/8" spark plug socket on a 12" extension and 3/8" ratchet.
- Turn counterclockwise to loosen, then spin it out by hand with the ratchet.
- Lift the plug out carefully; use a magnetic pickup tool if it doesn’t come up easily.
Step 6: Check and prep the new spark plug
- Check the gap using a feeler gauge set. Typical gap is around 0.043 in (1.1 mm) on this engine; use the spec provided with the plugs if it differs.
- If the plug is iridium, do not bend the tiny center tip; adjust only if the plug maker says it’s allowed.
- Apply a very small dab of dielectric grease inside the coil boot (this helps prevent moisture/corrosion; it’s non-conductive).
Step 7: Install the new spark plug
- Thread the plug in by hand first using the spark plug socket and extension only (no ratchet) to avoid cross-threading.
- Once finger-tight, use a 3/8" torque wrench to tighten the plug: Torque to 20 Nm (15 ft-lbs).
- If it doesn’t thread easily, stop and realign.
Step 8: Reinstall the ignition coil
- Push the coil straight down until you feel it seat on the plug.
- Install the coil bolt using a 10mm socket, then tighten with a torque wrench: Torque to 9 Nm (80 in-lbs).
- Reconnect the coil electrical connector until it clicks.
Step 9: Repeat for the remaining cylinders
- Repeat Steps 3–8 for the other 3 plugs, working one coil/plug at a time to avoid mixing anything up.
Step 10: Reinstall the intake duct and engine cover
- Reinstall the intake duct and tighten the clamp(s) using an 8mm socket.
- Reconnect any hoses/clips you removed.
- Press the engine cover back onto its grommets.
- If you disconnected the battery, reconnect the negative terminal using a 10mm socket and tighten snugly.
✅ After Repair
- Start the engine and let it idle for 30–60 seconds; it should be smooth.
- If the check engine light flashes or it runs rough, shut it off and recheck coil connectors and coil seating.
- Take a short test drive and verify normal power and no warning lights.
💰 DIY vs Shop Cost
Shop Cost: $250-$450 (parts + labor)
DIY Cost: $40-$120 (parts only)
You Save: $210-$330 by doing it yourself!
Shop labor rates vary but typically run $100-$150/hour. This repair takes a shop approximately 1.5-2.5 hours.
🎯 Ready to get started?
HowToo makes it easy: same-day/2-day shipping on every part, plus all the tools and specialty tools you need! Check out the parts and tools sections below to add everything to your cart.