









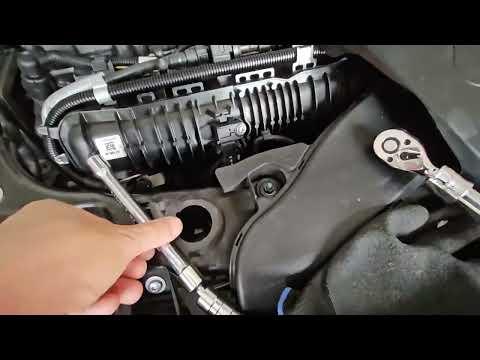







How to Replace Spark Plugs on a 2016-2019 BMW X1 (2.0L Turbo) - DIY Guide (Engine: Inline 4 2.0L)
Step-by-step spark plug change with required tools/parts, safety tips, and BMW torque specs
How to Replace Spark Plugs on a 2016-2019 BMW X1 (2.0L Turbo) - DIY Guide (Engine: Inline 4 2.0L)
Step-by-step spark plug change with required tools/parts, safety tips, and BMW torque specs for 2016, 2017, 2018, 2019


🔧 X1 - Spark Plug Replacement
Replacing the spark plugs restores strong ignition, smooth idle, and good fuel economy. On your X1, the plugs sit under the ignition coils on top of the engine, so the job is mostly careful removal and correct torque on reassembly.
Difficulty Level: Intermediate | Estimated Time: 1.0-2.0 hours
Assumption: common 2.0L turbo coil-on-plug layout.
⚠️ Safety & Precautions
- ⚠️ Work on a fully cool engine to avoid burns and damaged threads.
- ⚠️ Keep dirt out of the spark plug holes; debris can damage the engine.
- ⚠️ Turn ignition fully OFF, keep the key/fob away from the vehicle while working.
- ⚠️ If you disconnect the battery, you may lose some memory settings.
🔧 Required Tools
You'll need the following tools for this repair:
- Safety glasses
- Nitrile gloves
- Flashlight
- Trim removal tool (plastic pry tool)
- Ratchet (3/8")
- Torque wrench (3/8", inch-lb/ft-lb capable)
- Socket set with 10mm socket
- E-Torx E8 socket
- Extension bar set (3/8")
- Thin-wall 14mm 12-point spark plug socket (3/8")
- Small pick tool
- Compressed air or air blower
- Ignition coil puller (specialty)
🔩 Required Parts
HowToo sells all the parts you need for this repair:
- Spark plugs (correct spec for your engine) - Qty: 4
- Dielectric grease - Qty: 1
📋 Before You Begin
- Park on level ground, shift to Park, set the parking brake, and open the hood.
- Let the engine cool completely (warm aluminum threads strip more easily).
- If you choose to disconnect the battery: use a 10mm socket to remove the negative terminal and isolate it so it can’t spring back.
🔨 Step-by-Step Instructions
Follow these steps in order:
Step 1: Remove the engine cover
- Use a trim removal tool (plastic pry tool) and your hands to lift the engine cover straight up (it’s held by rubber grommets on most setups).
- Set the cover aside where it won’t get stepped on.
Step 2: Expose the ignition coils
- Use a flashlight to locate the 4 ignition coils on top of the valve cover.
- If any small wiring channels or brackets block access, remove their fasteners using a 10mm socket.
Step 3: Unplug the ignition coils
- Use a small pick tool only if needed to gently release the connector lock.
- Pull the electrical connector off each coil (pull on the connector body, not the wires).
- Take a quick photo for routing.
Step 4: Remove the ignition coils
- If your coils have hold-down bolts: remove them using an E-Torx E8 socket.
- Pull each coil straight up. If it’s stuck, use an ignition coil puller (specialty) (a small lever tool made to lift coils without cracking them).
- Set coils in order (cylinder 1-4) so they go back to the same place.
Step 5: Clean around the spark plug wells
- Use compressed air or air blower to blow out dirt/pebbles from each spark plug well.
- This prevents debris from falling into the cylinder when the plug comes out.
Step 6: Remove the old spark plugs
- Use a thin-wall 14mm 12-point spark plug socket (3/8") with a 3/8" ratchet and extension bar set (3/8").
- Break the plug loose carefully, then spin it out.
- If a plug feels extremely tight, stop and work it back-and-forth gently (tight plugs can damage threads if forced).
Step 7: Install the new spark plugs (by hand first)
- Place a new plug in the spark plug socket and carefully lower it into the well using the extension bar.
- Thread the plug in by hand using the extension only (no ratchet) until fully seated. This helps prevent cross-threading.
- Use a torque wrench (3/8", inch-lb/ft-lb capable) to tighten: Torque to 23 Nm (17 ft-lbs).
- Do not apply anti-seize unless your plug manufacturer specifically requires it (many BMW-style plugs are pre-coated).
Step 8: Reinstall ignition coils
- Apply a tiny smear of dielectric grease inside each coil boot (the rubber tube) to help sealing and future removal.
- Push each coil straight down until fully seated.
- If your coils use hold-down bolts: install and tighten using an E-Torx E8 socket and torque wrench to Torque to 8 Nm (71 in-lbs).
- Reconnect the electrical connectors until they click/lock.
Step 9: Reassemble covers and brackets
- Reinstall any brackets/wiring channels using a 10mm socket.
- Press the engine cover back onto its grommets by hand.
✅ After Repair
- Start the engine and let it idle for 30–60 seconds. It should run smooth with no shaking.
- Listen for a ticking/air leak sound near the top cover (could indicate a loose coil or connector).
- If you have a scan tool and had a check engine light before, clear codes and verify no misfire codes return.
- Test drive 10–15 minutes and recheck for warning lights.
💰 DIY vs Shop Cost
Shop Cost: $300-$600 (parts + labor)
DIY Cost: $60-$140 (parts only)
You Save: $160-$540 by doing it yourself!
Shop labor rates vary but typically run $100-$150/hour. This repair takes a shop approximately 1.0-2.0 hours.
🎯 Ready to get started?
HowToo makes it easy: same-day/2-day shipping on every part, plus all the tools and specialty tools you need! Check out the parts and tools sections below to add everything to your cart.
Guide for Spark Plug replace for these BMW vehicles
| Year Make Model | Sub Model | Engine | Body Style |
|---|---|---|---|
| 2019 BMW X1 | - | Inline 4 2.0L | - |
| 2018 BMW X1 | - | Inline 4 2.0L | - |
| 2017 BMW X1 | - | Inline 4 2.0L | - |
| 2016 BMW X1 | - | Inline 4 2.0L | - |