









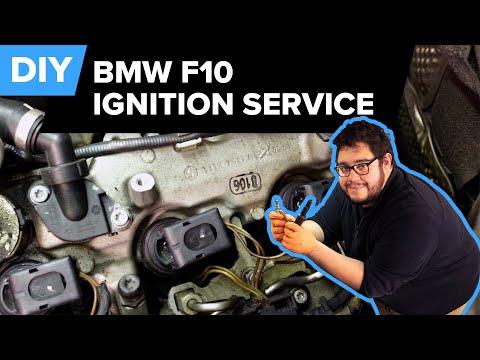







How to Replace Spark Plugs on a 2014-2016 BMW 550i (4.4L Twin-Turbo V8) (Engine: V8 4.4L)
Step-by-step DIY instructions with tools, parts list, and 23 Nm torque spec for all 8 plugs
How to Replace Spark Plugs on a 2014-2016 BMW 550i (4.4L Twin-Turbo V8) (Engine: V8 4.4L)
Step-by-step DIY instructions with tools, parts list, and 23 Nm torque spec for all 8 plugs for 2014, 2015, 2016


🔧 550i - Spark Plug Replacement
Changing the spark plugs on your 550i restores strong ignition, smooth idle, and good power—especially important on the turbo V8 where plugs wear faster. You’ll remove engine covers, unplug the ignition coils, and swap all 8 plugs.
Difficulty Level: Intermediate | Estimated Time: 2-4 hours
⚠️ Safety & Precautions
- ⚠️ Work on a fully cool engine to avoid burns and stripped threads.
- ⚠️ Keep dirt out of the plug holes—debris can damage the engine.
- ⚠️ Do not pull on wiring; release connectors carefully.
- ⚠️ Battery disconnect is recommended if you’re nervous around electrical connectors (optional but safer).
🔧 Required Tools
You'll need the following tools for this repair:
- Safety glasses
- Nitrile gloves
- Flashlight
- Fender cover
- Ratchet (3/8")
- Torque wrench (3/8", 10-60 Nm range)
- 14mm thin-wall spark plug socket (3/8")
- 3/8" extension set (3", 6", 10")
- 3/8" wobble extension or universal joint
- Socket set: 8mm, 10mm
- Torx bit set: T20, T25, T30
- Pick tool or small flathead screwdriver
- Compressed air blow gun
- Magnetic pickup tool
🔩 Required Parts
HowToo sells all the parts you need for this repair:
- Spark plugs (OEM-spec for your 550i) - Qty: 8
- Dielectric grease - Qty: 1
📋 Before You Begin
- Park on level ground, shift to Park, and set the parking brake.
- Let the engine cool completely (at least 1-2 hours after driving).
- If disconnecting the battery: use a 10mm socket to remove the negative terminal and isolate it so it can’t spring back.
- Take photos before unplugging anything.
🔨 Step-by-Step Instructions
Follow these steps in order:
Step 1: Remove the engine covers
- Lift off the top engine cover(s) by pulling upward firmly with your hands.
- If any cover uses fasteners on your setup, remove them with a Torx T25 screwdriver and set aside.
Step 2: Create working room at the rear (if needed)
- For extra access to the back cylinders, remove the rear plastic/cowl pieces as needed using a Torx T20 or Torx T25 screwdriver.
- Remove any small brackets in the way using an 8mm socket or 10mm socket.
- Keep bolts grouped by area.
Step 3: Unplug and remove one ignition coil
- Choose one cylinder and do the job one coil at a time (prevents mix-ups).
- Use a pick tool or small flathead screwdriver to release the coil electrical connector lock, then unplug it.
- Pull the ignition coil straight up to remove it (gentle twisting helps).
- Place the coil aside where it won’t get dirty.
Step 4: Clean around the spark plug well
- Use compressed air blow gun to blow dirt/debris out of the spark plug tube before removing the plug.
- This prevents grit from falling into the cylinder.
Step 5: Remove the old spark plug
- Install your 14mm thin-wall spark plug socket (3/8") on a 3/8" extension and ratchet (3/8").
- A spark plug socket is a deep socket with an internal insert that grips the plug so it can be lifted out.
- Turn counterclockwise to loosen, then spin it out.
- Carefully lift the plug out; use a magnetic pickup tool if it sticks.
Step 6: Install the new spark plug (by hand first)
- Put the new plug into the spark plug socket and lower it into the hole.
- Thread it in by hand using only the extension (no ratchet) to avoid cross-threading.
- Once it seats, attach the torque wrench and tighten to Torque to 23 Nm (17 ft-lbs).
- Do not use anti-seize on modern plated plugs.
Step 7: Reinstall the ignition coil
- Apply a tiny dab of dielectric grease inside the coil boot (helps sealing and future removal).
- Push the coil straight down until it fully seats on the plug.
- Reconnect the electrical connector until it clicks/locks.
Step 8: Repeat for all cylinders
- Repeat Steps 3–7 for the remaining 7 plugs.
- Use a 3/8" wobble extension or universal joint for tight angles near the firewall.
- A wobble/universal joint is a pivot adapter that lets the socket bend slightly to reach tight spots.
Step 9: Reinstall covers and any removed trim
- Reinstall any brackets using an 8mm socket or 10mm socket.
- Reinstall cowl pieces with the same Torx bits you removed.
- Snap the engine covers back into place by pressing down evenly.
Step 10: Reconnect the battery (if disconnected)
- Reconnect the negative terminal using a 10mm socket and tighten snugly.
✅ After Repair
- Start the engine and let it idle for 1-2 minutes. It should be smooth with no shaking.
- Check that no warning lights appear and there’s no fuel smell.
- If you have a scan tool, clear any stored misfire codes and recheck after a short drive.
- Test drive 10-15 minutes with gentle acceleration, then recheck for any issues.
💰 DIY vs Shop Cost
Shop Cost: $500-$1,000 (parts + labor)
DIY Cost: $120-$250 (parts only)
You Save: $380-$750 by doing it yourself!
Shop labor rates vary but typically run $100-$150/hour. This repair takes a shop approximately 2-4 hours.
🎯 Ready to get started?
HowToo makes it easy: same-day/2-day shipping on every part, plus all the tools and specialty tools you need! Check out the parts and tools sections below to add everything to your cart.
Guide for Spark Plug replace for these BMW vehicles
| Year Make Model | Sub Model | Engine | Body Style |
|---|---|---|---|
| 2016 BMW 550i | - | V8 4.4L | - |
| 2015 BMW 550i | - | V8 4.4L | - |
| 2014 BMW 550i | - | V8 4.4L | - |