









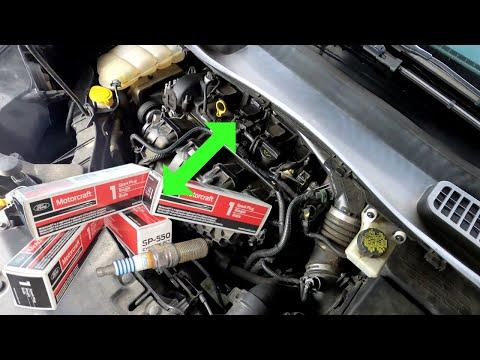





How to Replace Spark Plugs on a 2013-2023 Ford Escape 2.0L EcoBoost (Engine: Inline 4 2.0L)
Step-by-step guide with tools, parts, plug gap, torque specs, and safety tips
How to Replace Spark Plugs on a 2013-2023 Ford Escape 2.0L EcoBoost (Engine: Inline 4 2.0L)
Step-by-step guide with tools, parts, plug gap, torque specs, and safety tips for 2013, 2014, 2015, 2016, 2017, 2018, 2020, 2021, 2022, 2023


🔧 Escape - Spark Plug Replacement
Replacing the spark plugs on your Escape helps restore smooth idle, easy starting, fuel economy, and proper turbocharged engine performance. The 2.0L EcoBoost uses one ignition coil per spark plug, so you’ll remove the coils first, then replace the plugs underneath.
Difficulty Level: Beginner | Estimated Time: 1-2 hours
⚠️ Safety & Precautions
- ⚠️ Let the engine cool fully before starting. Spark plugs thread into the cylinder head, and hot aluminum threads can be damaged.
- ⚠️ Work on a level surface with the transmission in Park and the parking brake engaged.
- ⚠️ Disconnecting the battery is recommended because you’ll be unplugging ignition coil connectors.
- ⚠️ Do not drop dirt into the spark plug wells. The wells are the deep tubes where the spark plugs sit.
- ⚠️ Replace spark plugs one at a time to avoid mixing up coil positions.
🔧 Required Tools
You'll need the following tools for this repair:
- 8mm socket
- 10mm socket
- 5/8-inch spark plug socket
- 3/8-inch drive ratchet
- 3/8-inch drive 6-inch extension
- 3/8-inch drive torque wrench
- Flat-head screwdriver
- Spark plug gap gauge
- Compressed air nozzle
- Dielectric grease applicator
- Needle-nose pliers
- Battery terminal wrench 10mm
- Nitrile gloves
- Safety glasses
🔩 Required Parts
HowToo sells all the parts you need for this repair:
- Spark plugs - Qty: 4
- Dielectric grease - Qty: 1
📋 Before You Begin
- Park your Escape on level ground, shift to Park, and set the parking brake.
- Let the engine cool until you can comfortably touch the top of the engine.
- Open the hood and remove the engine cover if equipped.
- Disconnect the negative battery cable using a 10mm battery terminal wrench. The negative cable is usually marked with a minus symbol.
- Use only the correct spark plugs for the 2.0L turbo engine. Turbo engines are sensitive to plug type and gap.
- Check the new spark plug gap before installation. For the 2.0L EcoBoost, use 0.028-0.031 inch unless the plug manufacturer specifies pre-gapped and do-not-adjust.
🔨 Step-by-Step Instructions
Follow these steps in order:
Step 1: Remove the Engine Cover
- Use both hands to lift the plastic engine cover straight upward.
- If it feels stuck, gently wiggle it while pulling upward. It is held by rubber grommets, which are soft mounting bushings.
- Set the cover aside in a clean place.
Step 2: Disconnect the Battery
- Use a 10mm battery terminal wrench to loosen the negative battery terminal nut.
- Lift the negative cable off the battery post and move it aside so it cannot spring back.
- Tip: Wrap the cable end with a clean rag.
Step 3: Locate the Ignition Coils
- Look across the top of the engine for four ignition coils.
- An ignition coil is the small electrical part that sits directly above each spark plug and sends high voltage to fire it.
- Each coil has an electrical connector and one small retaining bolt.
Step 4: Unplug the First Ignition Coil
- Use your fingers or a flat-head screwdriver to gently release the locking tab on the first coil connector.
- Pull the connector straight back from the coil.
- Do not pull on the wires. Pull on the connector body only.
- Tip: Work one plug at a time.
Step 5: Remove the Ignition Coil Bolt
- Use an 8mm socket, 3/8-inch drive ratchet, and extension if needed to remove the coil retaining bolt.
- Place the bolt somewhere safe so it does not fall into the engine bay.
Step 6: Remove the Ignition Coil
- Pull the ignition coil straight upward by hand.
- If it sticks, twist it gently while pulling up.
- Inspect the rubber boot for oil, cracking, or carbon tracking. Carbon tracking looks like a thin gray or black lightning-shaped line.
- If the boot is damaged, the coil or boot should be replaced.
Step 7: Clean the Spark Plug Well
- Put on safety glasses.
- Use a compressed air nozzle to blow dirt out of the spark plug well.
- This prevents debris from falling into the cylinder when the spark plug is removed.
Step 8: Remove the Old Spark Plug
- Use a 5/8-inch spark plug socket, 3/8-inch drive 6-inch extension, and 3/8-inch drive ratchet.
- Turn the spark plug counterclockwise to loosen it.
- Once loose, continue turning by hand using the extension to avoid damaging the threads.
- Lift the spark plug out carefully with the spark plug socket.
Step 9: Check the New Spark Plug Gap
- Use a spark plug gap gauge to check the space between the center electrode and ground strap.
- The target gap for the 2.0L EcoBoost is 0.028-0.031 inch, unless your replacement plug states it is factory-set and should not be adjusted.
- Do not pry hard on fine-wire iridium plug tips. They can be damaged easily.
Step 10: Install the New Spark Plug by Hand
- Place the new spark plug into the 5/8-inch spark plug socket.
- Use the 3/8-inch drive 6-inch extension by hand only to start threading the spark plug clockwise.
- Turn it several full turns by hand before using the ratchet.
- If it feels tight right away, stop and restart. This prevents cross-threading, which means damaging the cylinder head threads.
Step 11: Torque the New Spark Plug
- Attach the 3/8-inch drive torque wrench to the 5/8-inch spark plug socket and extension.
- Tighten the spark plug to Torque to 15 Nm (11 ft-lbs).
- Do not over-tighten. The cylinder head is aluminum and can be damaged.
Step 12: Apply Dielectric Grease
- Use a dielectric grease applicator to place a small amount of dielectric grease inside the ignition coil boot.
- Dielectric grease is a non-conductive silicone grease that helps prevent moisture from sticking the boot to the spark plug.
- Use only a small dab. Too much can prevent the boot from seating correctly.
Step 13: Reinstall the Ignition Coil
- Push the ignition coil straight down onto the new spark plug by hand.
- You should feel it seat firmly onto the spark plug top.
- Install the coil retaining bolt using an 8mm socket.
- Tighten the ignition coil bolt to Torque to 8 Nm (71 in-lbs).
Step 14: Reconnect the Coil Connector
- Push the electrical connector onto the ignition coil until it clicks.
- If the connector is hard to seat, inspect the lock tab with a flat-head screwdriver and make sure it is not bent.
Step 15: Repeat for the Other Three Spark Plugs
- Repeat Steps 4 through 14 for the remaining three spark plugs.
- Use the same 8mm socket, 5/8-inch spark plug socket, extension, ratchet, and torque wrench for each one.
- Keep dirt out of every spark plug well before removing each plug.
Step 16: Reinstall the Engine Cover
- Line up the engine cover with the rubber mounting points.
- Press down by hand until the cover seats firmly.
Step 17: Reconnect the Battery
- Place the negative battery cable back onto the battery post.
- Use a 10mm battery terminal wrench to tighten the terminal nut snugly.
- Do not over-tighten the battery terminal.
✅ After Repair
- Start your Escape and let it idle for 1-2 minutes.
- The idle may be slightly uneven for a few seconds after the battery has been disconnected.
- Listen for misfires, ticking, or hissing sounds.
- If the check engine light flashes, shut the engine off and recheck that all coil connectors are fully seated.
- Take a short test drive and confirm smooth acceleration under light throttle.
- If the battery was disconnected, reset the clock and window auto-up feature if needed.
💰 DIY vs Shop Cost
Shop Cost: $220-$380 (parts + labor)
DIY Cost: $45-$110 (parts only)
You Save: $175-$270 by doing it yourself!
Shop labor rates vary but typically run $100-$150/hour. This repair takes a shop approximately 0.8-1.2 hours.
🎯 Ready to get started?
HowToo makes it easy: same-day/2-day shipping on every part, plus all the tools and specialty tools you need! Check out the parts and tools sections below to add everything to your cart.
Guide for Dielectric Grease replace for these Ford vehicles
| Year Make Model | Sub Model | Engine | Body Style |
|---|---|---|---|
| 2023 Ford Escape | - | Inline 4 2.0L | - |
| 2023 Ford Escape | - | Inline 3 1.5L | - |
| 2022 Ford Escape | - | Inline 4 2.0L | - |
| 2022 Ford Escape | - | Inline 3 1.5L | - |
| 2021 Ford Escape | - | Inline 4 2.0L | - |
| 2021 Ford Escape | - | Inline 3 1.5L | - |
| 2020 Ford Escape | - | Inline 4 2.0L | - |
| 2020 Ford Escape | - | Inline 3 1.5L | - |
| 2018 Ford Escape | - | Inline 4 2.0L | - |
| 2017 Ford Escape | - | Inline 4 2.0L | - |
| 2016 Ford Escape | - | Inline 4 2.0L | - |
| 2015 Ford Escape | - | Inline 4 2.0L | - |
| 2014 Ford Escape | - | Inline 4 2.0L | - |
| 2013 Ford Escape | - | Inline 4 2.0L | - |