


How to Replace Spark Plugs on a 2012-2017 Toyota Camry (2.5L) — DIY Step-by-Step Guide (Engine: Inline 4 2.5L)
Tools, parts, safety tips, and torque specs for coils and plugs to prevent misfires and restore smooth idle
How to Replace Spark Plugs on a 2012-2017 Toyota Camry (2.5L) — DIY Step-by-Step Guide (Engine: Inline 4 2.5L)
Tools, parts, safety tips, and torque specs for coils and plugs to prevent misfires and restore smooth idle for 2012, 2013, 2014, 2015, 2016, 2017
🔧 Camry - Spark Plug Replacement
Replacing spark plugs restores smooth starts, fuel economy, and helps prevent misfires. On your Camry, the plugs sit under the ignition coils on top of the engine, so this is a straightforward under-hood job.
Difficulty Level: Intermediate | Estimated Time: 1.0-2.0 hours
Assumption: factory 2.5L hybrid layout with top-access coils.
⚠️ Safety & Precautions
- ⚠️ Let the engine fully cool before starting to avoid burns and damaged threads.
- ⚠️ Hybrid safety: Make sure the car is OFF (not READY) and keep the key fob 15+ feet away so it can’t wake up.
- ⚠️ Disconnect the 12V battery negative terminal to prevent accidental powering of systems while your hands are near wiring.
- ⚠️ Blow dirt out of the plug wells before removing plugs to keep debris from falling into the cylinder.
🔧 Required Tools
You'll need the following tools for this repair:
- 10mm socket
- 3/8" drive ratchet
- 3/8" drive extension set (3" and 6")
- 14mm thin-wall spark plug socket (rubber insert)
- Torque wrench (3/8" drive, 10-30 Nm range)
- Flat trim tool
- Compressed air blow gun
- Shop vacuum
- Feeler gauge set (wire type)
- Nitrile gloves
- Safety glasses
🔩 Required Parts
HowToo sells all the parts you need for this repair:
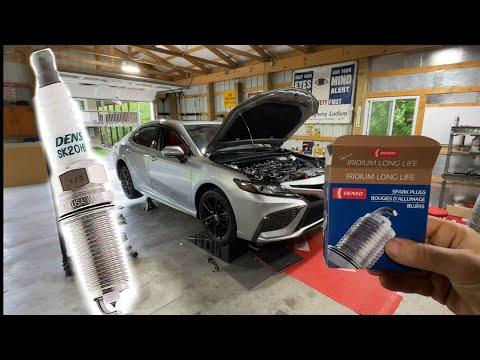
- Iridium spark plugs (pre-gapped) - Qty: 4
- Dielectric grease - Qty: 1
📋 Before You Begin
- Park on level ground, shift to Park, and set the parking brake.
- Turn the car OFF and verify the dash is dark (not READY).
- Open the trunk and access the 12V battery area; use a 10mm socket to disconnect the negative terminal and isolate it so it can’t spring back.
- Remove loose dirt around the top of the engine with a shop vacuum so it won’t fall into the plug wells.
🔨 Step-by-Step Instructions
Follow these steps in order:
Step 1: Remove the engine cover
- Grip the cover and pull upward to release the rubber grommets (no tools on most setups).
- If a plastic retainer is in the way, pop it gently with a flat trim tool.
Step 2: Unplug the ignition coils
- Each coil has an electrical connector on top.
- Press the lock tab and pull the connector straight off by hand. Pull the plug, not the wires.
Step 3: Remove the ignition coils
- Use a 10mm socket and 3/8" drive ratchet to remove the bolt holding each coil.
- Twist the coil gently, then pull it straight up and out. (A “coil boot” is the rubber sleeve that seals down into the spark plug tube.)
- Set coils aside in order (cylinder 1-4) so they go back where they came from.
- When reinstalling the coil bolts later: Torque to 9 Nm (80 in-lbs).
Step 4: Clean the spark plug wells
- Use a compressed air blow gun to blow dirt out of each plug tube before removing the plug.
- Use a shop vacuum as needed to catch loosened debris.
Step 5: Remove the old spark plugs
- Install the 14mm thin-wall spark plug socket (rubber insert) on a 3/8" drive extension and 3/8" drive ratchet.
- Turn counterclockwise to loosen, then remove the plug carefully.
- If a plug feels extremely tight, stop and work it gently back and forth to avoid damaging threads.
Step 6: Check the new plug gap (don’t “re-gap” aggressively)
- Use a feeler gauge set (wire type) to verify the gap matches the plug’s spec from the box.
- Iridium tips are delicate—do not pry on the center electrode. If the gap is off, exchange the plug.
Step 7: Install the new spark plugs
- Start each plug by hand using the 14mm thin-wall spark plug socket (rubber insert) and a 3/8" drive extension only (no ratchet at first).
- Thread it in until it seats smoothly. If it doesn’t spin easily, back it out and try again to avoid cross-threading.
- Tighten with a torque wrench (3/8" drive, 10-30 Nm range): Torque to 18 Nm (13 ft-lbs).
- Do not apply anti-seize unless the plug maker specifically requires it (it can cause over-tightening).
Step 8: Reinstall the ignition coils
- Apply a very small amount of dielectric grease inside the tip of each coil boot (this helps prevent moisture and makes future removal easier).
- Push the coil straight down until fully seated.
- Install the coil bolt with a 10mm socket, then tighten with a torque wrench: Torque to 9 Nm (80 in-lbs).
- Reconnect each coil electrical connector until it clicks.
Step 9: Reinstall the engine cover and reconnect the 12V battery
- Press the engine cover back onto its grommets by hand.
- Reconnect the 12V battery negative terminal using a 10mm socket and snug it firmly.
✅ After Repair
- Start the car (READY) and let it idle for 30-60 seconds; it should run smooth with no shaking.
- Listen for a ticking/air-leak sound near the coils (can indicate a coil not fully seated).
- If the check engine light comes on, recheck coil connectors and coil seating; scan for codes if available.
- Do a short test drive and confirm normal power and no warning lights.
💰 DIY vs Shop Cost
Shop Cost: $250-$450 (parts + labor)
DIY Cost: $40-$110 (parts only)
You Save: $140-$410 by doing it yourself!
Shop labor rates vary but typically run $100-$150/hour. This repair takes a shop approximately 1.0-1.5 hours.
🎯 Ready to get started?
HowToo makes it easy: same-day/2-day shipping on every part, plus all the tools and specialty tools you need! Check out the parts and tools sections below to add everything to your cart.
Guide for Spark Plug replace for these Toyota vehicles
| Year Make Model | Sub Model | Engine | Body Style |
|---|---|---|---|
| 2017 Toyota Camry | - | Inline 4 2.5L | - |
| 2016 Toyota Camry | - | Inline 4 2.5L | - |
| 2015 Toyota Camry | - | Inline 4 2.5L | - |
| 2014 Toyota Camry | - | Inline 4 2.5L | - |
| 2013 Toyota Camry | - | Inline 4 2.5L | - |
| 2012 Toyota Camry | - | Inline 4 2.5L | - |
