









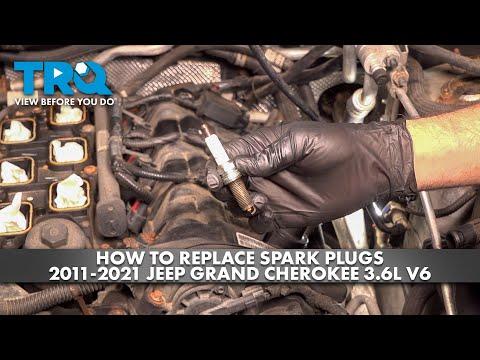






How to Replace Spark Plugs on a 2011 Jeep Grand Cherokee 3.6L V6 (Torque Specs)
Step-by-step DIY guide with required tools, parts list, safety tips, and coil bolt/plugs torque values for 2011, 2012, 2013, 2014, 2015, 2016, 2017, 2018, 2019, 2020, 2021, 2022
How to Replace Spark Plugs on a 2011 Jeep Grand Cherokee 3.6L V6 (Torque Specs)
Step-by-step DIY guide with required tools, parts list, safety tips, and coil bolt/plugs torque values for 2011, 2012, 2013, 2014, 2015, 2016, 2017, 2018, 2019, 2020, 2021, 2022


🔧 Grand Cherokee - Spark Plug Replacement
On your Grand Cherokee’s 3.6L V6, spark plugs fire the air/fuel mixture. Worn plugs can cause rough idle, misfires, poor fuel economy, and hard starts. This job is mostly remove-and-replace: engine cover off, ignition coils out, then swap all 6 plugs.
Difficulty Level: Intermediate | Estimated Time: 1.5-3.0 hours
⚠️ Safety & Precautions
- ⚠️ Work on a fully cool engine to avoid burns and to prevent damaging aluminum threads.
- ⚠️ Keep dirt out of the spark plug holes; debris can fall into the cylinder.
- ⚠️ Do not pull on wiring—release electrical connector locks first.
- ⚠️ Avoid anti-seize on modern plated spark plugs unless the plug maker specifically calls for it.
- ⚠️ Battery disconnect is not required, but disconnecting the negative terminal can prevent accidental shorts.
🔧 Required Tools
You'll need the following tools for this repair:
- Safety glasses
- Nitrile gloves
- 10mm socket
- 8mm socket
- 3/8" drive ratchet
- 3/8" drive torque wrench (10-30 ft-lbs range)
- 3/8" drive extension set (3", 6", 10")
- 3/8" drive wobble extension (specialty)
- 3/8" drive universal joint (specialty)
- 5/8" spark plug socket
- Small flathead screwdriver
- Trim clip removal tool
- Compressed air blow gun (specialty)
- Shop vacuum
- Flashlight
🔩 Required Parts
HowToo sells all the parts you need for this repair:
- Spark plugs (3.6L V6 correct type) - Qty: 6
- Dielectric grease - Qty: 1
📋 Before You Begin
- Park on level ground, shift to Park, and set the parking brake.
- Let the engine cool completely (at least 1-2 hours after driving).
- If you choose to disconnect the battery: use a 10mm socket to remove the negative terminal and keep it from touching the post.
- Label parts as you go. Keep bolts from each coil with that coil.
🔨 Step-by-Step Instructions
Follow these steps in order:
Step 1: Remove the engine cover
- Grab the cover with both hands and pull upward firmly to pop it off the mounting grommets.
- Use a flashlight to identify the three ignition coils on each side.
Step 2: Create working room (air intake tube/resonator if needed)
- If access is tight, loosen intake clamps using an 8mm socket and move the intake tube/resonator out of the way.
- Use a trim clip removal tool for any plastic retainers that are holding the ducting in place.
Step 3: Unplug an ignition coil connector
- Use a small flathead screwdriver to gently release the connector lock (don’t pry hard).
- Pull the connector straight off the coil.
Step 4: Remove the ignition coil
- Remove the coil hold-down bolt using a 10mm socket.
- Twist the coil slightly, then pull straight up to remove it from the spark plug tube.
- Wiggle, don’t yank the wiring.
Step 5: Clean the spark plug well
- Use a shop vacuum around the spark plug tube opening.
- Blow out remaining debris using a compressed air blow gun (specialty).
- A wobble extension is an extension that flexes slightly to reach bolts at an angle.
Step 6: Remove the spark plug
- Install a 5/8" spark plug socket onto a 3/8" drive extension and 3/8" drive ratchet.
- For tight rear cylinders, use a 3/8" drive wobble extension (specialty) or 3/8" drive universal joint (specialty) to get the angle.
- Turn counterclockwise to remove the plug. Lift it out carefully with the socket.
Step 7: Install the new spark plug (start by hand)
- Check the new plug matches the old one in size and reach.
- Do not “re-gap” fine-wire plugs unless the plug instructions specifically allow it.
- Place the new plug into the 5/8" spark plug socket and lower it into the hole.
- Thread it by hand first using only the extension (no ratchet at first) to avoid cross-threading.
- Tighten with a 3/8" drive torque wrench (10-30 ft-lbs range): Torque to 17 Nm (13 ft-lbs).
Step 8: Reinstall the ignition coil
- Apply a very small dab of dielectric grease inside the coil boot (helps prevent moisture; do not smear on plug threads).
- Push the coil straight down until fully seated.
- Install the coil bolt using a 10mm socket, then torque with a torque wrench: Torque to 8 Nm (71 in-lbs).
- Reconnect the electrical connector until it clicks/locks.
Step 9: Repeat for the remaining 5 cylinders
- Work one coil/plug at a time so nothing gets mixed up.
- Use the flashlight to confirm every connector is fully seated.
Step 10: Reassemble and reinstall the engine cover
- Reinstall any intake tube/resonator removed earlier using an 8mm socket on the clamps.
- Press the engine cover back onto its grommets until it snaps in place.
- If disconnected, reconnect the battery negative terminal using a 10mm socket.
✅ After Repair
- Start the engine and let it idle for 30-60 seconds. It should be smooth with no shaking.
- Listen for a ticking/air hiss near the intake tube area (could indicate a loose clamp).
- If the check engine light is on or it runs rough, recheck coil connectors and coil seating.
- Road test for 10 minutes, then recheck that everything is secure.
💰 DIY vs Shop Cost
Shop Cost: $300-$550 (parts + labor)
DIY Cost: $60-$150 (parts only)
You Save: $150-$450 by doing it yourself!
Shop labor rates vary but typically run $100-$150/hour. This repair takes a shop approximately 1.5-3.0 hours.
🎯 Ready to get started?
HowToo makes it easy: same-day/2-day shipping on every part, plus all the tools and specialty tools you need! Check out the parts and tools sections below to add everything to your cart.