








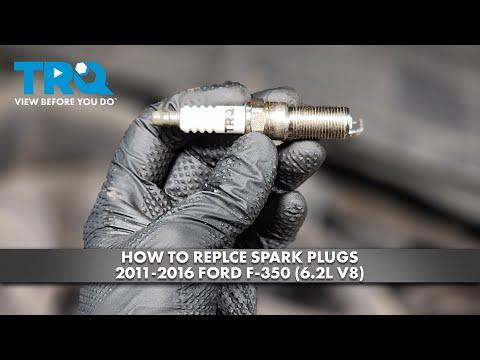






How to Replace Spark Plugs on a 2011-2024 Ford F-350 Super Duty 6.2L (16-Plug Guide) (Engine: V8 6.2L)
Step-by-step coil removal, required tools/parts, plug gap checks, and torque specs for a smooth-running engine
How to Replace Spark Plugs on a 2011-2024 Ford F-350 Super Duty 6.2L (16-Plug Guide) (Engine: V8 6.2L)
Step-by-step coil removal, required tools/parts, plug gap checks, and torque specs for a smooth-running engine for 2011, 2012, 2013, 2014, 2015, 2016, 2017, 2018, 2019, 2020, 2021, 2022


🔧 F-350 Super Duty - Spark Plug Replacement
On your F-350, the spark plugs fire the air/fuel mixture. Worn plugs can cause rough idle, misfires, poor fuel economy, and hard starts. This job is straightforward but takes time because you’ll remove ignition coils to access the plugs.
Difficulty Level: Intermediate | Estimated Time: 2-4 hours
⚠️ Safety & Precautions
- Work on a completely cool engine to avoid burned hands and damaged threads in the aluminum cylinder heads.
- Keep dirt out of the spark plug holes; debris can fall into the cylinder and cause damage.
- Do not over-tighten spark plugs; stripped threads are expensive to repair.
- Recommended: disconnect the negative battery cable to prevent accidental shorts while working around wiring.
🔧 Required Tools
You'll need the following tools for this repair:
- Safety glasses
- Nitrile gloves
- 10mm socket
- 7mm socket
- 3/8" drive ratchet
- 3/8" drive torque wrench (10-30 ft-lbs range)
- 5/8" spark plug socket
- 3/8" drive extension set (3", 6", 10")
- 3/8" drive swivel joint
- Flat trim tool
- Compressed air blow gun
- Feeler gauge set
- Shop rags
🔩 Required Parts
HowToo sells all the parts you need for this repair:
- Spark plugs (Motorcraft correct application) - Qty: 16
- Dielectric grease - Qty: 1
- Ignition coil boots (optional, if cracked/oil-soaked) - Qty: 8
📋 Before You Begin
- Park on level ground, shift to Park, and set the parking brake.
- Open the hood and let the engine cool fully (at least 1-2 hours if it was running).
- If you’re disconnecting the battery: use a 10mm socket to remove the negative cable and tuck it aside so it can’t spring back.
- Lay out parts by bank (driver/passenger side) so nothing gets mixed up.
🔨 Step-by-Step Instructions
Follow these steps in order:
Step 1: Remove the engine cover and open up access
- Remove the engine cover (if equipped) by lifting it up; use a flat trim tool if any grommets are stubborn.
- If the intake ducting blocks access on your truck, loosen clamps and move it aside using the appropriate socket/driver (commonly 7mm socket).
- Set all fasteners where they won’t get lost.
Step 2: Disconnect and remove one ignition coil at a time
- Pick one cylinder and complete it fully before moving to the next (this prevents mixing up connectors).
- Unplug the coil electrical connector by releasing the lock and pulling it straight off.
- Remove the coil hold-down bolt using a 7mm socket.
- Twist the coil slightly and pull it straight up to remove it.
- One-at-a-time prevents wiring mix-ups.
Step 3: Clean the spark plug well
- Blow out the spark plug well using a compressed air blow gun so dirt can’t fall into the cylinder.
- Wipe around the opening with shop rags if needed.
Step 4: Remove the old spark plug
- Install a 5/8" spark plug socket on a 3/8" drive extension and 3/8" drive ratchet.
- If the angle is tight, add a 3/8" drive swivel joint (a pivoting adapter that helps the socket bend slightly).
- Turn counterclockwise to remove the plug, then lift it out carefully.
Step 5: Check and prep the new spark plug
- Verify the new plugs match the old ones (same length and seat style).
- Check the gap with a feeler gauge set. If you bought the correct Motorcraft plugs, they’re typically pre-gapped; adjust only if the plug maker’s instructions allow it.
- Do not apply anti-seize unless the plug manufacturer specifically requires it.
Step 6: Install the new spark plug (by hand first)
- Thread the new plug into the hole by hand using the 5/8" spark plug socket and a 3/8" drive extension only (no ratchet yet).
- If it doesn’t turn smoothly, stop and restart to avoid cross-threading.
- Tighten with a 3/8" drive torque wrench: Torque to 20 Nm (15 ft-lbs).
Step 7: Reinstall the coil
- Apply a small smear of dielectric grease inside the coil boot (dielectric grease is non-conductive grease that helps prevent moisture and sticking).
- Push the coil straight down until fully seated on the plug.
- Install the coil bolt using a 7mm socket, then final tighten with a 3/8" drive torque wrench: Torque to 7 Nm (62 in-lbs).
- Reconnect the coil electrical connector until it clicks.
Step 8: Repeat for all remaining cylinders
- Repeat Steps 2-7 for every coil and plug.
- Your 6.2L uses 16 spark plugs total, so be sure you replace them all.
Step 9: Reassemble and reconnect battery
- Reinstall any intake ducting/engine cover removed earlier using the same tools you used to remove them (commonly 7mm socket).
- If disconnected, reconnect the negative battery cable using a 10mm socket.
✅ After Repair
- Start the engine and let it idle for 1-2 minutes. It should run smooth with no shaking.
- Listen for ticking or snapping near the coils (could indicate a coil not fully seated).
- Road test for 10-15 minutes and confirm no check engine light returns.
- If you have a scan tool, check for pending misfire codes and clear any stored codes if needed.
💰 DIY vs Shop Cost
Shop Cost: $350-$750 (parts + labor)
DIY Cost: $140-$320 (parts only)
You Save: $210-$430 by doing it yourself!
Shop labor rates vary but typically run $100-$150/hour. This repair takes a shop approximately 2-3 hours.
🎯 Ready to get started?
HowToo makes it easy: same-day/2-day shipping on every part, plus all the tools and specialty tools you need! Check out the parts and tools sections below to add everything to your cart.
Guide for Spark Plug replace for these Ford vehicles
| Year Make Model | Sub Model | Engine | Body Style |
|---|---|---|---|
| 2024 Ford F-350 Super Duty | - | V8 7.3L | - |
| 2024 Ford F-350 Super Duty | - | V8 6.8L | - |
| 2023 Ford F-350 Super Duty | - | V8 7.3L | - |
| 2023 Ford F-350 Super Duty | - | V8 6.8L | - |
| 2022 Ford F-350 Super Duty | - | V8 6.2L | - |
| 2022 Ford F-350 Super Duty | - | V8 7.3L | - |
| 2021 Ford F-350 Super Duty | - | V8 6.2L | - |
| 2021 Ford F-350 Super Duty | - | V8 7.3L | - |
| 2020 Ford F-350 Super Duty | - | V8 6.2L | - |
| 2020 Ford F-350 Super Duty | - | V8 7.3L | - |
| 2019 Ford F-350 Super Duty | - | V8 6.2L | - |
| 2018 Ford F-350 Super Duty | - | V8 6.2L | - |
| 2017 Ford F-350 Super Duty | - | V8 6.2L | - |
| 2016 Ford F-350 Super Duty | - | V8 6.2L | - |
| 2015 Ford F-350 Super Duty | - | V8 6.2L | - |
| 2014 Ford F-350 Super Duty | - | V8 6.2L | - |
| 2013 Ford F-350 Super Duty | - | V8 6.2L | - |
| 2012 Ford F-350 Super Duty | - | V8 6.2L | - |
| 2011 Ford F-350 Super Duty | - | V8 6.2L | - |