










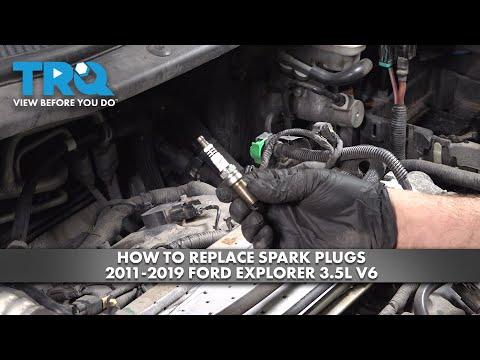






How to Replace Spark Plugs on a 2011-2022 Ford Explorer (Engine: V6 3.5L)
Step-by-step instructions with tools, parts, torque specs, and safety tips
How to Replace Spark Plugs on a 2011-2022 Ford Explorer (Engine: V6 3.5L)
Step-by-step instructions with tools, parts, torque specs, and safety tips for 2011, 2012, 2013, 2014, 2015, 2016, 2017, 2018, 2019


🔧 Spark Plugs - Replacement
Your Explorer uses six spark plugs, one per cylinder. This job is straightforward on the front bank, but the rear bank needs more reach because it sits closer to the firewall. Replacing all six at once is the right move for smooth idle, strong acceleration, and fuel economy.
Difficulty Level: Intermediate | Estimated Time: 2-4 hours
⚠️ Safety & Precautions
- Work on a cold engine only. Hot aluminum threads can be damaged easily.
- Disconnect the negative battery cable before removing ignition coils.
- Do not drop dirt into the spark plug holes.
- Use care around ignition coils. They can hold residual voltage.
- Do not use anti-seize unless the plug manufacturer specifically calls for it.
🔧 Required Tools
You'll need the following tools for this repair:
- 3/8-inch ratchet
- 3/8-inch torque wrench
- 5/8-inch spark plug socket
- 3-inch extension
- 6-inch extension
- 8mm socket
- 10mm socket
- Trim panel tool
- Needle-nose pliers
- Compressed air
- Feeler gauge
- Gloves
- Safety glasses
🔩 Required Parts
HowToo sells all the parts you need for this repair:
- Spark plugs - Qty: 6
📋 Before You Begin
- Park on level ground and let the engine cool completely.
- Set the parking brake.
- Disconnect the negative battery cable before touching the ignition coils.
- Lay out the plugs in order so you can compare the old ones as you remove them.
🔨 Step-by-Step Instructions
Follow these steps in order:
Step 1: Disconnect battery power
- Use a 10mm socket to loosen the negative battery terminal.
- Move the cable aside so it cannot spring back.
Step 2: Remove intake ducting for access
- Use the 8mm socket and trim panel tool to remove the air inlet duct and any clips blocking access to the rear bank.
- Set the parts aside in order.
- Take a quick photo first.
Step 3: Remove the ignition coils
- Use the 8mm socket to remove the coil hold-down bolts.
- Unplug each coil connector by pressing the lock tab and pulling straight off.
- Lift the coils straight up and out.
Step 4: Clean the plug wells
- Use compressed air to blow dirt away from each spark plug well.
- This keeps debris from falling into the cylinder head.
Step 5: Remove the old spark plugs
- Use the 5/8-inch spark plug socket, 3-inch extension, and 3/8-inch ratchet to remove each plug.
- Turn slowly to avoid thread damage.
- If a plug feels stuck, work it back and forth gently.
Step 6: Inspect and gap the new spark plugs
- Use a feeler gauge to verify the gap matches the plug specification.
- Do not force the electrode.
- Check every plug before installation.
Step 7: Install the new spark plugs
- Start each plug by hand using the 5/8-inch spark plug socket and extension.
- Thread them in several turns before using a ratchet.
- Torque each spark plug to 13 Nm (115 in-lbs).
Step 8: Reinstall the ignition coils
- Push each coil fully onto its spark plug.
- Reconnect each coil connector until it clicks.
- Install the coil bolts with the 8mm socket.
Step 9: Reinstall intake parts and battery cable
- Reinstall the air inlet duct and clips with the 8mm socket and trim panel tool.
- Reconnect the negative battery cable and tighten it with the 10mm socket.
✅ After Repair
- Start the engine and listen for smooth idle.
- Check that the check engine light stays off.
- If the engine runs rough, recheck coil connectors and plug seating.
- Drive a short test route and confirm normal acceleration.
💰 DIY vs Shop Cost
Shop Cost: $250-$500 (parts + labor)
DIY Cost: $40-$120 (parts only)
You Save: $210-$380 by doing it yourself!
Shop labor rates vary but typically run $100-$150/hour. This repair takes a shop approximately 2-4 hours.
🎯 Ready to get started?
HowToo makes it easy: same-day/2-day shipping on every part, plus all the tools and specialty tools you need! Check out the parts and tools sections below to add everything to your cart.
Guide for Fuel Tank Cap replace for these Ford vehicles
| Year Make Model | Sub Model | Engine | Body Style |
|---|---|---|---|
| 2022 Ford Explorer | - | V6 3.3L | - |
| 2021 Ford Explorer | - | V6 3.3L | - |
| 2020 Ford Explorer | - | V6 3.3L | - |
| 2019 Ford Explorer | - | V6 3.5L | - |
| 2018 Ford Explorer | - | V6 3.5L | - |
| 2017 Ford Explorer | - | V6 3.5L | - |
| 2016 Ford Explorer | - | V6 3.5L | - |
| 2015 Ford Explorer | - | V6 3.5L | - |
| 2014 Ford Explorer | - | V6 3.5L | - |
| 2013 Ford Explorer | - | V6 3.5L | - |
| 2012 Ford Explorer | - | V6 3.5L | - |
| 2011 Ford Explorer | - | V6 3.5L | - |
