


How to Replace Spark Plugs on a 2010-2017 Toyota Camry 2.5L Step-by-Step (Engine: V6 3.5L)
DIY spark plug change guide with tools, parts list, torque specs, safety tips, and after-repair checks
How to Replace Spark Plugs on a 2010-2017 Toyota Camry 2.5L Step-by-Step (Engine: V6 3.5L)
DIY spark plug change guide with tools, parts list, torque specs, safety tips, and after-repair checks for 2010, 2011, 2012, 2013, 2014, 2015, 2016, 2017
🔧 Camry - Spark Plug Replacement
You’ll be replacing the four spark plugs on your Camry’s 2.5L engine. Fresh plugs help with smoother running, better fuel economy, and easier starts.
Difficulty Level: Beginner | Estimated Time: 1–1.5 hours
⚠️ Safety & Precautions
- ⚠️ Work on a completely cool engine. Hot engine parts can burn you.
- ⚠️ Turn the ignition OFF and remove the key from the car.
- ⚠️ Disconnect the negative battery terminal if you’re nervous about working near electrical parts. This prevents accidental short circuits.
- ⚠️ Do not pull on ignition coil wires; always pull on the plastic connector body.
- ⚠️ Keep tools and bolts out of the spark plug holes so nothing falls into the engine.
🔧 Required Tools
You'll need the following tools for this repair:
- 3/8" drive ratchet
- 3/8" drive torque wrench (5–60 ft-lbs range)
- 10mm socket
- 14mm spark plug socket (with rubber insert or magnet)
- 3/8" drive extension (6")
- Flathead screwdriver (small)
- Needle-nose pliers
- Clean rag or shop towels
- Dielectric grease tube (small)
- Spark plug gap gauge (coin or wire type)
- Fender cover or old towel
- Safety glasses
- Mechanic gloves
🔩 Required Parts
HowToo sells all the parts you need for this repair:
- Iridium spark plugs (correct for 2.5L) - Qty: 4
- Throttle body/intake cleaner spray - Qty: 1 (optional, for light cleaning around area)
- Dielectric grease - Qty: 1 small tube
- Battery terminal protector spray - Qty: 1 (optional)
- Shop towels - Qty: 1 pack
📋 Before You Begin
- Park your Camry on level ground, shift to P, and set the parking brake.
- Open the hood and support it with the hood prop rod.
- If you choose to disconnect the battery: use a 10mm socket to loosen the nut on the negative (black) terminal and move the cable aside.
- Lay a towel over the front fender to avoid scratching the paint while you lean in.
- Make sure you have the correct spark plugs (iridium type, pre-gapped for this engine).
🔨 Step-by-Step Instructions
Follow these steps in order:
Step 1: Remove the engine cover
- The plastic engine cover is on top of the engine.
- Use your hands to pull up firmly at the corners; it’s held by rubber grommets, no bolts.
- Lift it off and set it aside safely.
- Pull straight up, not at an angle.
Step 2: Locate the ignition coils
- You’ll see four black ignition coils in a row on top of the engine, each with an electrical connector.
- An ignition coil sits directly above each spark plug.
- Work on one coil and plug at a time.
Step 3: Unplug the first ignition coil
- Pick the coil at one end (left or right) to start.
- Press down on the small plastic locking tab on the coil’s electrical connector.
- While holding the tab down, gently pull the connector straight back using your fingers.
- If it’s stuck, use a flathead screwdriver very gently to help press the tab, but do not pry hard.
Step 4: Remove the ignition coil
- Use a 10mm socket and ratchet to remove the single bolt holding the coil.
- Set the bolt in a safe spot so it doesn’t fall into the engine bay.
- Grip the coil body and pull it straight up; you may need to twist gently to break it free.
- Place the coil somewhere clean; avoid getting dirt on the rubber boot.
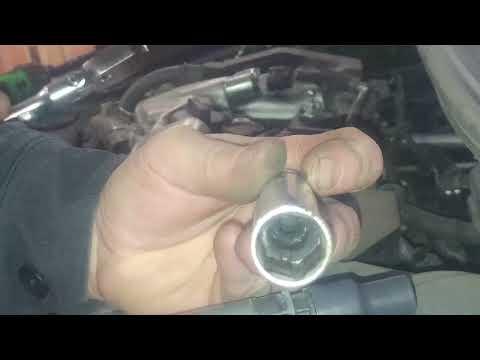
Step 5: Remove the old spark plug
- Attach the 14mm spark plug socket to the 6" extension, then to the ratchet.
- Lower the socket straight down into the spark plug hole until it sits on the plug.
- Turn the ratchet counterclockwise to loosen the spark plug. It may feel tight at first, then loosen up.
- Once loose, spin the extension by hand to remove the plug fully.
- Carefully pull the socket and extension straight up; the old plug should come out in the socket.
- If it’s very tight, stop and re-check you’re using correct socket.
Step 6: Inspect and check gap on the new spark plug
- Take one new spark plug out of the box. Handle it by the metal hex, not the tip.
- Use a spark plug gap gauge to check the gap. For the 2.5L engine, typical spec is around 0.039–0.043 in (1.0–1.1 mm); your plug packaging will list the exact spec.
- Most iridium plugs come pre-gapped. If the gap is slightly off, do not pry on the small center electrode; adjust only very gently on the outer ground strap if needed.
- Do not put anti-seize on the threads unless the plug maker specifically says to. Most modern plugs are already coated.
Step 7: Install the new spark plug
- Place the new plug into the 14mm spark plug socket. The rubber insert or magnet should hold it.
- Carefully lower the plug into the hole by hand, using just the extension (you can leave the ratchet off at first).
- Turn the extension by hand clockwise several turns to start threading the plug. It should turn smoothly with almost no resistance.
- If it feels cross-threaded (tight or crunchy), back it out and start again.
- Once it’s fully finger-tight, attach the ratchet and snug it.
- Use your torque wrench with the 14mm spark plug socket and torque to 18 Nm (13 ft-lbs).
- Torque wrench: tool that clicks at set tightness.
Step 8: Reinstall the ignition coil
- Put a tiny dab of dielectric grease inside the rubber boot of the coil (where it meets the plug). This helps seal out moisture and makes future removal easier.
- Slide the coil straight down onto the new spark plug until fully seated.
- Reinstall the coil bolt using the 10mm socket and ratchet.
- Use the torque wrench with the 10mm socket and torque the coil bolt to 10 Nm (89 in-lbs, about 7 ft-lbs).
- Reconnect the electrical connector by pushing it on until you hear or feel a click.
Step 9: Repeat for the remaining three spark plugs
- Repeat Steps 3–8 for each of the other three coils and spark plugs, one at a time.
- Always fully finish one cylinder (plug + coil) before moving to the next. This helps prevent mixing up parts or connectors.
- Double-check each coil bolt is snugged to 10 Nm (89 in-lbs) and each connector is firmly clicked in.
Step 10: Reinstall the engine cover and reconnect battery
- Line up the engine cover over its mounting posts.
- Press down firmly at each corner until it pops into place.
- If you disconnected the battery: use a 10mm socket to tighten the negative terminal nut snugly (do not over-tighten).
- Remove your fender cover or towels and any tools from the engine bay.
✅ After Repair
- Start the engine. It should start smoothly and idle evenly without misfires or shaking.
- Listen for any unusual sounds like ticking or hissing. If you hear anything odd, shut off the engine and re-check coil connections and plug torque.
- Take a short test drive around your area. Check for smooth acceleration and no warning lights on the dash.
- If the check engine light comes on or the engine feels rough, recheck that every coil is plugged in fully and all plugs are properly tightened.
💰 DIY vs Shop Cost
Shop Cost: $180–$280 (parts + labor)
DIY Cost: $40–$90 (parts only)
You Save: $90–$200 by doing it yourself!
Shop labor rates vary but typically run $100–$150/hour. This repair takes a shop approximately 0.8–1.0 hours.
🎯 Ready to get started?
HowToo makes it easy: same-day/2-day shipping on every part, plus all the tools and specialty tools you need! Check out the parts and tools sections above to add everything to your cart.
Guide for Spark Plug replace for these Toyota vehicles
| Year Make Model | Sub Model | Engine | Body Style |
|---|---|---|---|
| 2017 Toyota Camry | - | Inline 4 2.5L | - |
| 2016 Toyota Camry | - | Inline 4 2.5L | - |
| 2015 Toyota Camry | - | Inline 4 2.5L | - |
| 2014 Toyota Camry | - | Inline 4 2.5L | - |
| 2013 Toyota Camry | - | Inline 4 2.5L | - |
| 2012 Toyota Camry | - | Inline 4 2.5L | - |
| 2011 Toyota Camry | - | Inline 4 2.5L | - |
| 2010 Toyota Camry | - | Inline 4 2.5L | - |
