


How to Replace Spark Plugs on a 2010-2014 Honda CR-V (Engine: Inline 4 2.4L)
Step-by-step instructions with tools, parts, torque specs, and safety tips
How to Replace Spark Plugs on a 2010-2014 Honda CR-V (Engine: Inline 4 2.4L)
Step-by-step instructions with tools, parts, torque specs, and safety tips for 2010, 2011, 2012, 2013, 2014
🔧 Spark Plugs - Replacement
Your CR-V uses 4 spark plugs mounted in the top of the engine. Replacing them helps restore smooth idle, strong acceleration, and fuel economy when the plugs are worn. This is a straightforward job, but take care not to drop anything into the plug holes.
Difficulty Level: Beginner | Estimated Time: 1-2 hours
⚠️ Safety & Precautions
- Let the engine cool completely before starting. The engine cover and ignition coils can stay hot.
- Work on a level surface with the parking brake set.
- Keep dirt out of the spark plug wells. Debris can damage the engine if it falls into the cylinders.
- Do not overtighten new plugs. The aluminum cylinder head can be damaged.
- Battery disconnect is not required, but turning the ignition off is mandatory.
🔧 Required Tools
You'll need the following tools for this repair:
- 10mm socket
- Ratchet
- 6-inch extension
- 5/8-inch spark plug socket
- Torque wrench
- Trim tool
- Compressed air
- Gloves
- Safety glasses
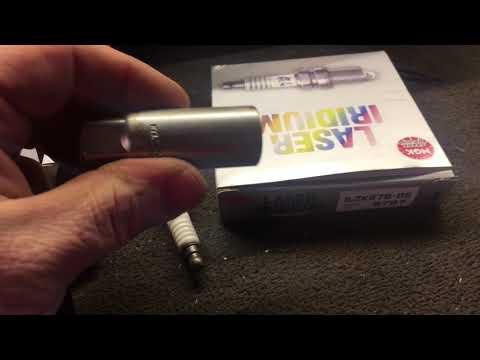
🔩 Required Parts
HowToo sells all the parts you need for this repair:
- Spark plugs - Qty: 4
📋 Before You Begin
- Park on level ground and let the engine cool down fully.
- Open the hood and make sure you have room to work.
- Have all 4 new spark plugs ready before removing the old ones.
🔨 Step-by-Step Instructions
Follow these steps in order:
Step 1: Remove the engine cover
- Pull up gently on the engine cover to release it from its rubber mounts.
- Set it aside in a safe spot.
Step 2: Clean around the ignition coils
- Use compressed air to blow dirt away from the top of the engine and the spark plug wells.
- Keep debris out of the cylinders.
Step 3: Remove the ignition coil connectors
- Press the release tab on each coil connector and unplug it.
- Work one coil at a time so you do not mix them up.
Step 4: Remove the ignition coils
- Use a 10mm socket and ratchet to remove the coil hold-down bolts.
- Lift each ignition coil straight up and out.
- Set the coils aside in order.
Step 5: Remove the old spark plugs
- Use a 5/8-inch spark plug socket, 6-inch extension, and ratchet to loosen each plug.
- Turn counterclockwise and remove all 4 plugs.
- Inspect the old plugs for heavy wear, oil fouling, or white deposits.
Step 6: Install the new spark plugs
- Thread each new plug in by hand first to avoid cross-threading.
- Use the 5/8-inch spark plug socket and torque wrench to tighten each plug to 18 Nm (13 ft-lbs).
- Start them by hand every time.
Step 7: Reinstall the ignition coils
- Push each ignition coil back into place.
- Reinstall the coil bolts with the 10mm socket.
- Tighten each bolt to 12 Nm (9 ft-lbs).
- Reconnect each coil connector until it clicks.
Step 8: Reinstall the engine cover
- Align the cover and press it down onto the mounting points.
- Make sure it sits flat and secure.
✅ After Repair
- Start the engine and let it idle for a minute.
- Listen for smooth operation and check for a check engine light.
- Take a short test drive to confirm normal acceleration.
- If the engine runs rough, recheck that every coil connector is fully seated.
💰 DIY vs Shop Cost
Shop Cost: $180-$320 (parts + labor)
DIY Cost: $40-$90 (parts only)
You Save: $140-$230 by doing it yourself!
Shop labor rates vary but typically run $100-$150/hour. This repair takes a shop approximately 1-2 hours.
🎯 Ready to get started?
HowToo makes it easy: same-day/2-day shipping on every part, plus all the tools and specialty tools you need! Check out the parts and tools sections below to add everything to your cart.
Guide for Spark Plug replace for these Honda vehicles
| Year Make Model | Sub Model | Engine | Body Style |
|---|---|---|---|
| 2014 Honda CR-V | - | Inline 4 2.4L | - |
| 2013 Honda CR-V | - | Inline 4 2.4L | - |
| 2012 Honda CR-V | - | Inline 4 2.4L | - |
| 2011 Honda CR-V | - | Inline 4 2.4L | - |
| 2010 Honda CR-V | - | Inline 4 2.4L | - |