









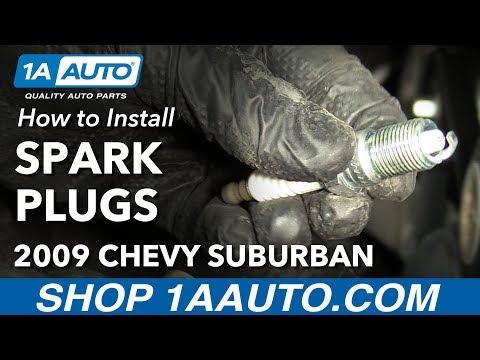







How to Replace Spark Plugs on a 2007-2008 Chevrolet Suburban 1500 (5.3L V8) (Engine: V8 5.3L)
Step-by-step DIY guide with tools, plug gap, torque specs, safety tips, and reassembly checks
How to Replace Spark Plugs on a 2007-2008 Chevrolet Suburban 1500 (5.3L V8) (Engine: V8 5.3L)
Step-by-step DIY guide with tools, plug gap, torque specs, safety tips, and reassembly checks for 2007, 2008


🔧 Suburban - Spark Plug Replacement
Replacing the spark plugs restores smooth starting, idle, and fuel economy. On your Suburban, you’ll remove the plug wire from each plug, remove the old plug, then install and torque the new one—working one cylinder at a time to avoid mixing up wires.
Difficulty Level: Intermediate | Estimated Time: 1.5-3 hours
⚠️ Safety & Precautions
- 🧯 Work on a fully cool engine to avoid burns and prevent thread damage in the cylinder heads.
- 🧤 Keep dirt out of the spark plug holes—blow/brush debris away before removing plugs.
- 🔌 If you disconnect the battery, remove the negative cable first and keep it from touching the terminal.
- 🧨 Don’t over-tighten spark plugs—over-torque can strip threads or damage the plug.
🔧 Required Tools
You'll need the following tools for this repair:
- Safety glasses
- Mechanic gloves
- 3/8" drive ratchet
- 3/8" drive torque wrench (10-100 ft-lbs range)
- 5/8" spark plug socket (rubber insert or magnetic)
- 3/8" drive extension set (3", 6", 10")
- 3/8" drive swivel adapter
- 10mm socket
- Flat-blade screwdriver
- Trim clip tool
- Feeler gauge (0.040")
- Dielectric grease
- Compressed air blow gun
- Shop light
🔩 Required Parts
HowToo sells all the parts you need for this repair:
- Spark plugs (OEM-spec for 5.3L) - Qty: 8
- Spark plug wire set - Qty: 1 (recommended if brittle/cracked)
📋 Before You Begin
- Park on level ground, shift to Park, and set the parking brake.
- Let the engine cool completely (at least 1 hour after driving).
- Open the hood and remove the plastic engine cover (pull upward) if equipped.
- If access is tight at the rear plugs, plan to work slowly with a swivel adapter (a joint that lets the socket bend).
🔨 Step-by-Step Instructions
Follow these steps in order:
Step 1: Create working room
- Use a flat-blade screwdriver to loosen the intake duct clamps if you need more space near the front plugs.
- If a side splash shield limits access to the rear plug area, use a trim clip tool to remove push-clips and move it aside.
- Set your shop light so you can clearly see the plug wires and plugs.
Step 2: Do one cylinder at a time (prevents mixing up wires)
- Pick one spark plug wire, then follow it from the coil to the spark plug.
- Twist the boot (the rubber end) by hand to break it loose, then pull straight off.
- Apply a small puff of air with the compressed air blow gun around the plug hole to clear dirt.
Step 3: Remove the old spark plug
- Install the 5/8" spark plug socket on a 3/8" drive extension and 3/8" drive ratchet.
- If the plug is hard to reach, add the 3/8" drive swivel adapter between the extension and socket.
- Turn counterclockwise to remove the plug, then lift it out carefully.
Step 4: Check and prep the new plug
- Use a feeler gauge (0.040") to confirm the plug gap is about 0.040" (1.0 mm).
- Don’t pry on fine-wire tips. If it’s an iridium-style plug, only verify the gap gently.
- Put a small dab of dielectric grease inside the spark plug wire boot (this helps prevent moisture and makes future removal easier).
- Do not coat the plug threads with grease; install the plug dry unless your plug manufacturer specifically instructs otherwise.
Step 5: Install the new spark plug (avoid cross-threading)
- Place the new plug into the 5/8" spark plug socket.
- Thread it in by hand using only the extension (no ratchet at first) until fully seated. If it doesn’t spin in easily, back it out and try again.
- Set your 3/8" drive torque wrench and tighten the plug to Torque to 25 Nm (18 ft-lbs).
Step 6: Reinstall the plug wire
- Push the plug wire boot straight onto the plug until you feel/hear it click into place.
- Route the wire back through any wire separators so it’s not touching the exhaust manifold.
Step 7: Repeat for all 8 spark plugs
- Repeat Steps 2–6 for each remaining plug, always completing one cylinder before moving to the next.
- If you need to unbolt a coil bracket for access, use a 10mm socket to remove the bolts, then reinstall and Torque to 10 Nm (89 in-lbs).
Step 8: Reassemble intake/splash shields
- Reinstall any splash shields using the trim clip tool to seat clips.
- Reinstall the intake duct and tighten clamps with a flat-blade screwdriver.
- Reinstall the engine cover if equipped.
✅ After Repair
- Start the engine and listen for a smooth idle.
- Check that no plug wire is arcing (ticking sound) and that all wires are fully seated.
- Test drive 10–15 minutes, then re-check that intake clamps are snug and nothing is rubbing near the exhaust.
- If you get a flashing check-engine light or a strong misfire, shut it off and re-check wire seating and routing.
💰 DIY vs Shop Cost
Shop Cost: $300-$650 (parts + labor)
DIY Cost: $60-$160 (parts only)
You Save: $140-$590 by doing it yourself!
Shop labor rates vary but typically run $100-$150/hour. This repair takes a shop approximately 1.5-3 hours.
🎯 Ready to get started?
HowToo makes it easy: same-day/2-day shipping on every part, plus all the tools and specialty tools you need! Check out the parts and tools sections below to add everything to your cart.
Guide for Spark Plug replace for these Chevrolet vehicles
| Year Make Model | Sub Model | Engine | Body Style |
|---|---|---|---|
| 2008 Chevrolet Suburban 1500 | - | V8 5.3L | - |
| 2008 Chevrolet Suburban 1500 | - | V8 6.0L | - |
| 2007 Chevrolet Suburban 1500 | - | V8 5.3L | - |
| 2007 Chevrolet Suburban 1500 | - | V8 6.0L | - |