









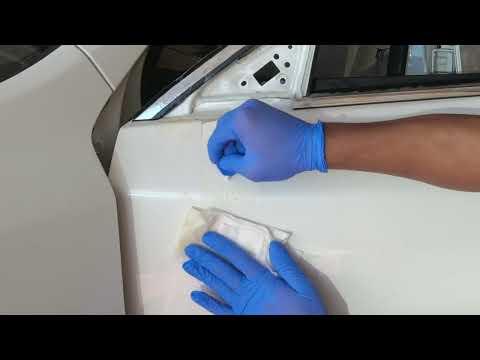







How to Replace Side View Mirrors on a 2017 Nissan Altima
Step-by-step DIY guide with door panel removal, tools, parts, torque specs, and testing tips for 2013, 2014, 2015, 2016, 2017
How to Replace Side View Mirrors on a 2017 Nissan Altima
Step-by-step DIY guide with door panel removal, tools, parts, torque specs, and testing tips for 2013, 2014, 2015, 2016, 2017


🔧 Altima - Side View Mirror Replacement
Replacing a side view mirror on your Altima means removing the inside front door trim panel, unplugging the mirror wiring, unbolting the mirror, and installing the new assembly. This is a good beginner repair because the mirror is bolted on from inside the door, but take your time with the plastic clips so nothing breaks.
Difficulty Level: Beginner | Estimated Time: 1-2 hours per side
⚠️ Safety & Precautions
- ⚠️ Disconnect the negative battery cable before unplugging mirror wiring to avoid short circuits.
- ⚠️ The door panel uses plastic clips that can crack if forced; use a plastic trim tool, not a metal screwdriver.
- ⚠️ Support the mirror with one hand before removing the final nut so it does not fall and scratch the door.
- ⚠️ If your replacement mirror has power adjustment, heated glass, or turn signal wiring, make sure the connector style matches before final installation.
🔧 Required Tools
You'll need the following tools for this repair:
- 10mm socket
- 10mm wrench
- Ratchet handle 1/4-inch drive
- 6-inch extension 1/4-inch drive
- Phillips #2 screwdriver
- Plastic trim removal tool set
- Panel clip removal pliers
- Small flat plastic pry tool
- Torque wrench 1/4-inch drive inch-pound
- Painter's tape 1-inch
- Magnetic parts tray
- Work gloves
- Safety glasses
🔩 Required Parts
HowToo sells all the parts you need for this repair:
- Side view mirror assembly - Qty: 1 per side
- Door trim panel clips - Qty: 3-5 recommended
- Mirror mounting nuts - Qty: 3 recommended if damaged or missing
📋 Before You Begin
- Park your Altima on level ground and set the parking brake.
- Lower the window on the door you are working on. This gives you more room to hold the door panel.
- Turn the ignition OFF and remove the key or keep the key fob away from the vehicle.
- Use a 10mm wrench to disconnect the negative battery cable. Wait at least 3 minutes before unplugging electrical connectors.
- Apply 1-inch painter's tape around the painted area near the mirror base to help prevent scratches.
- A trim tool is a plastic pry tool made to release interior panels without scratching them.
🔨 Step-by-Step Instructions
Follow these steps in order:
Step 1: Remove the Inner Door Handle Trim
- Use a small flat plastic pry tool to gently lift the trim cover behind the inside door handle.
- Use a Phillips #2 screwdriver to remove the screw hidden behind the trim cover.
- Place the screw in a magnetic parts tray so it does not get lost.
Step 2: Remove the Door Pull Screw
- Use a small flat plastic pry tool to lift the small cover inside the door pull handle area.
- Use a Phillips #2 screwdriver to remove the screw under the cover.
- Set the screw aside in the magnetic parts tray.
Step 3: Release the Door Trim Panel Clips
- Start at the lower rear corner of the door panel.
- Use a plastic trim removal tool to pry between the door panel and metal door shell.
- Pull outward gently until the first clip pops free.
- Continue around the bottom and sides of the panel with the plastic trim removal tool.
- Tip: Slow pressure breaks fewer clips.
Step 4: Lift the Door Panel Upward
- Use both hands to lift the door panel straight upward off the window ledge.
- Do not pull the panel far away yet because wiring is still attached.
- If a clip stays in the door, use panel clip removal pliers to remove it and reinstall it into the door panel.
Step 5: Disconnect Door Panel Wiring
- Support the door panel with one hand.
- Press each connector tab by hand and unplug the window switch and lock switch connectors.
- If a connector is tight, use the small flat plastic pry tool to gently press the release tab.
- Set the door panel on a clean blanket or soft surface.
Step 6: Remove the Mirror Sail Panel
- The sail panel is the small triangular trim piece inside the door near the mirror.
- Use a plastic trim removal tool to pry the sail panel straight away from the door.
- Remove it carefully so the retaining clips do not snap.
Step 7: Unplug the Side Mirror Connector
- Locate the mirror electrical connector behind the sail panel area.
- Press the connector lock tab by hand and unplug it.
- If needed, use the small flat plastic pry tool to press the lock tab without damaging the connector.
Step 8: Remove the Mirror Mounting Nuts
- Support the outside mirror with one hand.
- Use a 10mm socket, 6-inch extension, and 1/4-inch ratchet handle to remove the three mirror mounting nuts.
- Keep the nuts in the magnetic parts tray.
- Tip: Do not drop nuts inside the door.
Step 9: Remove the Old Mirror
- From outside the door, pull the mirror straight away from the door.
- Feed the wiring harness through the hole carefully by hand.
- Clean the mounting area with a clean cloth before installing the new mirror.
Step 10: Install the New Mirror
- Feed the new mirror wiring through the door opening by hand.
- Line up the mirror studs with the holes in the door.
- Hold the mirror flat against the door while starting the three nuts by hand.
- Use a 10mm socket, 6-inch extension, and 1/4-inch ratchet handle to snug the nuts evenly.
- Use a 1/4-inch drive inch-pound torque wrench and 10mm socket to tighten the mirror nuts to Torque to 8 Nm (71 in-lbs).
Step 11: Connect and Test the Mirror
- Plug the mirror electrical connector in by hand until it clicks.
- Temporarily plug in the window switch connector by hand.
- Use a 10mm wrench to reconnect the negative battery cable.
- Turn the ignition ON and test mirror adjustment using the mirror switch.
- If equipped, test mirror heat with the rear defroster button.
- Turn ignition OFF before continuing.
Step 12: Reinstall the Sail Panel
- Align the sail panel clips with the holes in the door.
- Press the panel into place by hand until it clicks.
- Make sure the rubber edge and trim sit flat.
Step 13: Reconnect Door Panel Wiring
- Hold the door panel close to the door.
- Plug the window switch and lock switch connectors in by hand until each one clicks.
- Check that no wiring is pinched behind the panel.
Step 14: Reinstall the Door Panel
- Hook the top edge of the door panel over the window ledge by hand.
- Line up the door panel clips with the holes in the metal door shell.
- Press around the edges of the panel by hand until each clip snaps in.
- If a clip will not seat, use panel clip removal pliers to remove and reposition the clip, then try again.
Step 15: Reinstall the Screws and Covers
- Use a Phillips #2 screwdriver to reinstall the screw in the door pull handle area.
- Use a Phillips #2 screwdriver to reinstall the screw behind the inside door handle trim.
- Snap both trim covers back into place by hand.
- Do not overtighten the screws because they thread into plastic.
✅ After Repair
- ✅ Test the power mirror in all directions: up, down, left, and right.
- ✅ Confirm the door locks and window switch work correctly.
- ✅ Open and close the door to make sure the panel is secure and does not rattle.
- ✅ Check that the mirror sits flush against the door and the gasket is not folded.
- ✅ If the battery was disconnected, reset the auto-up window function if needed by fully closing the window and holding the switch up for 3-5 seconds.
💰 DIY vs Shop Cost
Shop Cost: $250-$550 per side (parts + labor)
DIY Cost: $80-$250 per side (parts only)
You Save: $170-$300 by doing it yourself!
Shop labor rates vary but typically run $100-$150/hour. This repair takes a shop approximately 0.8-1.5 hours.
🎯 Ready to get started?
HowToo makes it easy: same-day/2-day shipping on every part, plus all the tools and specialty tools you need! Check out the parts and tools sections below to add everything to your cart.