


How to Replace Rear Window Regulators on a 2018 Chevrolet Colorado
Step-by-step rear door regulator removal and installation with tools, parts list, torque specs, and safety tips
How to Replace Rear Window Regulators on a 2018 Chevrolet Colorado
Step-by-step rear door regulator removal and installation with tools, parts list, torque specs, and safety tips


Colorado - Rear Window Regulator Replacement 🔧
On your 2018 Colorado extended cab, the rear window regulator is the mechanism that moves the rear side glass up and down. I’ll walk you through replacing one rear regulator (left or right) — the process is almost the same on both sides.
Note: I’ll assume you mean the rear side door glass (rear doors), not the small fixed cab glass. If you meant the fixed rear cab glass, tell me and I’ll adjust.
Safety First ⚠️
- 🧤 Disconnect the battery: Remove the negative (black) cable from the battery before working on door wiring to avoid shorts and accidental window movement.
- 🪜 Work on level ground: Park, set parking brake, and keep the truck in gear.
- 🕶️ Protect the glass: Use tape and a helper if possible so the glass doesn’t drop and crack.
Parts You’ll Need 📦
- 🧩 Rear door window regulator assembly (side you’re replacing; with or without motor depending on what you buy)
- GM sells the regulator and motor as a unit on many Colorados. Aftermarket may offer regulator-only or regulator+motor.
- 🧵 New door panel clips (optional but recommended; some will break)
Tools Required 🛠️
- 🔧 Socket set: 7 mm, 10 mm, and possibly 13 mm sockets, ratchet, and short extension
- 🔩 Torx drivers: T20 and T30 bits (Torx = star-shaped screw head)
- 🪛 Phillips and flathead screwdrivers
- 📐 Trim removal tool: Plastic pry tool to pop off door panels without scratching
- 🔗 Needle-nose pliers: For clips and connectors
- 📏 Painter’s tape: To hold the glass in place
- 💡 Work light: To see inside the door
- 🔧 Torque wrench: 5–15 N·m (4–11 lb·ft) range for regulator and glass bolts
Colorado - Rear Door Panel Removal 🚪
Do one door at a time so you can look at the other side as a reference.
- Disconnect the battery 🔋
- Open the hood.
- Use a 10 mm wrench to loosen the negative battery terminal and remove it. Move it aside so it can’t spring back.
- Remove trim covers and screws 🔩
- At the inside door handle, gently pry off the small trim bezel with a plastic trim tool. There is usually a hidden screw behind it.
- In the armrest pull pocket, look for a rubber mat. Lift it out to reveal one or two screws.
- Remove:
- Torx T20/T30 screw behind the handle bezel.
- 7 mm screws in the armrest pocket and possibly at the lower edge of the panel.
- Pop the door panel clips 🧷
- Starting at the bottom corner, slide the trim tool between the panel and metal door.
- Pry gently to pop the plastic clips. Work your way around the sides and bottom.
- Once all clips are loose, lift the panel straight up to unhook it from the top edge near the window.
- Disconnect wiring 🔌
- Support the panel with one hand.
- Unplug:
- Power window switch connector
- Door lock / speaker connectors if present
- Set the door panel somewhere safe, cloth side up.
- Remove the water shield 💧
- The clear/foam sheet is the vapor barrier that keeps moisture out.
- Carefully peel it back from the top and sides near the regulator area. Do not tear it; you’ll re-use it.
Colorado - Secure the Glass & Access the Regulator 🪟
- Reconnect battery temporarily (optional but helpful) 🔋
- Reconnect the negative terminal just for a moment.
- Plug the window switch back into the harness (you can leave the panel hanging or hold the switch).
- Turn key to ON and move the window until the glass clamp bolts are visible through the access holes in the door.
- Turn key OFF, disconnect switch, and disconnect battery again.
- Secure the glass 🧵
- With the glass in a mid or up position, use painter’s tape from the outside of the glass over the top of the door frame and down the inside to hold the glass in place.
- Use several strips so the glass cannot drop.
Colorado - Remove Glass from Regulator ⚙️
- Loosen the glass clamp bolts 🔩
- Locate the two 10 mm bolts that clamp the glass to the regulator sliders.
- Loosen them a few turns; you usually do not need to remove them completely.
- Gently lift the glass by hand to free it from the clamps.
- Raise and secure the glass fully up 🪟
- Slide the glass all the way up into the window frame by hand.
- Add more painter’s tape across the top to hold it firmly in the fully up position.
- Make sure it’s solid; if it drops, it can break.
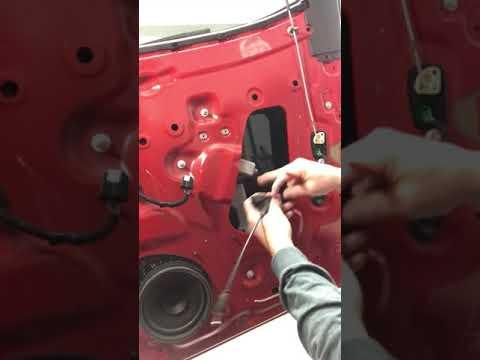
Colorado - Remove the Regulator & Motor 🧰
- Unplug the window motor 🔌
- Find the electrical connector on the window motor.
- Press the locking tab and pull the connector straight out.
- Remove regulator and motor bolts 🔧
- Remove the 10 mm bolts holding the regulator tracks to the door (usually 3–4 bolts).
- Remove the 10 mm bolts holding the motor to the door (usually 3 bolts).
- Support the regulator as you remove the last bolt so it doesn’t drop inside the door.
- Snake the regulator out 🐍
- Carefully maneuver the regulator and motor assembly out through the large access opening in the door.
- Note the orientation for installing the new one.
Colorado - Install the New Regulator 🆕
- Position the new regulator 📐
- Slide the new regulator and motor into the door through the same opening.
- Align the mounting holes with the holes in the door.
- Install and torque regulator bolts 🔩
- Install all regulator and motor bolts finger-tight first.
- Then torque them to about 8–10 N·m (6–7 lb·ft). Snug, not gorilla tight.
- Reconnect the motor connector 🔌
- Plug the electrical connector back into the motor until it clicks.
Colorado - Reattach the Glass to the Regulator 🪟
- Reconnect battery and switch (for alignment) 🔋
- Reconnect the negative battery terminal.
- Plug the window switch back into the harness (you can hold it or temporarily hang the panel).
- Lower regulator to glass position ⬇️
- Turn key to ON.
- Use the switch to move the regulator sliders to a position where the glass clamps line up with the glass.
- Turn key OFF.
- Set the glass into the clamps 🧵
- Remove or loosen the tape enough to lower the glass by hand into the clamps.
- Make sure the glass sits fully and evenly in both clamps.
- Tighten glass clamp bolts 🔧
- Tighten the two 10 mm glass clamp bolts to about 8 N·m (6 lb·ft).
- Do not overtighten; you can crack the glass.
- Test window operation 🎛️
- With the door still open and panel off, cycle the window up and down several times.
- Check:
- Moves smoothly, no binding or grinding
- Goes fully up and seals at the top
- Goes fully down without tilting
- If it binds, stop immediately and re-check glass alignment in the clamps.
Colorado - Reinstall Water Shield & Door Panel 🧱
- Reinstall the vapor barrier 💧
- Press the plastic/foam sheet back into place along the edges.
- Make sure it seals all the way around to keep water out of the cabin.
- Reconnect all wiring to the door panel 🔌
- Plug in:
- Window switch connector
- Door lock / speaker connectors
- Plug in:
- Hang the door panel 🚪
- Hook the top of the panel over the window ledge first.
- Once it’s seated at the top, push the panel toward the door so the clips line up with their holes.
- Snap clips and install screws 🔩
- Press around the edges to snap all the clips back in.
- Reinstall:
- 7 mm screws in the armrest and lower panel
- Torx screw behind the handle bezel
- Reinstall the rubber mat in the armrest pocket and the handle trim bezel.
- Final checks ✅
- Confirm:
- Window switch works normally
- Door locks and handle work
- No rattles when closing the door
- Confirm:
Torque & Tips Summary 📋
- 📌 Regulator & motor bolts: 8–10 N·m (6–7 lb·ft)
- 📌 Glass clamp bolts: 8 N·m (6 lb·ft)
- 📌 Door panel screws: Snug by hand; do not overtighten (they’re small).
- 💡 Do both rear regulators if one failed — they age similarly.
Need Parts & Tools? 🛒
HowToo makes it easy: below this answer you’ll see recommended rear window regulators, door clips, and the exact tools for your Colorado. All parts are new, from trusted U.S. distributors, and you can add them to your cart right from the parts section.
If you tell me which side (left/right) and whether your current motor is bad or just the regulator, I can help you pick the exact style (with or without motor) and any extra clips you should order.
