










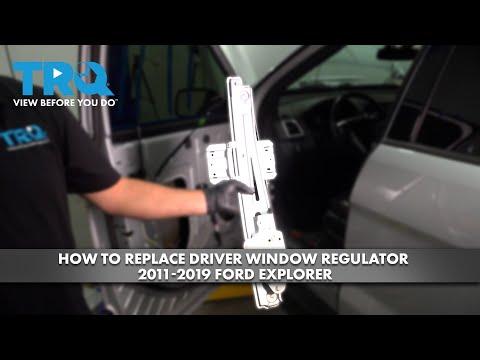






How to Replace Rear Window Regulators on a 2018-2019 Ford Explorer
Step-by-step DIY rear regulator replacement with tools, parts list, safety tips, and reassembly instructions to restore smooth window operation
How to Replace Rear Window Regulators on a 2018-2019 Ford Explorer
Step-by-step DIY rear regulator replacement with tools, parts list, safety tips, and reassembly instructions to restore smooth window operation for 2018, 2019


🔧 Explorer - Rear Window Regulator Replacement
You’ll be removing the rear door trim panel, separating the glass from the regulator, then swapping in a new regulator assembly. This restores smooth up/down window movement when the cable or mechanism has failed.
Difficulty Level: Intermediate | Estimated Time: 2–3 hours per side
⚠️ Safety & Precautions
- ⚠️ Disconnect the negative battery cable before working in the door to avoid accidental window motor movement or side airbag issues.
- ⚠️ Your Explorer has side airbags in the rear doors. Do not probe connectors with test lights or poke wires.
- ⚠️ Wear safety glasses. If the glass slips, it can chip or shatter.
- ⚠️ Support the window glass with tape and/or a helper before loosening the glass clamps.
- ⚠️ Work with the vehicle on level ground, transmission in Park, and parking brake set.
🔧 Required Tools
You'll need the following tools for this repair:
- 🔹10mm socket
- 🔹8mm socket
- 🔹Ratchet handle (1/4" or 3/8" drive)
- 🔹75–100mm socket extension
- 🔹Torx T20 screwdriver
- 🔹Phillips #2 screwdriver
- 🔹Flat trim removal tool (plastic pry tool)
- 🔹Panel clip removal tool
- 🔹Needle-nose pliers
- 🔹Small flathead screwdriver (4–5mm tip)
- 🔹Torque wrench (inch-lb, low range)
- 🔹Masking tape (wide, painter’s tape)
- 🔹Work light
- 🔹Mechanic’s gloves
- 🔹Safety glasses
🔩 Required Parts
HowToo sells all the parts you need for this repair:
- 🔹Rear window regulator assembly (left or right, as needed) - Qty: 1
- 🔹Rear window motor (if not included with regulator) - Qty: 1
- 🔹Rear door trim panel clips - Qty: 8–12
- 🔹Butyl sealing strip or door vapor barrier adhesive - Qty: 1
- 🔹Replacement rear door water shield (if existing one tears badly) - Qty: 1 (optional)
📋 Before You Begin
- Park your Explorer on level ground, set the parking brake, and switch ignition off.
- Lower the affected rear window until you can just see the glass mounting points through the lower openings in the inner door (if the regulator still moves at all). If it’s dead, you’ll access them later by moving the regulator manually.
- Open the rear door fully for working space.
- Disconnect the negative battery terminal using the 10mm socket and set the cable aside so it cannot spring back.
🔨 Step-by-Step Instructions
Follow these steps in order:
Step 1: Remove rear door trim panel
- Use the flat trim removal tool to gently pry off the small trim cover behind the inside door handle to expose a screw.
- Use the small flathead screwdriver to pop out any small caps hiding screws in the armrest or pull handle area.
- Remove the exposed screws with the Phillips #2 screwdriver or Torx T20 screwdriver (varies by build).
- Starting at the bottom edge of the door panel, slide the panel clip removal tool between the panel and metal door, then pry straight out to pop each plastic clip. Work slowly to avoid breaking clips.
- Once all clips are loose, lift the panel straight up and off the window ledge.
- Support the panel with one hand and unplug the electrical connectors (window switch, door lamp) using the small flathead screwdriver to release tabs if needed.
- Set the panel somewhere safe, face up so you don’t scratch it.
Step 2: Remove door speaker and expose vapor barrier
- Use the Phillips #2 screwdriver or 8mm socket (depending on your speaker fasteners) to remove the door speaker screws.
- Pull the speaker out gently and unplug its connector by hand or with the small flathead screwdriver to lift the tab.
- Carefully peel back the plastic vapor barrier from the lower half of the door using your hands. Try not to tear it; go slow.
- If the butyl adhesive is very sticky, use the flat trim removal tool to separate the plastic from the metal.
Step 3: Secure the glass safely
- From outside the door, gently push the glass fully up into the closed position.
- Run several strips of masking tape from the outside of the glass over the top of the door frame and down the inside to hold the glass up. Use at least 3–4 wide strips. More tape is safer here.
- If the glass is currently stuck down and you cannot move it with the switch, you will loosen the clamps in the next step and then manually slide the glass up while supporting it.
Step 4: Detach glass from regulator
- Look through the service holes in the inner door metal to locate the two glass mounting clamps (usually near the bottom of the glass path).
- Use the 10mm socket with ratchet handle to loosen (do not fully remove) the clamp bolts holding the glass to the regulator sliders.
- Once loose, gently slide the glass upward by hand from the top edge (outside the door) until it is fully closed, then retape it securely to the door frame.
- Make sure the glass is completely free of the regulator sliders by wiggling it gently; there should be a small gap where the clamp was.
- Torque spec: When reassembling, tighten the glass clamp bolts to manufacturer specification (snug plus a small additional turn) using the 10mm socket.
Step 5: Disconnect regulator and motor wiring
- Locate the window motor on the inner door metal, near the center.
- Unplug the motor electrical connector by pressing the locking tab with the small flathead screwdriver and pulling the plug straight out.
- Check for any wiring retainers clipped to the regulator frame and release them with the panel clip removal tool or needle-nose pliers.
Step 6: Remove the old regulator assembly
- Identify all the regulator and motor mounting bolts (usually 10mm bolts around the rails and motor).
- Use the 10mm socket, extension, and ratchet handle to remove these bolts one by one while supporting the regulator so it does not drop.
- Once all bolts are out, angle the regulator and motor assembly through the largest opening in the inner door and remove it from the door.
- Torque spec: On installation, regulator and motor mounting bolts should be tightened to manufacturer specification (firm hand-tight with the 10mm socket); do not overtighten into thin sheet metal.
Step 7: Transfer motor to new regulator (if needed)
- If your new regulator does not include a motor, place the old and new regulators on a clean surface in the same orientation. Match positions to avoid confusion.
- Use the Torx T20 screwdriver or 8mm socket (depending on design) to remove the motor screws from the old regulator.
- Lift the motor straight off, making sure the gear comes free cleanly.
- Install the motor onto the new regulator in the same orientation and reinstall the screws using the Torx T20 screwdriver or 8mm socket.
- Torque spec: Tighten motor screws to manufacturer specification (snug, do not strip).
Step 8: Install the new regulator assembly
- Feed the new regulator and motor assembly into the door through the same large opening used during removal.
- Align the mounting holes in the regulator and motor with the threaded holes in the door.
- Install all regulator and motor bolts by hand first to avoid cross-threading.
- Tighten the bolts evenly using the 10mm socket, extension, and ratchet handle.
- Torque spec: Tighten to manufacturer specification; they should be firm but not crushing the metal.
- Reconnect the motor wiring connector by pushing it in until it clicks.
Step 9: Reattach glass to the new regulator
- Carefully remove the masking tape while holding the glass with one hand so it doesn’t drop.
- Slide the glass down gently until it lines up with the new regulator glass clamps seen through the access holes.
- If needed, temporarily reconnect the negative battery terminal with the 10mm socket, turn ignition on, and use the window switch to move the regulator sliders to the correct position, then turn ignition off and disconnect the battery again once aligned.
- Make sure the glass is fully seated in the clamps.
- Using the 10mm socket and ratchet handle, tighten the glass clamp bolts.
- Torque spec: Tighten to manufacturer specification (snug plus a small additional turn); do not overtighten or you risk cracking the glass.
Step 10: Reinstall vapor barrier and speaker
- Press the plastic vapor barrier back into place along its original butyl adhesive. If the adhesive is weak, add butyl sealing strip along the edges.
- Ensure all openings are sealed so water cannot enter the cabin. This prevents future leaks.
- Reconnect the speaker connector by hand and push it in until it clicks.
- Reinstall the speaker using the Phillips #2 screwdriver or 8mm socket and tighten the screws snugly.
Step 11: Reinstall door trim panel
- Reconnect all electrical connectors to the door panel (window switch, door lamp) by hand.
- Hook the top of the door panel over the window ledge, making sure the lock rod and handle areas line up correctly.
- Push the panel inward so all the plastic clips line up with their holes.
- Firmly press around the edges of the panel with your hands to snap all clips back into place.
- Reinstall the screws in the armrest, pull handle, and behind the handle using the Phillips #2 screwdriver or Torx T20 screwdriver.
- Snap the small trim covers back over the screws by hand.
Step 12: Restore power and initialize window
- Reconnect the negative battery terminal with the 10mm socket and tighten it securely.
- Turn the ignition to ON (engine can be off).
- On the repaired rear window switch:
- Lower the window fully and hold the switch down for about 3 seconds.
- Raise the window fully and hold the switch up for about 3 seconds.
- This simple procedure helps the motor learn the up/down positions so auto functions work correctly.
✅ After Repair
- 🔹Operate the repaired rear window several times from both the rear switch and the driver’s main switch. Listen for rubbing, grinding, or binding.
- 🔹Verify the glass travels smoothly, seals correctly at the top, and sits level when closed.
- 🔹Check the rear door for any rattles by gently closing and tapping around the panel.
- 🔹Confirm all door functions: lock/unlock, inside handle, outside handle, and speaker audio.
- 🔹After driving in rain or a wash, check the rear footwell and door panel bottom for any signs of water leaks.
💰 DIY vs Shop Cost
Shop Cost: $450–$650 per rear window (parts + labor)
DIY Cost: $120–$250 per window (parts only, depending on regulator with/without motor)
You Save: About $300–$400 per window by doing it yourself!
Shop labor rates vary but typically run $100–$150/hour. This repair takes a shop approximately 1.5–2.0 hours per side.
🎯 Ready to get started?
HowToo makes it easy: same-day/2-day shipping on every part, plus all the tools and specialty tools you need! Check out the parts and tools sections above to add everything to your cart.
Guide for Window Motor and Regulator Assembly replace for these Ford vehicles
| Year Make Model | Sub Model | Engine | Body Style |
|---|---|---|---|
| 2019 Ford Explorer | - | - | - |
| 2018 Ford Explorer | - | - | - |
