









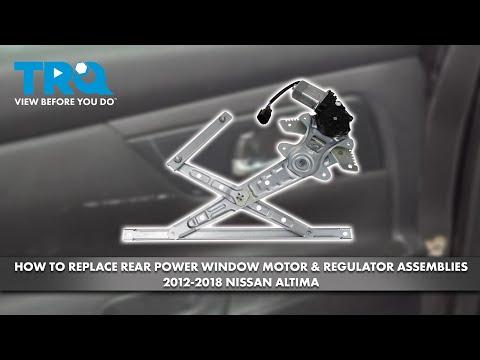







How to Replace Rear Window Regulators on a 2017 Nissan Altima
Step-by-step rear door regulator repair guide with tools, parts, torque specs, and safety tips for 2013, 2014, 2015, 2016, 2017, 2018
How to Replace Rear Window Regulators on a 2017 Nissan Altima
Step-by-step rear door regulator repair guide with tools, parts, torque specs, and safety tips for 2013, 2014, 2015, 2016, 2017, 2018


🔧 Altima - Rear Window Regulator Replacement
This repair replaces a failed rear door window regulator, which is the scissor/cable mechanism that raises and lowers the glass. On your Altima, the rear door panel must come off, the glass must be secured, and the regulator/motor assembly is removed through the door opening.
Difficulty Level: Intermediate | Estimated Time: 1.5-2.5 hours per door
⚠️ Safety & Precautions
- ⚠️ Support the window glass before removing the regulator. The glass can drop suddenly and break.
- ⚠️ Disconnect the negative battery cable before unplugging door electrical connectors.
- ⚠️ Wear gloves because the inside of the door shell has sharp metal edges.
- ⚠️ Do not slam the door while the glass is taped or unsecured.
- ⚠️ Keep the plastic water shield intact. It prevents rainwater from entering the cabin.
🔧 Required Tools
You'll need the following tools for this repair:
- 10mm socket
- Ratchet with 3/8-inch drive
- 6-inch socket extension with 3/8-inch drive
- Phillips #2 screwdriver
- Small flat-blade screwdriver
- Plastic trim removal tool set
- Needle-nose pliers
- Torque wrench rated 5-25 Nm
- Painter’s tape 2-inch wide
- Shop towels
- Nitrile gloves
- Safety glasses
🔩 Required Parts
HowToo sells all the parts you need for this repair:
- Rear window regulator with motor assembly - Qty: 1 per door
- Rear door trim panel clips - Qty: As needed
- Butyl sealing tape for water shield - Qty: 1 roll if original seal is damaged
📋 Before You Begin
- Park your Altima on level ground and turn the ignition OFF.
- Open the rear door you are repairing fully.
- If the window still moves, use the switch to position the glass about halfway down so you can access the glass clamp bolts.
- If the window does not move, you may need to manually lift or lower the glass after the door panel is removed.
- Disconnect the negative battery cable using a 10mm socket. Wait at least 1 minute before unplugging door connectors.
- A trim removal tool is a plastic pry tool that helps remove panels without scratching the door.
- Butyl tape is a sticky black sealing rope used to reseal the plastic water shield.
🔨 Step-by-Step Instructions
Follow these steps in order:
Step 1: Remove the Rear Door Switch Trim
- Use a plastic trim removal tool to gently pry up the rear window switch trim from the armrest.
- Lift the trim just enough to access the connector.
- Use a small flat-blade screwdriver to press the connector lock tab, then unplug the switch.
- Go slow to avoid broken clips.
Step 2: Remove Door Panel Fasteners
- Use a Phillips #2 screwdriver to remove the screw inside the pull handle area, if equipped.
- Use a small flat-blade screwdriver to open any small screw covers near the interior door handle.
- Use a Phillips #2 screwdriver or 10mm socket to remove the exposed fasteners.
- Place all screws in a cup or tray so they do not get lost.
Step 3: Release the Door Panel Clips
- Use a plastic trim removal tool at the lower edge of the door panel.
- Pop the panel clips loose one at a time around the sides and bottom.
- Lift the door panel straight upward to unhook it from the window ledge.
- Use needle-nose pliers to release the interior handle cable ends if they remain attached.
- Set the door panel on a clean towel.
Step 4: Peel Back the Water Shield
- Use your gloved hands and a plastic trim removal tool to carefully peel back the plastic water shield.
- Do not tear it. You will reuse it.
- If the black sealer stretches, use shop towels to keep it off the upholstery.
- Keep the shield clean and sticky.
Step 5: Reconnect Power Temporarily If Needed
- If the window still works, reconnect the window switch connector by hand.
- Reconnect the negative battery cable using a 10mm socket.
- Turn the ignition ON and move the glass until the glass clamp bolts line up with the door access holes.
- Turn the ignition OFF and disconnect the negative battery cable again using a 10mm socket.
- If the regulator is completely failed, skip motor movement and access the glass bolts manually through the opening.
Step 6: Secure the Window Glass
- Use painter’s tape 2-inch wide to tape the glass to the outside upper door frame.
- Run at least 3 long strips from the outside glass over the top of the door frame and onto the inside glass.
- Use your hands to gently push the glass fully upward before taping if it is loose.
- Use more tape than you think.
Step 7: Detach the Glass from the Regulator
- Use a 10mm socket, 6-inch socket extension, and ratchet to loosen the two glass-to-regulator bolts through the door access holes.
- Do not remove the bolts completely unless required by the replacement design.
- Lift the glass fully upward by hand and confirm the tape is holding it securely.
- For installation later, tighten these bolts to Torque to 6 Nm (53 in-lbs).
Step 8: Unplug the Window Motor
- Use a small flat-blade screwdriver to press the window motor connector lock tab.
- Pull the connector straight out by the connector body, not by the wires.
- Move the harness aside so it does not snag during removal.
Step 9: Remove the Regulator Assembly
- Use a 10mm socket, 6-inch socket extension, and ratchet to remove the regulator mounting bolts.
- Use the same 10mm socket to remove the motor mounting bolts if the motor is bolted separately to the door shell.
- Support the regulator with one hand as the last bolt comes out.
- Remove the regulator and motor assembly through the large door opening.
- For installation later, tighten regulator and motor mounting bolts to Torque to 8 Nm (71 in-lbs).
Step 10: Install the New Regulator
- Feed the new rear window regulator with motor assembly into the door through the large opening.
- Use your hands to line up the regulator and motor mounting holes.
- Start all bolts by hand first to avoid cross-threading.
- Use a 10mm socket, 6-inch socket extension, and ratchet to snug the bolts.
- Use a torque wrench rated 5-25 Nm and 10mm socket to tighten the bolts to Torque to 8 Nm (71 in-lbs).
Step 11: Reattach the Glass
- Use your hands to carefully lower the taped glass into the regulator glass clamps or mounting points.
- Make sure the glass sits squarely in both clamps.
- Use a 10mm socket to snug the glass bolts.
- Use a torque wrench rated 5-25 Nm and 10mm socket to tighten the glass bolts to Torque to 6 Nm (53 in-lbs).
- Remove the painter’s tape 2-inch wide from the glass and door frame.
Step 12: Test Window Operation Before Reassembly
- Reconnect the motor connector by hand until it clicks.
- Reconnect the rear window switch connector by hand.
- Reconnect the negative battery cable using a 10mm socket.
- Turn the ignition ON and operate the rear window switch.
- Watch the glass travel fully up and fully down without binding, tilting, or clicking.
- If the glass binds, turn the ignition OFF and loosen the glass bolts with a 10mm socket, realign the glass, then retighten to Torque to 6 Nm (53 in-lbs).
Step 13: Reinstall the Water Shield
- Turn the ignition OFF.
- Use your hands to press the plastic water shield back onto the original sealer.
- If the original sealer no longer sticks, apply butyl sealing tape for water shield around the edge.
- Press firmly around the full shield perimeter to prevent water leaks.
Step 14: Reinstall the Door Panel
- Reconnect the interior handle cables by hand if removed.
- Hang the door panel over the top window ledge by hand.
- Line up the panel clips with their holes.
- Use the palm of your hand to press the clips into place around the panel.
- Use a Phillips #2 screwdriver or 10mm socket to reinstall the door panel fasteners.
- Do not overtighten trim screws; tighten them snug only.
Step 15: Reinstall the Switch Trim
- Plug the rear window switch connector in by hand until it clicks.
- Set the switch trim into the armrest opening.
- Press it down by hand until the clips lock into place.
✅ After Repair
- Run the rear window fully down and fully up 3 times from the rear door switch.
- Test the same window from the driver master switch.
- Check that the door lock, interior handle, speaker, and switch all work.
- Spray a small amount of water over the outside glass area and check the inside lower door area for leaks.
- If the battery was disconnected, reset the clock and any radio presets if needed.
💰 DIY vs Shop Cost
Shop Cost: $350-$650 per rear door, including parts and labor
DIY Cost: $90-$220 per rear door, parts only
You Save: $260-$430 by doing it yourself!
Shop labor rates vary but typically run $100-$150/hour. This repair takes a shop approximately 1.2-2.0 hours.
🎯 Ready to get started?
HowToo makes it easy: same-day/2-day shipping on every part, plus all the tools and specialty tools you need! Check out the parts and tools sections below to add everything to your cart.