









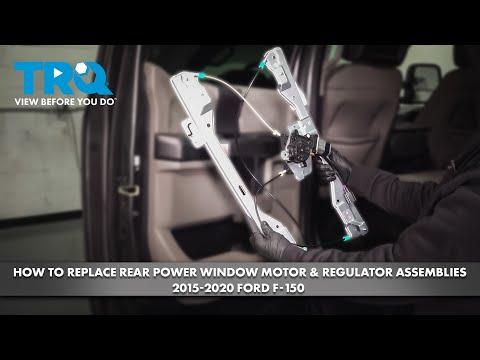






How to Replace Rear Window Regulators on a 2016 Ford F-150
Step-by-step rear door regulator replacement with tools, torque specs, safety tips, and testing instructions
How to Replace Rear Window Regulators on a 2016 Ford F-150
Step-by-step rear door regulator replacement with tools, torque specs, safety tips, and testing instructions


F-150 - Rear Door Window Regulator Replacement 🪛
I’ll walk you through replacing a rear door window regulator on your F-150. The left and right rear doors are almost identical, so the process is the same for both.
Safety First ⚠️
- 🧤 Disconnect the battery: Remove the negative (black) cable to avoid accidental window movement and short circuits.
- 🪜 Work on level ground: Park, set the parking brake, and keep the truck in Park.
- 🕶️ Protect the glass: Support the window with tape so it doesn’t drop and crack.
Tools & Supplies You’ll Need 🧰
- 🔧 Socket set: 7mm, 8mm, and 10mm sockets with ratchet and short extension
- 🔩 Torx bits: T20 and T25 (Torx = star-shaped screw head)
- 🪛 Trim removal tool: Plastic pry tool to pop panels without scratching
- 🪛 Small flat screwdriver: For popping covers and clips
- 🔨 Pick tool or small awl: Helpful for releasing plastic clips
- 🧵 Painter’s tape or masking tape: To hold the glass up
- 💡 Work light: So you can see inside the door
- 🧽 Shop towels: To protect paint and clean up
Optional but helpful:
- 🧰 Magnetic pickup tool: In case you drop a bolt inside the door
- 🧴 White lithium grease: To lightly lube the new regulator tracks
Key Fastener Sizes & Torques 🔩
- 🧷 Door panel screws: 7mm (tighten to about 35–45 in-lb – snug, not gorilla tight)
- 🧷 Regulator/motor bolts: 10mm (tighten to about 7–9 ft-lb)
- 🧷 Glass clamp bolts: 10mm (tighten to about 7–9 ft-lb)
If you don’t have a torque wrench, just go firm and then a small extra twist. Do not overtighten; these are small bolts in thin metal.
Step 1 – Prepare the Truck 🧯
- 🧰 Park the truck, set the parking brake, and turn ignition off.
- 🧰 Open the rear door you’re working on fully.
- 🧰 Disconnect the negative battery cable under the hood (10mm wrench). Move the cable aside so it can’t spring back.
Step 2 – Remove Rear Door Panel 🚪
- 🧰 Using the small flat screwdriver or trim tool, gently pry off:
- The small trim cover behind the interior door handle.
- The rubber mat inside the pull handle pocket (where you grab to close the door).
- 🧰 Remove the screws:
- One 7mm screw behind the interior handle trim.
- One or two 7mm screws in the pull handle pocket (varies slightly by door).
- Check along the bottom edge of the panel for any additional 7mm screws and remove them.
- 🧰 Use the plastic trim tool along the bottom edge of the door panel. Slide it in and twist to pop the plastic clips. Work your way around the sides.
- 🧰 Once the clips are loose, lift the door panel straight up to unhook it from the top edge near the window.
- 🧰 Reach behind the panel:
- Unplug the window switch connector.
- Unclip the door handle cable (usually a plastic clip and a cable end that hooks into the handle).
- 🧰 Set the door panel somewhere safe, face up, so you don’t scratch it.
Step 3 – Remove the Water Shield / Vapor Barrier 💧
- 🧰 You’ll see a plastic sheet stuck to the door with sticky butyl (black gooey sealant). This keeps water out of the cabin.
- 🧰 Carefully peel it back starting at a corner. Do not tear it. Peel it back enough to access the large openings in the door where the regulator sits.
- 🧰 Let it hang or tape it up out of the way.
Step 4 – Secure the Glass in the Up Position 🪟
- 🧰 If the window is still up:
- Use painter’s tape on the outside of the glass, running from the glass up over the top of the door frame and down the inside. Use 3–4 strips.
- This holds the glass so it doesn’t drop when you disconnect it from the regulator.
- 🧰 If the window is stuck down:
- Temporarily reconnect the window switch and battery and try to raise it.
- If the regulator is completely dead, you may need to manually lift the glass by hand from inside the door while someone holds it, then tape it in place.
Step 5 – Disconnect the Glass from the Regulator 🔧
- 🧰 Look through the large access holes in the inner door metal. You’ll see the glass clamps where the regulator holds the bottom of the glass.
- 🧰 Each clamp usually has a 10mm bolt. Loosen (do not fully remove) these bolts until the glass can slide free of the regulator channels.
- 🧰 Once loose, gently push the glass all the way up by hand and add more tape to secure it firmly.
Step 6 – Remove the Old Regulator and Motor ⚙️
- 🧰 Unplug the window motor electrical connector.
- 🧰 Remove the 10mm bolts holding the regulator and motor to the door. There are usually:
- 3 bolts for the motor.
- 2–3 bolts for the regulator tracks.
- 🧰 Support the regulator with one hand as you remove the last bolt so it doesn’t drop inside the door.
- 🧰 Maneuver the regulator and motor assembly out through the large opening in the door. You may need to tilt and rotate it a bit.
Step 7 – Prepare and Install the New Regulator 🆕
- 🧰 Compare the new regulator to the old one:
- Same shape and mounting points.
- Same connector on the motor.
- 🧰 If the motor is separate and you’re reusing the old motor:
- Swap the motor over using the same 10mm bolts.
- 🧰 Lightly apply white lithium grease to the regulator tracks if they are dry (thin film only).
- 🧰 Feed the new regulator and motor into the door through the opening.
- 🧰 Line up the mounting holes and start all the 10mm bolts by hand.
- 🧰 Tighten the regulator and motor bolts to about 7–9 ft-lb (snug plus a small extra twist).
- 🧰 Plug in the motor connector.
Step 8 – Reattach the Glass to the Regulator 🪟
- 🧰 Carefully remove some of the tape holding the glass, but keep a couple of strips in place so it doesn’t fall.
- 🧰 Gently lower the glass by hand until it sits in the regulator clamps. You may need a helper to hold the glass while you line it up.
- 🧰 Make sure the glass is centered in the window channels (front and rear guides).
- 🧰 Tighten the 10mm glass clamp bolts to about 7–9 ft-lb.
- 🧰 Remove the remaining tape.
Step 9 – Test the Window Operation 🔌
- 🧰 Temporarily reconnect:
- The rear door window switch.
- The negative battery cable.
- 🧰 Turn the ignition to ON (engine off is fine).
- 🧰 Run the window:
- All the way down and all the way up several times.
- Listen for grinding or binding. Watch that the glass moves smoothly and stays straight.
- 🧰 If it binds or tilts:
- Loosen the glass clamp bolts slightly, adjust the glass position, and retighten.
- 🧰 Turn ignition off and disconnect the negative battery cable again before reassembly.
Step 10 – Reinstall the Vapor Barrier and Door Panel 🧩
- 🧰 Press the plastic water shield back into place. Make sure the black sticky seal makes good contact all the way around, especially at the bottom and edges.
- 🧰 Bring the door panel back to the door:
- Reconnect the door handle cable (hook the end in, then clip the housing into place).
- Reconnect the window switch connector.
- 🧰 Hang the top of the door panel on the top edge of the door (by the window), then push it down to seat it.
- 🧰 Line up the plastic clips and press around the edges of the panel until all clips snap in.
- 🧰 Reinstall:
- All 7mm screws (handle area, bottom edge, etc.).
- The trim cover behind the handle.
- The rubber mat in the pull handle pocket.
- 🧰 Reconnect the negative battery cable and tighten the 10mm nut snugly.
Step 11 – Final Check ✅
- 🧰 Test the rear window from:
- The rear door switch.
- The driver’s master switch.
- 🧰 Listen for any rattles when closing the door. If you hear one, a clip may not be fully seated—press around the panel again.
Extra Tips & Common Gotchas 💡
- 🧰 Don’t skip the tape: A falling glass pane can crack or pinch fingers.
- 🧰 Keep screws organized: Lay them out in the pattern you removed them so they go back in the right spots.
- 🧰 If the window won’t move after reassembly: Recheck the motor connector and the door switch connector.
If you tell me whether you’re doing the left, right, or both rear doors, I can add any side-specific notes (like child lock linkage) for that door. 🛠️
HowToo makes it easy: same-day/2-day shipping on every part, plus all the tools and specialty tools you need!
Guide for replace for these Ford vehicles
| Year Make Model | Sub Model | Engine | Body Style |
|---|