









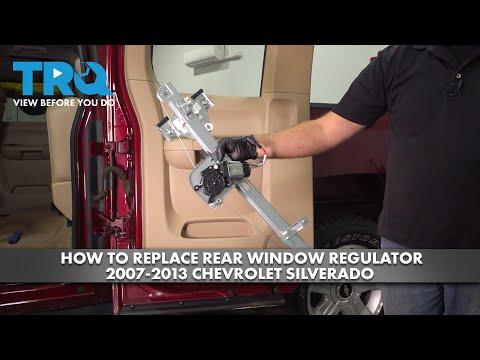






How to Replace Rear Window Regulators on a 2012 Chevy Silverado 1500
Step-by-step DIY rear door regulator and motor replacement with tools, parts list, torque specs, and safety tips
How to Replace Rear Window Regulators on a 2012 Chevy Silverado 1500
Step-by-step DIY rear door regulator and motor replacement with tools, parts list, torque specs, and safety tips


🔧 Silverado 1500 - Rear Window Regulator Replacement
You’ll remove the rear door panel, detach the glass from the regulator, then unbolt and swap the faulty regulator assembly. This restores smooth up/down operation of the rear power window.
Difficulty Level: Intermediate | Estimated Time: 1.5-2.0 hours per door
⚠️ Safety & Precautions
- ⚠️ Disconnect the 12V negative battery cable to avoid accidental window movement or short circuits.
- ⚠️ Your Silverado is a hybrid – do not touch any orange high-voltage cables or connectors under the hood or under the vehicle. You won’t be near them for this job, just be aware.
- ⚠️ Work on level ground and keep the transmission in PARK with the parking brake set.
- ⚠️ Use safety glasses and mechanic gloves; door panels have sharp metal edges inside.
- ⚠️ Support the glass before loosening its clamps so it cannot drop and crack.
🔧 Required Tools
You'll need the following tools for this repair:
- 🛠️ Ratchet handle 3/8"
- 🛠️ 7mm socket
- 🛠️ 10mm socket
- 🛠️ Torx T30 bit or screwdriver
- 🛠️ Extension bar 3" for 3/8" ratchet
- 🛠️ Trim removal tool plastic (specialty)
- 🛠️ Flathead screwdriver small
- 🛠️ Phillips screwdriver #2
- 🛠️ Torque wrench 3/8" drive (inch-lb and ft-lb)
- 🛠️ Painter’s tape 1"-2"
- 🛠️ Utility knife or razor blade
- 🛠️ Work light LED
- 🛠️ Safety glasses
- 🛠️ Mechanic gloves
🔩 Required Parts
HowToo sells all the parts you need for this repair:
- 🔩 Rear power window regulator with motor (left rear) - Qty: 1
- 🔩 Rear power window regulator with motor (right rear) - Qty: 1
- 🔩 Rear door trim panel push clips - Qty: 10-20 (have spares)
- 🔩 Butyl sealant strip or door vapor barrier adhesive tape - Qty: 1 roll
- 🔩 Painter’s tape - Qty: 1 roll
- 🔩 Dielectric grease small packet - Qty: 1 (optional, for electrical connectors)
📋 Before You Begin
- Park the Silverado on level ground, set the parking brake, and switch ignition OFF.
- Open the rear door you’re working on fully for space.
- Disconnect the negative battery cable using the 10mm socket and move it aside so it cannot spring back.
- If one side failed, plan to do each rear door separately so you can see how the good side is routed if needed.
🔨 Step-by-Step Instructions
Follow these steps in order:
Step 1: Remove door handle and switch trim
- Use the trim removal tool plastic to gently pry up the rear window switch bezel in the armrest; lift it out.
- Use the flathead screwdriver small carefully if needed to pop clips, but protect the plastic with a rag.
- Disconnect the window switch electrical connector by pressing the tab with the flathead screwdriver small and pulling straight out.
- Use the trim removal tool plastic to pop off the small trim cover behind the inside door handle (hiding a screw).
Step 2: Remove door panel screws
- Use the 7mm socket with the ratchet handle 3/8" to remove the screws in the armrest and lower edge of the door panel (usually 2–3 screws).
- Use the Torx T30 bit with the ratchet handle 3/8" or screwdriver to remove the screw behind the inside door handle.
- Keep all screws organized; note their original locations. Group screws by area
Step 3: Remove the rear door trim panel
- Starting at the bottom corner of the panel, insert the trim removal tool plastic between the panel and the metal door.
- Pry outward to release each plastic clip around the sides and bottom. You’ll hear pops as clips release.
- Once clips are free, lift the door panel straight up to unhook it from the top edge at the window.
- Carefully tilt the panel out and disconnect any remaining electrical connectors using the flathead screwdriver small if needed.
- Set the panel aside on a clean surface to avoid scratching it.
Step 4: Remove the vapor barrier (plastic sheet)
- The vapor barrier is the plastic sheet stuck to the metal door with sticky sealant; it keeps moisture out of the interior.
- Use the utility knife or razor blade to gently cut and separate the sealant while peeling the plastic back.
- Peel it back enough to expose the regulator, cables, and glass clamp area. Try not to tear it.
- Let the plastic hang or tape it out of your way using painter’s tape.
Step 5: Secure the glass in the up position
- With the regulator still installed, push the glass fully up by hand.
- Use several strips of painter’s tape from the outside of the glass over the top of the door frame and down the other side to hold the glass in place.
- Use more tape inside the door frame if desired for extra support. Do not rely on one strip
Step 6: Lower regulator to glass clamp access (if needed)
- Reconnect the window switch temporarily: plug it back into its connector.
- Reconnect the negative battery cable using the 10mm socket just long enough to move the window.
- Turn ignition ON, and use the switch to move the glass until you can see the glass clamp bolts through the access holes.
- Turn ignition OFF again, then disconnect the battery negative cable using the 10mm socket once the clamp bolts are visible.
- Unplug the window switch again and set it aside.
Step 7: Detach glass from regulator
- Locate the two glass clamp bolts (they secure the bottom of the glass to the regulator).
- Use the 10mm socket with the ratchet handle 3/8" to loosen and remove these bolts.
- Gently push the glass fully up by hand, making sure the bottom edge is free from the regulator.
- Add extra painter’s tape around the top of the door to secure the glass firmly in the fully-up position.
Step 8: Disconnect regulator wiring
- Locate the electrical connector at the window motor on the regulator assembly.
- Press the locking tab and disconnect the connector using the flathead screwdriver small if needed.
- If there are any wire clips holding the harness to the door, release them by hand or gently with the trim removal tool plastic.
Step 9: Remove the old regulator
- Find the mounting bolts for the regulator tracks and motor (typically 6–8 bolts).
- Use the 10mm socket with the ratchet handle 3/8" and extension bar 3" to remove all regulator and motor mounting bolts.
- Support the regulator with one hand while removing the last bolts so it does not drop inside the door.
- Carefully maneuver the regulator and motor assembly out through the largest inner door opening.
Step 10: Install the new regulator
- Insert the new rear window regulator with motor into the door, feeding it through the same opening.
- Line up the regulator and motor with their mounting holes.
- Install all regulator and motor mounting bolts by hand using the 10mm socket to start threads so nothing cross-threads.
- Use the torque wrench 3/8" drive with the 10mm socket to tighten regulator and motor bolts to 10 Nm (89 in-lbs).
Step 11: Reattach glass to the new regulator
- Reconnect the window motor electrical connector; optionally apply a small amount of dielectric grease to the connector pins.
- Reconnect the window switch temporarily and the negative battery cable using the 10mm socket.
- Turn ignition ON. While holding the glass lightly, use the switch to move the regulator until the glass clamp slots line up with the glass mounting pads.
- Turn ignition OFF and disconnect the battery negative cable again using the 10mm socket.
- Install the two glass clamp bolts with the 10mm socket and then torque them using the torque wrench 3/8" drive to 10 Nm (89 in-lbs).
- Remove the painter’s tape from the glass after the clamps are tight.
Step 12: Test operation before closing door
- Reconnect the window switch fully and reconnect the battery negative cable using the 10mm socket.
- Turn ignition ON and cycle the window up and down several times using the switch.
- Listen for grinding, binding, or clicking; the glass should move smoothly and sit fully closed at the top.
- If the window binds or seems crooked, stop, lower it, and loosen the clamp bolts slightly with the 10mm socket, adjust the glass position by hand, and retighten to 10 Nm (89 in-lbs).
- Once smooth, turn ignition OFF and you can leave the battery connected from this point.
Step 13: Reinstall vapor barrier
- Press the plastic vapor barrier back into place against the original sealant.
- If the old sealant no longer sticks well, apply new butyl sealant strip or door vapor barrier adhesive tape around the perimeter using your hands.
- Make sure all wiring stays inside and no gaps remain at the bottom area where water could pass through.
Step 14: Reinstall door trim panel
- Reconnect any electrical connectors for the door panel, including the rear window switch.
- Hook the top edge of the door panel over the window ledge and align it with the door.
- Push the panel straight in so all plastic clips line up with their holes, then hit around the edges with the heel of your hand to snap clips into place.
- Replace any broken clips with new ones before installing if the panel feels loose.
- Install the Torx screw behind the inside handle using the Torx T30 bit and ratchet handle 3/8"; snug to about 3 Nm (27 in-lbs) (just firm, not overtight).
- Install the 7mm screws in the armrest and lower panel using the 7mm socket and ratchet handle 3/8", tightening to about 3 Nm (27 in-lbs).
- Snap the inside handle trim cover back on by hand.
- Press the window switch bezel back into the armrest until it clicks into place.
✅ After Repair
- 🔍 Turn ignition ON and test both rear windows from the rear door switches and from the driver master switch.
- 🔍 Confirm the window closes fully and seals properly; check for wind noise on a short drive.
- 🔍 Listen for rattles in the rear door over bumps; if you hear something, recheck that all screws and clips are fully seated.
- 🔍 Make sure door locks and handles (inside and outside) operate smoothly after panel reinstallation.
💰 DIY vs Shop Cost
Shop Cost: $350-$550 per rear door (parts + labor)
DIY Cost: $90-$180 per rear door (parts only)
You Save: $260-$370 per door by doing it yourself!
Shop labor rates vary but typically run $100-$150/hour. This repair takes a shop approximately 1.0-1.5 hours per door.
🎯 Ready to get started?
HowToo makes it easy: same-day/2-day shipping on every part, plus all the tools and specialty tools you need! Check out the parts and tools sections above to add everything to your cart.
Guide for replace for these Chevrolet vehicles
| Year Make Model | Sub Model | Engine | Body Style |
|---|