










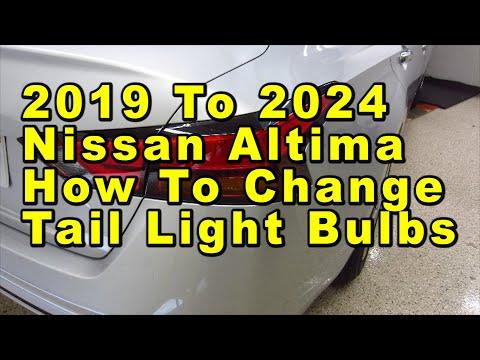







How to Replace Rear Turn Signal & Reverse Light Bulbs on a 2019 Nissan Altima
Step-by-step 2019 Altima taillight bulb replacement with tools, parts, torque specs, and safety tips for 2016, 2017, 2018, 2019
How to Replace Rear Turn Signal & Reverse Light Bulbs on a 2019 Nissan Altima
Step-by-step 2019 Altima taillight bulb replacement with tools, parts, torque specs, and safety tips for 2016, 2017, 2018, 2019


🔧 Altima - Taillight Bulb Replacement
This will walk you through replacing the rear turn signal and reverse light bulbs on both sides of your Altima. On your car the main red brake/tail lights are LEDs (part of the lamp and not simple bulbs), but the amber turn signals and white reverse lights are replaceable bulbs.
Difficulty Level: Beginner | Estimated Time: 30-45 minutes
⚠️ Safety & Precautions
- 🔹Always work with the engine off, transmission in Park, and parking brake fully applied.
- 🔹Turn off all exterior lights before starting so bulbs and wiring are not live.
- 🔹Let the lights cool for a few minutes before touching them to avoid burns.
- 🔹Wear safety glasses and gloves to protect your hands from sharp edges and glass.
- 🔹Do not pull on wires; always twist and pull on the bulb socket or connector.
- 🔹Battery disconnect is not required, but you can disconnect the negative terminal if you feel safer.
🔧 Required Tools
You'll need the following tools for this repair:
- 🔹10mm socket
- 🔹1/4" drive ratchet
- 🔹1/4" drive extension (3"-6")
- 🔹Phillips #2 screwdriver
- 🔹Flathead screwdriver (small)
- 🔹Plastic trim removal tool (specialty)
- 🔹Work gloves
- 🔹Safety glasses
- 🔹Clean shop rag
🔩 Required Parts
HowToo sells all the parts you need for this repair:
- 🔹Rear turn signal bulb (amber 7440A type) - Qty: 2 (replace both sides)
- 🔹Reverse light bulb (921 / W16W type) - Qty: 2 (replace both sides)
- 🔹Dielectric grease for bulb sockets - Qty: 1 small tube
- 🔹Plastic trunk trim fasteners - Qty: 4-6 (optional, in case any break)
📋 Before You Begin
- 🔹Park the Altima on level ground, shift to Park, and set the parking brake.
- 🔹Turn off the headlights and hazard lights, and remove the key or turn the ignition off.
- 🔹Open the trunk fully so you can access the interior trim behind the taillights.
- 🔹If you want extra safety, disconnect the negative battery cable with a 10mm socket.
🔨 Step-by-Step Instructions
Follow these steps in order:
Step 1: Open the trunk and move the trim
- 🔹Open the trunk and remove any cargo blocking the sides.
- 🔹On each side, locate the trunk side carpet/trim panel near the taillight area.
- 🔹Use the plastic trim removal tool or flathead screwdriver to gently pop out any plastic push clips holding the trim (turn them 90° if they are quarter-turn clips).
- 🔹Pull the trim back enough to see the rear of the taillight assembly on the body.
- Work slowly so clips don’t snap
Step 2: Remove outer taillight mounting nuts (body lamps)
- 🔹Behind each outer taillight, find the two or three small nuts securing the lamp to the body.
- 🔹Use a 10mm socket, ratchet, and extension to remove these nuts.
- 🔹Keep the nuts in a safe place; you’ll reuse them.
- 🔹From the outside of the car, support the taillight with one hand so it doesn’t drop when fully loose.
- Torque on reassembly: 5 Nm (44 in-lbs)
Step 3: Remove the outer taillight assembly
- 🔹With the nuts removed, gently pull the outer taillight straight rearward from the body.
- 🔹There are alignment pins that can be snug; wiggle slightly while pulling.
- 🔹Do not yank—wiring is still attached.
- 🔹Carefully rest the lamp on a clean shop rag on the bumper or hold it in one hand.
- Pull straight back to avoid breaking pins
Step 4: Remove and replace the rear turn signal bulb (outer lamp)
- 🔹On the back of the outer taillight, find the bulb socket for the turn signal; it’s usually the lower or outermost socket and uses an amber bulb.
- 🔹Grip the socket and twist it about a quarter-turn counterclockwise by hand to unlock it, then pull it out.
- 🔹Pull the old bulb straight out of the socket.
- 🔹Apply a thin smear of dielectric grease to the bulb’s metal contacts if you have it.
- 🔹Install the new 7440A amber bulb straight into the socket until fully seated.
- 🔹Insert the socket back into the housing and twist clockwise to lock.
Step 5: Reinstall the outer taillight assembly
- 🔹Align the locating pins on the taillight with the holes in the body.
- 🔹Gently push the taillight straight into place until it sits flush with the body.
- 🔹From inside the trunk, reinstall the 10mm nuts using the 10mm socket, ratchet, and extension.
- 🔹Tighten evenly and do not overtighten.
- Torque to 5 Nm (44 in-lbs)
Step 6: Access the inner trunk-lid reverse light
- 🔹Now look at the inner lamps that are attached to the trunk lid itself; these usually contain the white reverse light.
- 🔹On the inside of the trunk lid, locate the small plastic covers or trim panel behind each inner lamp.
- 🔹Use the Phillips #2 screwdriver or plastic trim removal tool to remove any screws or clips holding the small access panel.
- 🔹Remove the panel to expose the bulb socket for the reverse light.
Step 7: Replace the reverse light bulb (inner trunk lamps)
- 🔹Locate the reverse light bulb socket (usually the only or lowest one, with a clear/white lens externally).
- 🔹Twist the socket a quarter-turn counterclockwise and pull it out of the housing.
- 🔹Pull the old 921 bulb straight out of the socket.
- 🔹Apply a thin smear of dielectric grease to the new bulb’s contacts.
- 🔹Push the new 921 / W16W bulb straight into the socket until snug.
- 🔹Insert the socket back into the housing and twist clockwise to lock.
Step 8: Reinstall inner trim on trunk lid
- 🔹Reposition the small access panel on the trunk lid.
- 🔹Reinstall any screws with the Phillips #2 screwdriver and any clips you removed.
- 🔹Make sure the panel is secure and doesn’t sag.
Step 9: Refit trunk side trim and clips
- 🔹Push the trunk side carpet/trim back into its original position on both sides.
- 🔹Reinstall the plastic clips using your fingers or the plastic trim removal tool to press them fully seated.
- 🔹Make sure no wiring is pinched behind the trim.
Step 10: Repeat on the other side
- 🔹Repeat Steps 2–9 on the opposite side so both turn signals and both reverse lights are new.
- Always replace bulbs in pairs
✅ After Repair
- 🔹Turn the ignition on (engine can stay off) and set the parking brake.
- 🔹Have a helper press the brake, use the turn signals, and shift into Reverse (with foot on brake) while you stand behind the car to confirm all lights work.
- 🔹Check that the turn signals flash the correct color and speed on both sides.
- 🔹Make sure all lamps sit flush with the body and the trunk closes without rubbing on the lights.
- 🔹If any light doesn’t come on, recheck the bulb orientation and that the socket is fully locked.
💰 DIY vs Shop Cost
Shop Cost: $140-$220 (parts + labor)
DIY Cost: $25-$50 (parts only)
You Save: $90-$195 by doing it yourself!
Shop labor rates vary but typically run $100-$150/hour. This repair takes a shop approximately 0.5-1.0 hours.
🎯 Ready to get started?
HowToo makes it easy: same-day/2-day shipping on every part, plus all the tools and specialty tools you need! Check out the parts and tools sections above to add everything to your cart.
