









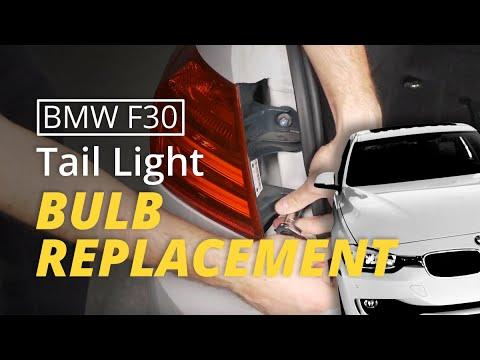







How to Replace Rear Turn Signal Bulbs (Outer Tail Lamp) on a 2016 BMW 340i
Step-by-step trunk access guide with tools, bulb vs LED tail lamp options, and 5 Nm torque spec for 2016, 2017, 2018
How to Replace Rear Turn Signal Bulbs (Outer Tail Lamp) on a 2016 BMW 340i
Step-by-step trunk access guide with tools, bulb vs LED tail lamp options, and 5 Nm torque spec for 2016, 2017, 2018


🔧 340i - Rear Turn Signal Replacement
On your 340i, the rear turn signal is located in the outer tail lamp (the lamp on the rear quarter panel). Depending on your tail lamp style, you’ll either replace a traditional amber bulb or replace the turn-signal LED as part of the tail lamp assembly.
Difficulty Level: Beginner | Estimated Time: 0.5-1.5 hours
⚠️ Safety & Precautions
- ⚠️ Turn ignition OFF and remove the key/remote from the car.
- ⚠️ Let the exhaust area cool before reaching into the trunk side pockets.
- ⚠️ Don’t touch bulb glass with bare fingers (skin oil can shorten bulb life).
- ⚠️ Support the tail lamp as you remove nuts so it doesn’t drop and chip paint.
- ⚠️ Battery disconnect is not required for this job.
🔧 Required Tools
You'll need the following tools for this repair:
- 8mm socket
- 1/4" drive ratchet
- 3" extension for 1/4" ratchet
- Plastic trim removal tool set
- Flathead screwdriver (small)
- Torque wrench (inch-pound or low-range Nm)
- Nitrile gloves
- Safety glasses
- Flashlight
🔩 Required Parts
HowToo sells all the parts you need for this repair:
- Rear turn signal bulb (amber) - Qty: 1 or replace both sides
- Outer rear tail lamp assembly - Qty: 1 if turn signal is LED/non-serviceable
- Outer tail lamp gasket/seal - Qty: 1 recommended if damaged or leaking
- Dielectric grease - Qty: 1 optional
📋 Before You Begin
- 🅿️ Park on level ground and set the parking brake.
- 🧰 Open the trunk and remove any cargo so you can access the trunk side liner.
- 🔦 Have a flashlight ready; the tail lamp fasteners sit deep behind the liner.
- ℹ️ Assumption: This covers the common outer tail lamp turn signal location; some lamp versions use an LED turn signal that requires replacing the outer tail lamp assembly.
🔨 Step-by-Step Instructions
Follow these steps in order:
Step 1: Access the tail lamp fasteners
- Open the trunk and locate the trunk side liner behind the outer tail lamp (left or right corner).
- Use a plastic trim removal tool set to pop the liner clip(s) or open the access flap (varies by liner style).
- Use a flashlight to find the tail lamp connector and the 2-3 mounting nuts.
Step 2: Disconnect the tail lamp electrical connector
- Use a flathead screwdriver (small) only if needed to gently release the connector lock tab.
- Unplug the connector by hand and move it aside so it won’t snag.
- Tip: Don’t pull on wires—pull on the connector body.
Step 3: Remove the outer tail lamp from the body
- Use an 8mm socket, 1/4" drive ratchet, and 3" extension for 1/4" ratchet to remove the tail lamp mounting nuts.
- With one hand outside supporting the lamp, carefully push the lamp studs outward from inside the trunk.
- Pull the tail lamp straight rearward from the outside. If it feels stuck, wiggle gently—don’t pry on paint.
Step 4A: If your tail lamp uses a replaceable bulb (bulb carrier method)
- On the back of the tail lamp, remove the bulb carrier (also called a “bulb holder,” the plastic plate that holds the bulbs) by releasing its tabs by hand or using a flathead screwdriver (small) gently.
- Remove the turn signal bulb by twisting it out or pulling it straight out (depends on holder style).
- Install the new rear turn signal bulb (amber) while wearing nitrile gloves.
- If you have it, apply a tiny amount of dielectric grease to the connector seal (not the bulb glass).
- Reinstall the bulb carrier fully seated.
Step 4B: If your turn signal is LED (non-serviceable)
- If there is no removable bulb carrier and the turn signal is part of the lamp, replace the outer rear tail lamp assembly.
- Transfer or install a new outer tail lamp gasket/seal onto the replacement lamp if applicable.
Step 5: Reinstall the tail lamp and torque fasteners
- Position the lamp on the body and align the locating pin(s) and studs.
- Hand-thread the nuts first to avoid cross-threading.
- Use an 8mm socket and torque wrench (inch-pound or low-range Nm) to tighten the nuts evenly: Torque to 5 Nm (44 in-lbs).
- Reconnect the electrical connector until it clicks into place.
Step 6: Refit the trunk liner
- Reinstall the liner/access flap and push clips back in using a plastic trim removal tool set (or by hand).
✅ After Repair
- 🔁 Turn the ignition on and test left/right rear turn signals and hazards.
- 🚦 Verify the turn signal flashes at a normal speed (fast flash can indicate a bulb/outage detection issue).
- 🌧️ After your next car wash or rain, check the trunk corner for moisture (a pinched gasket can leak).
💰 DIY vs Shop Cost
Shop Cost: $120-$350 (parts + labor, higher if LED tail lamp assembly)
DIY Cost: $5-$40 (bulb) or $150-$300 (tail lamp assembly)
You Save: $80-$200 by doing it yourself!
Shop labor rates vary but typically run $100-$150/hour. This repair takes a shop approximately 0.5-1.0 hours.
🎯 Ready to get started?
HowToo makes it easy: same-day/2-day shipping on every part, plus all the tools and specialty tools you need! Check out the parts and tools sections below to add everything to your cart.