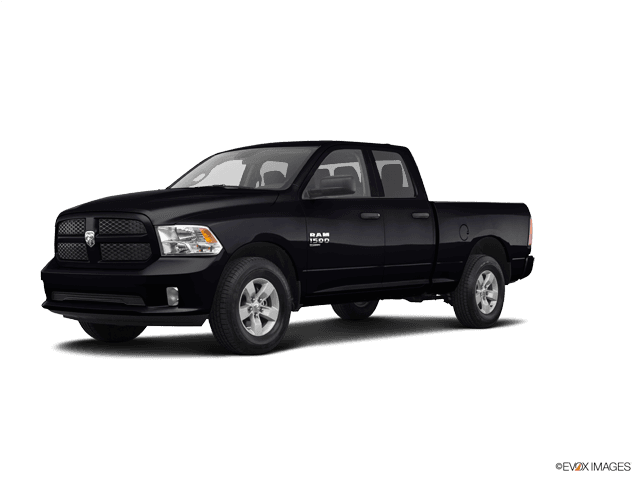


How to Replace Rear Turn Signal Bulbs on a 2020 Ram 1500 Classic
Step-by-step rear turn signal bulb replacement with tools, bulb type (3157A), torque specs, and safety tips for 2019, 2020
How to Replace Rear Turn Signal Bulbs on a 2020 Ram 1500 Classic
Step-by-step rear turn signal bulb replacement with tools, bulb type (3157A), torque specs, and safety tips for 2019, 2020
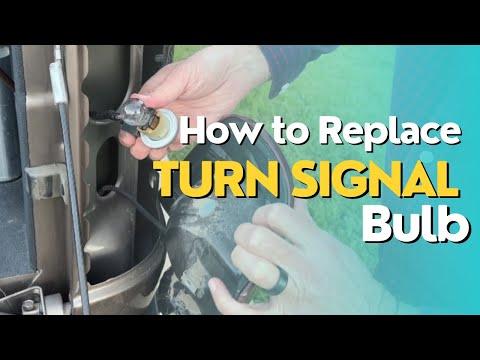
1500 Classic - Rear Turn Signal Bulb Replacement 💡
Nice and beginner-friendly job. I’ll walk you through it step by step.
Safety & Prep ⚠️
- 🧯 Safety first: Park on level ground, set the parking brake, and turn the ignition OFF.
- 🔌 Power: Turn off lights and hazard flashers so the circuit is not live.
- 🧤 Gloves: Wear clean gloves so skin oils don’t get on the new bulb (can shorten bulb life).
Parts You Need 📦
- 💡 Rear turn signal bulb (each side):
- Type: 3157A (amber) dual-filament bulb (used for turn/brake on many 1500 Classic tail lamps).
- I recommend replacing both sides so brightness and color match.
If your truck has aftermarket tail lights, the bulb type may differ.
Tools You Need 🧰
- 🔧 Torx T25 screwdriver or bit: Torx is a star-shaped screw head used on many tail lamps.
- 🔧 Ratchet + 1/4" drive with T25 bit (optional, but easier if screws are tight).
- 🪛 Plastic trim tool or plastic pry tool: A non-metal tool to gently pry the lamp if it’s stuck.
- 🧽 Clean rag: To wipe dust from the lamp area and your hands.
Step 1 – Open the Tailgate 🚪
- 📂 Lower the tailgate fully. This exposes the inner edge of the tail light assembly on each side.
Step 2 – Remove Tail Light Screws 🔩
- 🪛 On the side you’re working on, look at the inner vertical edge of the tail light (next to the tailgate opening).
- 🪛 You’ll see two Torx screws (T25) holding the tail light:
- One near the top.
- One near the bottom.
- 🧰 Use the T25 driver to remove both screws. Turn counterclockwise to loosen.
- 📦 Put the screws somewhere safe so they don’t fall or get lost.
Step 3 – Pull the Tail Light Off the Truck 🚙
- ✋ Hold the tail light housing with both hands.
- ↔️ Pull it straight back toward you (away from the truck).
- There are plastic alignment pins/clips on the outer edge that pop out of rubber grommets.
- 🧰 If it feels stuck, gently wiggle it side-to-side while pulling straight back. Use a plastic trim tool at the outer edge if needed, but don’t pry hard.
- ⚠️ Don’t yank; the wiring harness is still connected behind the lamp.
Step 4 – Find the Rear Turn Signal Bulb Socket 💡
- 🔍 On the back of the tail light, you’ll see multiple bulb sockets in the housing.
- For most 1500 Classic tail lamps:
- Top socket: Tail/stop/turn (3157A) – this is usually your turn signal bulb.
- Middle/bottom: Reverse light and/or running light depending on configuration.
- 🔄 The sockets twist into the housing. The turn signal socket will have an amber bulb (or clear bulb behind amber lens).
Step 5 – Remove the Bulb Socket 🔁
- ✋ Grip the correct socket firmly.
- 🔄 Turn the socket counterclockwise about 1/4 turn until it stops.
- 📤 Pull the socket straight out of the tail light housing.
Step 6 – Remove the Old Bulb 🧯
- 🧤 Hold the socket in one hand and the bulb base in the other.
- 📤 Pull the bulb straight out of the socket. It’s a push-in wedge bulb (no twist, just pull).
- 🧹 If it’s stuck, gently wiggle while pulling straight out.
Step 7 – Install the New Bulb ✨
- 🧤 Handle the new bulb by the base if possible. If you touch the glass, wipe it with a clean rag.
- 📥 Push the new 3157A bulb straight into the socket until it seats firmly.
- ⚠️ Make sure it’s fully seated; a loose bulb can flicker or not work.
Step 8 – Reinstall the Socket 🔄
- 📐 Line up the tabs on the socket with the slots in the tail light housing.
- 📥 Insert the socket into the opening.
- 🔄 Turn the socket clockwise about 1/4 turn until it locks in place.
Step 9 – Refit the Tail Light to the Truck 🚚
- 📏 Check that the wiring harness is not twisted or pinched.
- 📐 Line up the alignment pins on the outer edge of the tail light with the holes in the truck body.
- 📥 Push the tail light straight in until the pins snap into place and the lamp sits flush with the body.
Step 10 – Reinstall the Screws & Torque 🔧
- 🔩 Reinstall the two T25 screws on the inner edge.
- 🔧 Tighten them snug:
- Spec is about 2–3 N·m (18–27 in-lb) – basically just snug, not “gorilla tight.”
- ⚠️ Do not overtighten; you can crack the plastic housing.
Step 11 – Test the Lights ✅
- 🔑 Turn the ignition to RUN (engine can be off).
- 🔁 Turn on the left or right turn signal for the side you replaced.
- 👀 Check:
- Bulb flashes at normal speed (not very fast).
- Brightness matches the other side.
- 🚨 Also test the hazard lights to confirm both sides work.
Do the Other Side Too 🔄
- 🔁 Repeat the same steps on the other rear turn signal. It’s best practice to replace bulbs in pairs.
Tips & Tricks 🧠
- 🧽 Clean the lens area: While the tail light is off, wipe dirt from the body and lamp seal area to help prevent leaks.
- 💦 Check the foam seal: If the foam gasket on the back of the tail light is damaged, water can get in; replace the seal if it’s torn or crumbling.
- 🔧 LED upgrade: If you ever switch to LED bulbs, you may need resistors or a compatible flasher to avoid hyper-flash (fast blinking).
If you’d like, tell me if your tail lights are stock or aftermarket (clear/black housings, etc.), and I can confirm the exact bulb position for your turn signal.
HowToo makes it easy: below this answer you’ll see compatible bulbs and basic tools you can add to your cart, with same-day/2-day shipping on most items! 🛒