









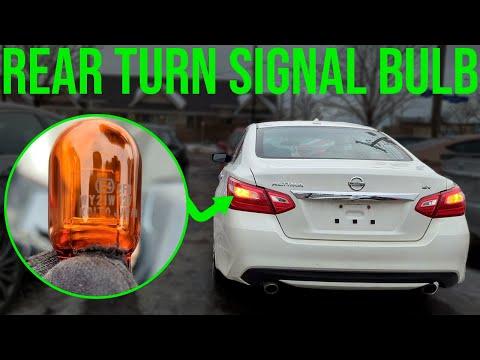






How to Replace Rear Turn Signal Bulbs on a 2018 Nissan Altima
Step-by-step DIY guide with trunk access tips, tools, parts, and safety checks for 2017, 2018
How to Replace Rear Turn Signal Bulbs on a 2018 Nissan Altima
Step-by-step DIY guide with trunk access tips, tools, parts, and safety checks for 2017, 2018


🔧 Altima - Rear Turn Signal Bulb Replacement
Replacing the rear turn signal bulbs on your Altima is a beginner-friendly job. You’ll access the rear lamp housing from inside the trunk, remove the bulb socket, and install a new amber turn signal bulb.
Difficulty Level: Beginner | Estimated Time: 15-30 minutes
⚠️ Safety & Precautions
- ⚠️ Turn the ignition off and remove the key before starting.
- ⚠️ Let the bulbs cool if the lights were recently on.
- ⚠️ Wear gloves or avoid touching the glass part of the new bulb with bare fingers.
- ⚠️ No battery disconnect is normally required for this bulb replacement.
🔧 Required Tools
You'll need the following tools for this repair:
- Trim panel removal tool
- Flat-blade screwdriver
- Clean nitrile gloves
- Safety glasses
🔩 Required Parts
HowToo sells all the parts you need for this repair:
- Rear turn signal bulb, amber - Qty: 1 per side
- Rear turn signal bulbs, amber - Replace in pairs - Qty: 2
📋 Before You Begin
- Park your Altima on level ground.
- Shift to Park and set the parking brake.
- Turn off the ignition and all exterior lights.
- Open the trunk fully so you have room to work.
- A trim panel removal tool is a plastic pry tool used to remove clips without scratching panels.
🔨 Step-by-Step Instructions
Follow these steps in order:
Step 1: Open the Trunk and Locate the Access Area
- Open the trunk lid fully.
- Go to the side where the turn signal bulb is being replaced.
- Look at the trunk side trim directly behind the rear lamp assembly.
- Use a trim panel removal tool to gently loosen the trunk liner or access flap.
- Work slowly to avoid breaking clips.
Step 2: Move the Trunk Trim Aside
- Use a flat-blade screwdriver or trim panel removal tool to remove any plastic push clips if needed.
- A push clip is a small plastic fastener that holds trim panels in place.
- Pull the trunk liner back just enough to reach the bulb sockets behind the tail lamp.
- Do not yank the trim; just flex it gently out of the way.
Step 3: Identify the Rear Turn Signal Bulb Socket
- Find the bulb socket for the rear turn signal inside the rear lamp housing.
- The turn signal bulb socket is typically the socket for the amber flashing bulb.
- If unsure, turn the hazard lights on briefly, watch which socket flashes, then turn the lights off again before removing it.
- Use safety glasses while working close to the trunk trim and lamp housing.
Step 4: Remove the Bulb Socket
- Grip the turn signal bulb socket by hand.
- Rotate the socket counterclockwise about a quarter turn.
- Pull the socket straight out of the rear lamp housing.
- No torque spec applies because the socket is hand-tight only.
- Do not pull on the wires.
Step 5: Remove the Old Bulb
- Put on clean nitrile gloves.
- Pull the old rear turn signal bulb straight out of the socket by hand.
- If the bulb is stuck, gently wiggle it while pulling straight out.
- Check the socket for heat damage, corrosion, or melted plastic.
Step 6: Install the New Bulb
- Hold the new rear turn signal bulb, amber with clean nitrile gloves.
- Push the new bulb straight into the socket until it seats fully.
- Do not force it at an angle.
- If you touched the glass, wipe it clean with a dry lint-free cloth before installing.
Step 7: Reinstall the Bulb Socket
- Insert the bulb and socket back into the rear lamp housing.
- Turn the socket clockwise by hand until it locks in place.
- Make sure it is snug and even.
- No torque spec applies because this is a hand-locking bulb socket.
Step 8: Test the Turn Signal
- Turn the ignition to ON without starting the engine.
- Switch on the turn signal for the side you repaired.
- Walk to the rear and confirm the bulb flashes normally.
- Also press the hazard switch and confirm both rear turn signals flash.
- If the signal flashes very fast, the bulb may not be seated correctly or the wrong bulb may be installed.
Step 9: Reinstall the Trunk Trim
- Turn the ignition and lights back off.
- Move the trunk liner back into position by hand.
- Use the trim panel removal tool or your fingers to reinstall any plastic push clips.
- Press each clip until it sits flush with the trim.
- Close the trunk and check that nothing is pinched.
✅ After Repair
- ✅ Test the left turn signal, right turn signal, and hazard lights.
- ✅ Confirm the dash indicator flashes at a normal speed.
- ✅ Check the lamp housing from outside to make sure the bulb is bright and amber.
- ✅ If one bulb failed, replacing both rear turn signal bulbs is recommended so brightness and age match.
💰 DIY vs Shop Cost
Shop Cost: $50-$120 per side parts + labor
DIY Cost: $5-$20 per bulb parts only
You Save: $45-$100 by doing it yourself!
Shop labor rates vary but typically run $100-$150/hour. This repair takes a shop approximately 0.3-0.5 hours.
🎯 Ready to get started?
HowToo makes it easy: same-day/2-day shipping on every part, plus all the tools and specialty tools you need! Check out the parts and tools sections below to add everything to your cart.