









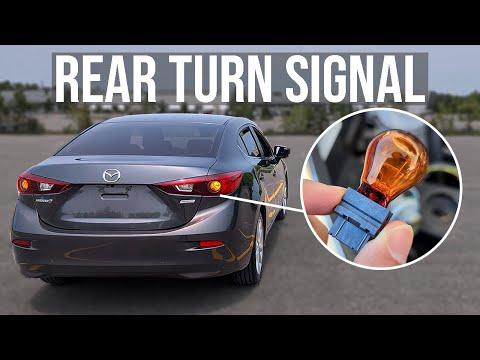







How to Replace Rear Turn Signal Bulbs on a 2018 Mazda 3 (7440A)
Step-by-step trunk access instructions, required tools/parts, safety tips, and testing for fast-blink fixes for 2007, 2008, 2009, 2010, 2011, 2012, 2013, 2014, 2015, 2016, 2017, 2018
How to Replace Rear Turn Signal Bulbs on a 2018 Mazda 3 (7440A)
Step-by-step trunk access instructions, required tools/parts, safety tips, and testing for fast-blink fixes for 2007, 2008, 2009, 2010, 2011, 2012, 2013, 2014, 2015, 2016, 2017, 2018


🔧 Mazda3 - Rear Turn Signal Bulb Replacement
You’ll access the rear lamp from inside the trunk, remove the turn-signal bulb socket, and swap the bulb. This fixes a fast-blinking turn signal, a warning message, or a dead rear indicator.
Difficulty Level: Beginner | Estimated Time: 0.3-0.7 hours
⚠️ Safety & Precautions
- ⚠️ Turn lights off and let bulbs cool before touching.
- ⚠️ Support the trunk so it can’t drop on you while working.
- ⚠️ Avoid touching a glass bulb with bare fingers (skin oils can shorten bulb life).
- ⚠️ Battery disconnect is not required for this job.
🔧 Required Tools
You'll need the following tools for this repair:
- Trim removal tool (plastic)
- 10mm socket
- 1/4" ratchet
- Flashlight
- Nitrile gloves
- Safety glasses
🔩 Required Parts
HowToo sells all the parts you need for this repair:
- Rear turn signal bulb (amber, typically 7440A) - Replace in pairs - Qty: 2
📋 Before You Begin
- 🅿️ Park on level ground and shift to Park.
- 🧰 Open the trunk and remove loose cargo so you can reach the side panels.
- 🔎 Confirm you’re replacing the rear turn signal (amber blink) and not the brake or reverse light.
🔨 Step-by-Step Instructions
Follow these steps in order:
Step 1: Get access to the rear lamp area (inside the trunk)
- Use a flashlight to look behind the tail lamp area on the side you’re fixing.
- If there’s a small carpet access door, open it by hand or gently with a trim removal tool (plastic).
- If there’s no access door, gently pull the trunk side liner back using a trim removal tool (plastic) (this is the carpeted panel).
Step 2: Remove the turn signal bulb socket
- Locate the bulb socket going into the tail lamp (it has wires going to it).
- Grip the socket and rotate it counterclockwise about 1/4 turn by hand, then pull it straight out.
- Turn-signal socket is usually the outer-lamp socket.
Step 3: Remove the old bulb
- Wear nitrile gloves.
- Pull the bulb straight out of the socket (this style is typically a wedge-base bulb, meaning it just pulls out).
Step 4: Install the new bulb
- Push the new rear turn signal bulb (amber, typically 7440A) straight into the socket until fully seated.
- If your replacement bulb is glass, avoid touching the glass; hold it by the base using nitrile gloves.
Step 5: Reinstall the socket and close up
- Reinsert the socket into the tail lamp housing, then turn it clockwise until it locks.
- Reposition the trunk liner and press any clips back in by hand (use the trim removal tool (plastic) only if needed).
Step 6: If you had to remove any 10mm fasteners (only if equipped)
- Some trunk liners or retainers use small fasteners; remove/install using a 10mm socket and 1/4" ratchet.
- If you removed a lamp retaining nut for access, snug it gently—these studs can break if over-tightened.
✅ After Repair
- ✅ Test the turn signal on that side and the hazards to confirm normal blink speed.
- ✅ Verify the bulb socket is locked (no moisture gap).
- ✅ Repeat on the other side if you’re replacing in pairs (recommended).
💰 DIY vs Shop Cost
Shop Cost: $80-$150 (parts + labor)
DIY Cost: $10-$30 (parts only)
You Save: $70-$120 by doing it yourself!
Shop labor rates vary but typically run $100-$150/hour. This repair takes a shop approximately 0.3-0.6 hours.
🎯 Ready to get started?
HowToo makes it easy: same-day/2-day shipping on every part, plus all the tools and specialty tools you need! Check out the parts and tools sections below to add everything to your cart.