


How to Replace Rear Turn Signal Bulb (or LED Tail Lamp) on a 2020 Chevrolet Traverse
Step-by-step tail lamp removal, bulb/socket swap, tools needed, and torque specs for reassembly
How to Replace Rear Turn Signal Bulb (or LED Tail Lamp) on a 2020 Chevrolet Traverse
Step-by-step tail lamp removal, bulb/socket swap, tools needed, and torque specs for reassembly
🔧 Traverse - Rear Turn Signal Bulb Replacement
On your Traverse, the rear turn signal may be a traditional replaceable bulb or an LED unit that’s built into the tail lamp (no separate bulb). The job is usually done by removing the rear tail lamp and swapping the bulb socket, then reinstalling the lamp without damaging the alignment pins.
Difficulty Level: Beginner | Estimated Time: 0.5-1.0 hours
⚠️ Safety & Precautions
- ⚠️ Let the exhaust cool before working near the rear bumper.
- ⚠️ Turn the lights off and remove the key/fob from the vehicle area to prevent lights cycling.
- ⚠️ Wear gloves; bulbs can be hot and glass can cut.
- ⚠️ If your rear turn signal is LED, don’t force a “bulb socket” that isn’t there—those lamps are serviced as an assembly.
- ⚠️ Battery disconnect is not required for this job.
🔧 Required Tools
You'll need the following tools for this repair:
- Nitrile gloves
- Safety glasses
- Plastic trim removal tool
- 1/4" ratchet
- 3" extension for 1/4" drive
- 10mm socket
- Torque wrench (inch-pound) 20-100 in-lb range
- Clean shop towel
🔩 Required Parts
HowToo sells all the parts you need for this repair:
- Rear turn signal bulb (amber) - Check old bulb number (commonly 7440/7440A) - Qty: 1
- Dielectric grease (electrical) - Qty: 1
- Rear tail lamp assembly (only if your turn signal is LED/non-serviceable) - Replace in pairs recommended - Qty: 1
📋 Before You Begin
- Park on level ground, shift to Park, and set the parking brake.
- Open the liftgate so you can access the inboard edge of the rear tail lamp.
- Set a shop towel on the bumper corner under the lamp to protect paint.
🔨 Step-by-Step Instructions
Follow these steps in order:
Step 1: Confirm whether you have a replaceable bulb or LED
- Turn the hazard lights on and walk to the rear to confirm which side is out.
- Turn hazards back off.
- Open the liftgate and look at the inside edge of the tail lamp for fasteners.
- If you later find a twist-out bulb socket behind the lamp, you have a replaceable bulb. If you only find an electrical connector going into the lamp with no removable socket, it’s LED (lamp assembly replacement).
Step 2: Remove the rear tail lamp fasteners
- Use a 10mm socket, 3" extension, and 1/4" ratchet to remove the tail lamp retaining fasteners on the inboard edge (near the liftgate opening).
- Place the fasteners somewhere safe so they don’t fall into the body cavity.
- Torque to 27 in-lb (3 N·m) during reinstallation (low torque into lamp studs; don’t overtighten).
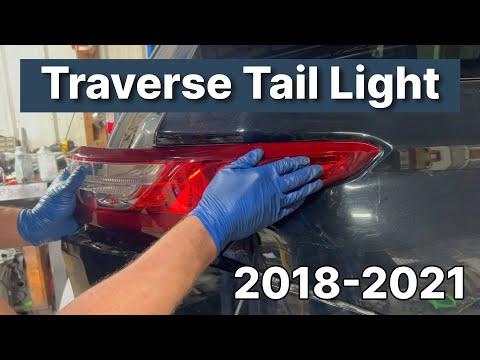
Step 3: Release the tail lamp from the body
- Hold the lamp with both hands.
- Pull the lamp straight rearward to release the alignment pins (they locate the lamp). Don’t pry on the painted edge.
- If it’s stuck, use a plastic trim removal tool gently at the lamp-to-body seam to start it moving.
Step 4: Remove the turn signal bulb (replaceable-bulb setup)
- Find the turn signal bulb socket on the back of the tail lamp (usually an amber bulb socket).
- Twist the socket counterclockwise by hand to remove it (a “socket” is the plastic holder that locks the bulb into the lamp).
- Pull the bulb straight out of the socket.
- Install the new bulb by pushing it straight in (don’t touch glass with bare fingers; use nitrile gloves or a clean shop towel).
- Add a tiny amount of dielectric grease (electrical) to the socket seal if it looks dry.
- Reinstall the socket and twist clockwise until it locks.
Step 5: If your turn signal is LED (no bulb socket)
- Disconnect the lamp electrical connector by pressing the lock tab and pulling it off (use plastic trim removal tool only if needed; don’t yank wires).
- Replace the tail lamp assembly (transfer any clips/grommets from the old lamp if they stayed in the body).
Step 6: Reinstall the tail lamp
- Line up the alignment pins with the body grommets, then push the lamp straight forward until it seats flush.
- Reinstall the retaining fasteners using the 10mm socket and 1/4" ratchet.
- Torque to 27 in-lb (3 N·m).
Step 7: Function check
- Turn on the hazards and verify the repaired side flashes normally.
- Verify brake lights and tail lights still work on that side.
✅ After Repair
- Confirm the lamp sits flush and the panel gaps look even.
- Recheck operation at night: turn signal, brake, tail, and reverse (if applicable in that lamp).
- If the new bulb still doesn’t work, the next checks are the socket corrosion and the rear lighting fuse/BCM output.
💰 DIY vs Shop Cost
Shop Cost: $80-$200 (bulb + labor) / $350-$900 (if LED tail lamp assembly)
DIY Cost: $5-$25 (bulb) / $180-$450 (tail lamp assembly)
You Save: $60-$450 by doing it yourself!
Shop labor rates vary but typically run $100-$150/hour. This repair takes a shop approximately 0.5-1.0 hours.
🎯 Ready to get started?
HowToo makes it easy: same-day/2-day shipping on every part, plus all the tools and specialty tools you need! Check out the parts and tools sections below to add everything to your cart.
Guide for replace for these Chevrolet vehicles
| Year Make Model | Sub Model | Engine | Body Style |
|---|
