


How to Replace Rear Turn Signal Bulb on a 2016 Ford Edge (Fast Blink Fix)
Step-by-step tail lamp removal, bulb/LED checks, required tools & parts, and 5 Nm (44 in-lb) torque spec
How to Replace Rear Turn Signal Bulb on a 2016 Ford Edge (Fast Blink Fix)
Step-by-step tail lamp removal, bulb/LED checks, required tools & parts, and 5 Nm (44 in-lb) torque spec


🔧 Edge - Rear Turn Signal Bulb Replacement
You’ll remove the rear tail lamp housing, swap the turn-signal bulb, then reinstall the lamp so it seals properly. This restores proper signaling and helps you avoid fast-blink “bulb out” warnings.
Difficulty Level: Beginner | Estimated Time: 0.5-1.0 hours
Assumption: Your Edge has a serviceable rear turn-signal bulb (some lamp packages use non-serviceable LED; that path is included below).
⚠️ Safety & Precautions
- ⚠️ Turn the ignition off and remove the key/fob from the vehicle.
- ⚠️ Let the tail lamp area cool if lights were on (bulbs can be hot).
- ⚠️ Wear gloves to avoid cutting yourself on sheet metal edges.
- ⚠️ Do not touch a new bulb’s glass with bare fingers (skin oil can shorten bulb life).
🔧 Required Tools
You'll need the following tools for this repair:
- Safety glasses
- Nitrile gloves
- Plastic trim removal tool
- 8mm socket
- 1/4" drive ratchet
- 6" socket extension
- Small flat-blade screwdriver
- Torque wrench (in-lb or Nm)
- Flashlight
🔩 Required Parts
HowToo sells all the parts you need for this repair:
- Rear turn signal bulb (amber, vehicle-matched) - Qty: 1
- Rear turn signal bulb (amber, vehicle-matched) - Qty: 1 (replace in pairs is recommended)
📋 Before You Begin
- Park on level ground and set the parking brake.
- Open the liftgate for access to the rear lamp fasteners.
- Set a towel on the bumper corner to protect the paint while you handle the lamp.
🔨 Step-by-Step Instructions
Follow these steps in order:
Step 1: Confirm the correct side and bulb function
- Turn the hazard lights on briefly, then off (no tools needed).
- Walk around and note which rear turn signal is out or fast-blinking.
Step 2: Access the tail lamp fasteners
- Open the liftgate (no tools needed).
- Use a plastic trim removal tool to open/remove the rear lamp access cover on the inside edge of the cargo opening (if equipped).
- If a push-pin retainer is present, gently lift the center with a small flat-blade screwdriver, then remove the retainer.
Step 3: Remove the rear tail lamp assembly
- Use an 8mm socket, 6" extension, and 1/4" drive ratchet to remove the lamp retaining nuts/bolts you can see from the liftgate opening.
- Support the lamp with your free hand as the last fastener comes off.
- Pull the lamp straight rearward to release the alignment pins (do not pry against painted body panels).
- Tip: Wiggle gently; avoid sharp yanks.
Step 4: Remove the turn-signal bulb socket
- Use a flashlight to locate the turn-signal socket on the back of the lamp (it’s the socket that corresponds to the amber/blinking section).
- Twist the socket counterclockwise by hand to unlock it, then pull it out of the housing.
- Definition: A “bulb socket” is the plastic holder that locks into the lamp and carries power to the bulb.
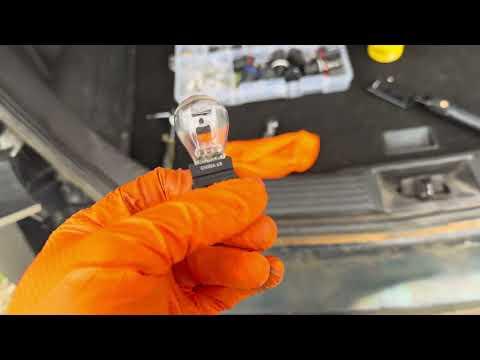
Step 5: Replace the bulb
- Wear nitrile gloves.
- Pull the old bulb straight out of the socket (no tools needed).
- Push the new bulb straight into the socket until fully seated.
- If you accidentally touch the glass, wipe it with a clean dry cloth before installing.
Step 6: Reinstall the socket and lamp
- Insert the socket back into the lamp and twist clockwise by hand until it locks.
- Position the lamp to line up the guide pins, then press it straight into place.
- Reinstall the retaining nuts/bolts using the 8mm socket, extension, and ratchet.
- Torque to 5 Nm (44 in-lbs).
- Reinstall the access cover/retainers using the plastic trim removal tool and small flat-blade screwdriver as needed.
Step 7: If your rear turn signal is LED (no replaceable bulb)
- If there is no removable bulb socket and the turn signal is part of an LED board, the LED is typically not serviced separately.
- In that case, replace the rear tail lamp assembly (steps are the same for removal/installation, but you transfer wiring connectors instead of a bulb).
✅ After Repair
- Turn hazards on and confirm the repaired side flashes normally (no fast blink).
- Check tail lamps, brake lights, and reverse lights to confirm nothing else was unplugged.
- Verify the lamp sits flush and the seal is even to prevent water leaks.
💰 DIY vs Shop Cost
Shop Cost: $80-$180 (parts + labor)
DIY Cost: $10-$35 (parts only)
You Save: $70-$145 by doing it yourself!
Shop labor rates vary but typically run $100-$150/hour. This repair takes a shop approximately 0.5-1.0 hours.
🎯 Ready to get started?
HowToo makes it easy: same-day/2-day shipping on every part, plus all the tools and specialty tools you need! Check out the parts and tools sections below to add everything to your cart.