









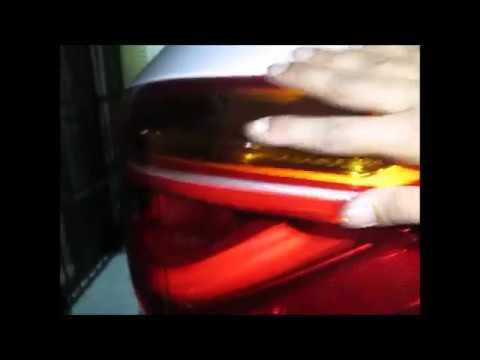







How to Replace Rear Turn Signal Bulb on a 2012-2019 BMW X1 (Outer Tail Lamp)
Step-by-step DIY guide with tools, PY21W bulb info, LED tail lamp notes, and 5 Nm torque spec
How to Replace Rear Turn Signal Bulb on a 2012-2019 BMW X1 (Outer Tail Lamp)
Step-by-step DIY guide with tools, PY21W bulb info, LED tail lamp notes, and 5 Nm torque spec for 2012, 2013, 2014, 2015, 2016, 2017, 2018, 2019


🔧 X1 - Rear Turn Signal Bulb Replacement
On your X1, the rear turn signal is inside the rear tail lamp assembly. Depending on which tail lamp version you have, it’s either a replaceable bulb (common) or an LED that requires replacing the entire lamp (some versions).
Assumption: Your X1 uses a serviceable rear turn-signal bulb in the outer tail lamp. If yours is LED/non-serviceable, follow the “LED tail lamp” notes in the steps.
Difficulty Level: Beginner | Estimated Time: 0.5-1.0 hours
⚠️ Safety & Precautions
- ⚠️ Work on a cool vehicle; tail lamps can be warm after driving.
- ⚠️ Turn the ignition OFF and remove the key/fob from the vehicle.
- ⚠️ Don’t touch a new bulb’s glass with bare fingers; skin oils can shorten bulb life.
- ⚠️ Use plastic trim tools to avoid cracking interior panels.
🔧 Required Tools
You'll need the following tools for this repair:
- Plastic trim removal tool set
- 8mm socket
- 1/4" drive ratchet
- 1/4" drive extension (3"-6")
- Torque wrench (2-20 Nm range)
- Pick tool
- Flashlight
- Nitrile gloves
- Safety glasses
🔩 Required Parts
HowToo sells all the parts you need for this repair:
- Rear turn signal bulb (amber, PY21W) - Replace in pairs - Qty: 2
- Tail lamp bulb carrier/socket (rear, outer lamp) - Optional if melted/corroded - Qty: 1
- Rear outer tail lamp assembly - Only if turn signal is LED/non-serviceable - Qty: 1
📋 Before You Begin
- Park on level ground, shift to Park, and set the parking brake.
- Open the rear hatch and remove cargo so you can access the side panels.
- Keep hardware in a small cup.
🔨 Step-by-Step Instructions
Follow these steps in order:
Step 1: Access the rear tail lamp fasteners
- Open the hatch and go to the side you’re replacing.
- Use a flashlight to locate the small access door/cover in the cargo-side trim behind the tail lamp area.
- Remove the access cover using a plastic trim removal tool set (a trim tool is a plastic pry tool that helps pop panels without damage).
Step 2: Remove the outer tail lamp assembly
- Put on nitrile gloves and safety glasses.
- Use an 8mm socket with a 1/4" drive ratchet and extension (3"-6") to remove the tail lamp retaining nuts (typically 2).
- Support the lamp with your free hand as the last nut comes off.
- Gently pull the lamp straight outward from the body. If it feels stuck, use a plastic trim removal tool set to help release the locating pins—don’t pry hard on the painted edge.
- Disconnect the electrical connector by lifting the lock using a pick tool, then pulling the connector straight off.
Step 3: Remove the bulb carrier (bulb holder)
- On the back of the lamp, locate the bulb carrier (a plastic plate that holds the bulbs).
- Release the carrier’s clips by hand, or carefully with a pick tool if needed.
- Lift the carrier off and inspect for heat damage or corrosion. Melted plastic means replace the carrier.
Step 4: Replace the rear turn signal bulb
- Identify the turn signal bulb position (usually the amber bulb location on the carrier).
- Remove the old bulb by pulling it straight out (or slight twist, depending on carrier style).
- Install the new rear turn signal bulb (amber, PY21W) using nitrile gloves.
Step 5: If your turn signal is LED (non-serviceable)
- If you don’t see a turn signal bulb on the carrier, or the “turn signal” is an LED strip/module, it’s not a bulb service item.
- In that case, replace the rear outer tail lamp assembly instead of a bulb.
- Transfer any reusable pieces (like seals) from the old lamp to the new one if applicable.
Step 6: Reinstall the tail lamp
- Reconnect the electrical connector by pushing it on until it clicks/locks.
- Reinstall the bulb carrier onto the lamp until the clips fully seat.
- Align the locating pins and slide the lamp back into place evenly.
- Install the retaining nuts using an 8mm socket and ratchet, then Torque to 5 Nm (44 in-lbs) using a torque wrench (2-20 Nm range).
- Reinstall the access cover using a plastic trim removal tool set to press it in flush.
✅ After Repair
- Turn ignition ON and test the rear turn signal and hazard lights.
- Verify the lamp sits flush and doesn’t wiggle.
- If you get a bulb warning on the dash, recheck the connector seating and confirm you installed the correct bulb type.
💰 DIY vs Shop Cost
Shop Cost: $120-$250 (parts + labor)
DIY Cost: $10-$40 (parts only, bulb type) or $180-$450 (if LED lamp assembly)
You Save: $80-$210 by doing it yourself!
Shop labor rates vary but typically run $100-$150/hour. This repair takes a shop approximately 0.5-1.0 hours.
🎯 Ready to get started?
HowToo makes it easy: same-day/2-day shipping on every part, plus all the tools and specialty tools you need! Check out the parts and tools sections below to add everything to your cart.
Guide for Turn Signal Light Bulb replace for these BMW vehicles
| Year Make Model | Sub Model | Engine | Body Style |
|---|---|---|---|
| 2019 BMW X1 | - | - | - |
| 2018 BMW X1 | - | - | - |
| 2017 BMW X1 | - | - | - |
| 2016 BMW X1 | - | - | - |
| 2015 BMW X1 | - | - | - |
| 2014 BMW X1 | - | - | - |
| 2013 BMW X1 | - | - | - |
| 2012 BMW X1 | - | - | - |