


How to Replace Rear Shock Absorbers on a 2018-2024 Toyota Camry
Step-by-step instructions with tools, parts, torque specs, and safety tips
How to Replace Rear Shock Absorbers on a 2018-2024 Toyota Camry
Step-by-step instructions with tools, parts, torque specs, and safety tips for 2018, 2019, 2020, 2021, 2022, 2023, 2024
Assumption: This guide covers the rear shock absorbers on your Camry. The front suspension uses struts, which is a different job.
🔧 Rear Shock Absorbers - Replacement
The rear shocks control body bounce and help keep the tires planted. On your Camry, the rear shocks are replaced from underneath the car with the lower trim panels out of the way.
Difficulty Level: Intermediate | Estimated Time: 2-3 hours
⚠️ Safety & Precautions
- Work on level ground and chock the front wheels before lifting the rear.
- Use jack stands; never rely on the floor jack alone. Jack stands are metal supports that hold the car up safely.
- Rear suspension parts can be under spring load. Keep hands clear while removing the lower bolt.
- Do not remove both rear shocks at the same time unless the suspension is fully supported.
- Battery disconnect is not required for this repair.
🔧 Required Tools
You'll need the following tools for this repair:
- Floor jack (rated 3-ton minimum)
- Jack stands (rated 3-ton minimum)
- Wheel chocks
- Ratchet
- 14mm socket
- 17mm socket
- Torque wrench
- Trim clip removal tool
- Breaker bar
- Safety glasses
- Mechanic gloves
- Penetrating oil
🔩 Required Parts
HowToo sells all the parts you need for this repair:
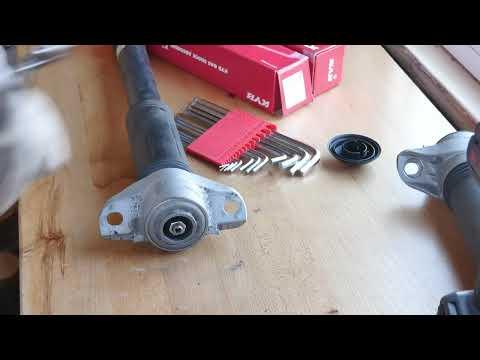
- Rear shock absorber assembly - Qty: 2
- Rear shock mounting hardware - Qty: 2 sets
- Rear trim panel clips - Qty: 1 pack
📋 Before You Begin
- Park on level ground, set the parking brake, and chock the front wheels.
- Loosen the rear wheel lug nuts slightly before lifting if you plan to remove the wheels.
- Spray penetrating oil on the lower shock bolts before starting.
- Replace shocks in pairs to keep handling balanced.
🔨 Step-by-Step Instructions
Follow these steps in order:
Step 1: Lift the rear of the car
- Use the floor jack to raise the rear of the car at the approved lift point.
- Place jack stands under the rear support points and lower the car onto them.
- Remove the rear wheels with the ratchet and 17mm socket if needed for access.
Step 2: Remove rear trunk side trim
- Open the trunk and use the trim clip removal tool to remove the side trunk liner fasteners.
- Pry the liner back enough to expose the upper shock mount nut.
- Keep the clips organized.
Step 3: Support the suspension arm
- Use the floor jack under the rear lower control arm or knuckle to hold the suspension in place.
- This helps prevent sudden movement when the lower bolt is removed.
Step 4: Remove the lower shock bolt
- Use the 17mm socket and breaker bar to remove the lower shock absorber bolt.
- If the bolt is tight, hold the opposite side with a matching wrench if needed.
- Lower the jack slowly once the bolt is out.
Step 5: Remove the upper shock mount nut
- Use the 14mm socket to remove the upper shock mount nut from inside the trunk.
- Pull the shock absorber out from below the car.
- Do one side at a time.
Step 6: Install the new shock absorber
- Position the new shock absorber in place and start the upper nut by hand.
- Raise or lower the suspension slightly with the floor jack to line up the lower bolt hole.
- Install the lower bolt by hand first, then snug both fasteners with the ratchet.
Step 7: Torque the fasteners
- Use the torque wrench and 14mm socket to tighten the upper mount nut to 25 Nm (18 ft-lbs).
- Use the torque wrench and 17mm socket to tighten the lower shock bolt to 95 Nm (70 ft-lbs).
Step 8: Reassemble the trim and wheels
- Reinstall the trunk side liner with the trim clip removal tool.
- If removed, reinstall the wheels and snug the lug nuts with the 17mm socket.
- Lower the car and torque the lug nuts to 103 Nm (76 ft-lbs).
✅ After Repair
- Test drive on a smooth road first, then on a bumpy road.
- Listen for clunks or rattles from the rear.
- Check that the car sits evenly side to side.
- Recheck torque after a short drive if fasteners were disturbed.
💰 DIY vs Shop Cost
Shop Cost: $450-$850 (parts + labor)
DIY Cost: $180-$360 (parts only)
You Save: $270-$490 by doing it yourself!
Shop labor rates vary but typically run $100-$150/hour. This repair takes a shop approximately 2-3 hours.
🎯 Ready to get started?
HowToo makes it easy: same-day/2-day shipping on every part, plus all the tools and specialty tools you need! Check out the parts and tools sections below to add everything to your cart.
Guide for Suspension Shock Absorber replace for these Toyota vehicles
| Year Make Model | Sub Model | Engine | Body Style |
|---|---|---|---|
| 2024 Toyota Camry | - | - | - |
| 2023 Toyota Camry | - | - | - |
| 2022 Toyota Camry | - | - | - |
| 2021 Toyota Camry | - | - | - |
| 2020 Toyota Camry | - | - | - |
| 2019 Toyota Camry | - | - | - |
| 2018 Toyota Camry | - | - | - |
