


How to Replace Rear Shock Absorbers on a 2014 Toyota Camry (DIY Repair Guide)
Step-by-step instructions with required tools, parts list, and torque specs for a safe rear shock replacement
How to Replace Rear Shock Absorbers on a 2014 Toyota Camry (DIY Repair Guide)
Step-by-step instructions with required tools, parts list, and torque specs for a safe rear shock replacement
🔧 Camry - Rear Shock Absorber Replacement
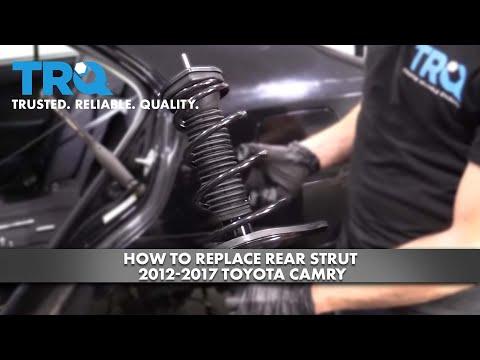
On your Camry, the rear suspension uses separate shock absorbers (the front uses struts, which is a different job). Replacing worn rear shocks restores ride control, reduces bouncing, and helps keep the rear tires planted over bumps.
Difficulty Level: Intermediate | Estimated Time: 1.5-3.0 hours
Assumption: Rear shocks only (not front struts); OEM-style replacement.
⚠️ Safety & Precautions
- ⚠️ Support the car with jack stands on solid points; never rely on a floor jack alone.
- ⚠️ Hybrid safety: keep tools away from any orange high-voltage cables; do not unplug or touch HV connectors.
- ⚠️ Keep the car fully OFF (not in READY) and keep the key fob away from the car while working.
- ⚠️ Wear eye protection when working under the wheel well and when removing trim clips.
🔧 Required Tools
You'll need the following tools for this repair:
- Floor jack (rated 2-ton minimum)
- Jack stands (rated 2-ton minimum, pair)
- Wheel chocks
- 21mm lug nut socket
- 3/8" drive ratchet
- 1/2" drive breaker bar
- Socket set (10mm, 12mm, 14mm, 17mm, 19mm)
- Combination wrench set (14mm, 17mm, 19mm)
- Torque wrench (20-200 Nm range)
- Trim clip removal tool
- Flathead screwdriver
- Penetrating oil
- Paint marker
- Mechanic gloves
- Safety glasses
🔩 Required Parts
HowToo sells all the parts you need for this repair:
- Rear shock absorbers - Replace in pairs - Qty: 2
- Rear shock upper mounting nuts - Qty: 4
- Rear shock lower mounting bolts/nuts - Qty: 2
📋 Before You Begin
- Park on level ground, shift to P, and set the parking brake.
- Place wheel chocks at the front wheels.
- Open the trunk; you’ll be removing small trunk side trim panels to reach the upper shock nuts.
- “Trim clips” are plastic fasteners—pry gently.
🔨 Step-by-Step Instructions
Follow these steps in order:
Step 1: Loosen rear wheel lug nuts
- Use a 21mm lug nut socket and a breaker bar to loosen (do not remove) the rear lug nuts about 1/2 turn.
Step 2: Lift and support the rear of the car
- Use a floor jack to lift the rear.
- Set the car onto jack stands at solid rear lift/support points.
- Remove both rear wheels using the 21mm lug nut socket.
Step 3: Access the upper shock mounts in the trunk
- Use a trim clip removal tool and flathead screwdriver to carefully remove the trunk side trim/liner pieces near the rear wheel well area.
- Locate the shock’s upper mounting nuts (one shock per side).
- Put clips in a cup so they don’t vanish.
Step 4: Support the rear suspension arm
- Place the floor jack under the rear suspension arm (near the shock area) with light upward pressure.
- This keeps the suspension from dropping when the shock bolt comes out.
Step 5: Remove the lower shock bolt
- Spray the lower shock fastener with penetrating oil and wait a minute.
- Use a 17mm or 19mm socket with a ratchet (and a matching combination wrench to hold the other side if needed) to remove the lower shock bolt/nut.
- If it’s tight, use the breaker bar carefully.
Step 6: Remove the upper shock nuts
- From inside the trunk, use a 14mm socket and ratchet to remove the upper shock mounting nuts.
- Keep one hand on the shock so it doesn’t drop suddenly once the last nut is off.
Step 7: Remove the shock absorber
- Lower the floor jack slightly (only as needed) and wiggle the shock out through the wheel well.
- Compare the old and new shocks side-by-side (length, mounts) before installing.
Step 8: Install the new shock absorber
- Position the new shock in place from the wheel well.
- Start the upper nuts by hand in the trunk using the 14mm socket (do not fully tighten yet).
- Line up the lower mount and insert the lower bolt by hand; use the floor jack to raise/lower the suspension arm slightly until the bolt slides through smoothly.
- If it won’t line up, adjust the jack height.
Step 9: Torque the shock fasteners
- Torque the lower shock bolt using a torque wrench: Torque to 103 Nm (76 ft-lbs).
- Torque the upper shock nuts using a torque wrench: Torque to 39 Nm (29 ft-lbs).
- Repeat Steps 4–9 for the other side.
Step 10: Reinstall trunk trim and wheels
- Reinstall the trunk liners/clips using the trim clip removal tool (reverse of removal).
- Reinstall wheels and hand-thread lug nuts using the 21mm lug nut socket.
- Lower the car off the jack stands using the floor jack.
- Torque lug nuts in a star pattern with a torque wrench: Torque to 103 Nm (76 ft-lbs).
✅ After Repair
- Do a short test drive over a few bumps at low speed. Listen for clunks (a common sign a fastener isn’t fully seated/torqued).
- Re-check lug nut torque after the test drive: 103 Nm (76 ft-lbs).
- Rear shocks alone usually do not require alignment, but if the car still feels unstable, have the suspension inspected.
💰 DIY vs Shop Cost
Shop Cost: $350-$750 (parts + labor)
DIY Cost: $120-$350 (parts only)
You Save: $230-$400 by doing it yourself!
Shop labor rates vary but typically run $100-$150/hour. This repair takes a shop approximately 1.5-2.5 hours.
🎯 Ready to get started?
HowToo makes it easy: same-day/2-day shipping on every part, plus all the tools and specialty tools you need! Check out the parts and tools sections below to add everything to your cart.
Guide for Suspension Shock Absorber Mount Bushing replace for these Toyota vehicles
| Year Make Model | Sub Model | Engine | Body Style |
|---|
