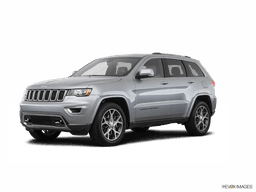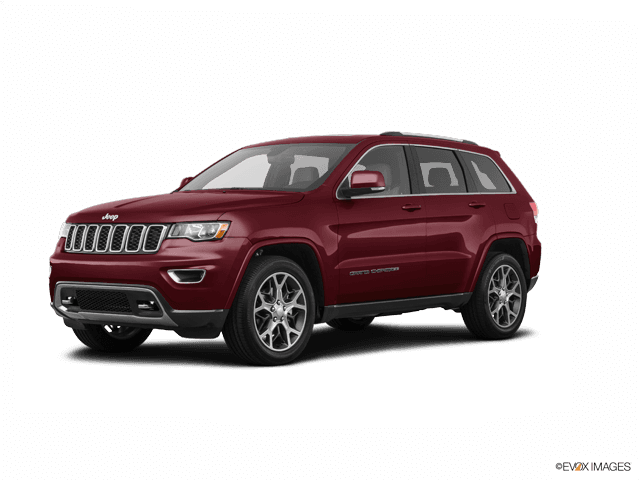









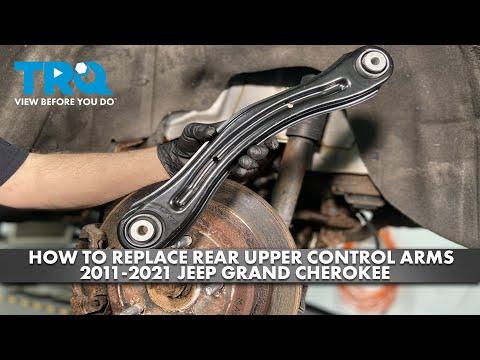







How to Replace Rear Control Arms on a 2018 Jeep Grand Cherokee
Step-by-step rear suspension arm guide with tools, parts, torque specs, and alignment tips for 2016, 2017, 2018, 2019, 2020, 2021
How to Replace Rear Control Arms on a 2018 Jeep Grand Cherokee
Step-by-step rear suspension arm guide with tools, parts, torque specs, and alignment tips for 2016, 2017, 2018, 2019, 2020, 2021


🔧 Grand Cherokee - Rear Control Arm Replacement
This repair replaces the rear suspension control arms on your Grand Cherokee. The rear suspension uses multiple links/control arms per side, so this guide covers the common rear upper and lower control/link arms and explains how to keep the alignment close enough to drive safely to an alignment shop.
Difficulty Level: Advanced | Estimated Time: 3-6 hours
⚠️ Safety & Precautions
- ⚠️ Support your Grand Cherokee with jack stands. Never work under a vehicle held up only by a floor jack.
- ⚠️ The rear suspension and differential are heavy. Keep fingers clear when removing bolts.
- ⚠️ Do not remove all rear links at once. Replace one arm at a time so the suspension does not shift suddenly.
- ⚠️ Final-tighten control arm bolts at normal ride height. Tightening with the suspension hanging can tear new bushings.
- ⚠️ A four-wheel alignment is required after replacing rear control arms.
- ⚠️ Battery disconnect is not required for this mechanical repair.
🔧 Required Tools
You'll need the following tools for this repair:
- Floor jack (rated 3-ton minimum)
- Jack stands (rated 3-ton minimum)
- Wheel chocks
- Safety glasses
- Mechanic gloves
- 1/2-inch drive breaker bar
- 1/2-inch drive torque wrench (up to 200 ft-lbs)
- 3/8-inch drive ratchet
- 1/2-inch drive ratchet
- 21mm socket
- 18mm socket
- 15mm socket
- 21mm wrench
- 18mm wrench
- 15mm wrench
- Pry bar set
- Dead blow hammer
- Paint marker
- Tape measure
- Penetrating oil
- Wire brush
🔩 Required Parts
HowToo sells all the parts you need for this repair:
- Rear upper control arm/link - Left: Qty: 1
- Rear upper control arm/link - Right: Qty: 1
- Rear lower control arm/link - Left: Qty: 1
- Rear lower control arm/link - Right: Qty: 1
- Rear toe link - Left: Qty: 1
- Rear toe link - Right: Qty: 1
- Rear control arm mounting bolt and nut kit - Qty: 1
- Rear stabilizer bar link nuts - Qty: 2
📋 Before You Begin
- 🅿️ Park your Grand Cherokee on level ground and set the parking brake.
- 🧱 Place wheel chocks in front of the front wheels.
- 📏 Measure from the center of each rear wheel hub to the lower edge of the fender. Write both measurements down.
- 🖊️ Use a paint marker to mark any eccentric/cam washer positions before loosening bolts. These washers affect alignment.
- 💧 Spray penetrating oil on every rear control arm bolt and nut. Let it soak for 10-15 minutes.
- 🛞 Loosen the rear wheel lug nuts slightly before lifting the vehicle.
- 🔧 Replace one arm at a time. This keeps the rear suspension located and makes the job safer.
🔨 Step-by-Step Instructions
Follow these steps in order:
Step 1: Lift and Support the Rear
- Use a 21mm socket and 1/2-inch drive breaker bar to loosen the rear wheel lug nuts one turn.
- Use the floor jack under the approved rear lift point to raise the rear of your Grand Cherokee.
- Place jack stands under the approved rear frame support points.
- Lower the vehicle gently onto the jack stands.
- Keep the floor jack nearby to support the lower control arm or rear knuckle as needed.
Step 2: Remove the Rear Wheel
- Use a 21mm socket to remove the lug nuts.
- Remove the rear wheel.
- Place the wheel flat under the side of the vehicle as an extra safety backup.
- Keep lug nuts in one place.
Step 3: Clean and Mark the Alignment Bolts
- Use a wire brush to clean dirt and rust from the rear control arm mounting bolts.
- Use a paint marker to mark the position of each cam washer or eccentric washer before loosening it.
- An eccentric washer is an offset washer that changes wheel alignment when rotated.
- These marks help you drive carefully to the alignment shop, but they do not replace a real alignment.
Step 4: Support the Rear Suspension Arm or Knuckle
- Place the floor jack under the rear lower control arm or rear knuckle.
- Raise it slightly until it just supports the suspension weight.
- The knuckle is the metal part that holds the wheel hub and connects the suspension arms.
Step 5: Remove the Rear Stabilizer Link if It Blocks Access
- Use an 18mm socket and 18mm wrench to remove the rear stabilizer bar link nut if the link blocks the control arm bolt.
- Move the stabilizer link aside.
- The stabilizer link connects the sway bar to the suspension and helps reduce body lean.
- During installation, tighten the rear stabilizer link nut to Torque to 95 Nm (70 ft-lbs).
Step 6: Replace the Rear Upper Control Arm/Link
- Use an 18mm socket and 18mm wrench to loosen the inner upper control arm bolt and nut.
- Use an 18mm socket and 18mm wrench to loosen the outer upper control arm bolt and nut at the knuckle.
- Remove one bolt at a time while supporting the arm with your hand.
- Use a pry bar set gently if the arm is stuck in the bracket.
- Compare the old and new upper arm to make sure the shape and bushing locations match.
- Install the new upper arm by hand.
- Start both bolts and nuts by hand to avoid cross-threading.
- Snug the bolts with an 18mm socket and 18mm wrench, but do not final-tighten yet.
- Final upper arm/link mounting bolt torque at ride height is Torque to 115 Nm (85 ft-lbs).
Step 7: Replace the Rear Toe Link
- Use a paint marker to clearly mark the toe link adjuster position before loosening it.
- Use a 21mm socket and 21mm wrench to loosen the inner toe link bolt and nut.
- Use an 18mm socket and 18mm wrench to loosen the outer toe link bolt and nut at the knuckle.
- Remove the toe link from the vehicle.
- The toe link controls whether the rear tire points slightly inward or outward.
- Install the new toe link in the same direction as the old one.
- Line up your paint marks as closely as possible.
- Start all hardware by hand first.
- Snug the hardware with a 21mm socket, 21mm wrench, 18mm socket, and 18mm wrench, but do not final-tighten yet.
- Final toe link mounting bolt torque at ride height is Torque to 115 Nm (85 ft-lbs).
Step 8: Replace the Rear Lower Control Arm/Link
- Keep the floor jack lightly supporting the lower control arm.
- Use a 21mm socket and 21mm wrench to loosen the inner lower control arm bolt and nut.
- Use a 21mm socket and 21mm wrench to loosen the outer lower control arm bolt and nut at the knuckle.
- Slowly lower or raise the floor jack a small amount if the bolts are tight from suspension pressure.
- Remove the bolts and take out the lower control arm.
- Use a dead blow hammer to tap the arm loose if needed.
- Compare the old and new lower control arms before installing.
- Install the new lower control arm into the brackets.
- Start the bolts and nuts by hand.
- Snug the bolts with a 21mm socket and 21mm wrench, but do not final-tighten yet.
- Final lower control arm/link mounting bolt torque at ride height is Torque to 135 Nm (100 ft-lbs).
Step 9: Reconnect the Rear Stabilizer Link
- Move the stabilizer link back into position.
- Install the nut by hand.
- Use an 18mm socket, 18mm wrench, and torque wrench to tighten the stabilizer link nut to Torque to 95 Nm (70 ft-lbs).
Step 10: Set the Rear Suspension to Ride Height
- Use the floor jack under the rear lower control arm or knuckle.
- Raise the suspension until the hub-to-fender measurement matches the number you wrote down earlier.
- This puts the bushings in their normal resting position before tightening.
- Do not skip this step.
Step 11: Final-Tighten the Rear Control Arm Bolts
- Use an 18mm socket, 18mm wrench, and torque wrench to tighten the rear upper arm/link bolts to Torque to 115 Nm (85 ft-lbs).
- Use a 21mm socket, 21mm wrench, and torque wrench to tighten the rear lower arm/link bolts to Torque to 135 Nm (100 ft-lbs).
- Use a 21mm socket, 21mm wrench, 18mm socket, 18mm wrench, and torque wrench to tighten the rear toe link bolts to Torque to 115 Nm (85 ft-lbs).
- Make sure any cam washer paint marks still line up closely.
Step 12: Reinstall the Rear Wheel
- Install the wheel onto the hub by hand.
- Use a 21mm socket to snug the lug nuts in a star pattern.
- Use the floor jack to lift the vehicle slightly.
- Remove the jack stands.
- Lower your Grand Cherokee to the ground.
- Use a 21mm socket and torque wrench to tighten the lug nuts to Torque to 176 Nm (130 ft-lbs).
Step 13: Repeat on the Other Rear Side
- Use the same steps on the opposite rear side.
- Replace rear suspension arms in left/right pairs when possible for even handling and tire wear.
✅ After Repair
- ✅ Check that every rear control arm bolt, toe link bolt, stabilizer link nut, and lug nut is torqued.
- ✅ Take a short, slow test drive. Listen for clunks, pops, or rubbing.
- ✅ If the steering wheel is off-center or the vehicle pulls, drive slowly and go directly for alignment.
- ✅ Get a professional four-wheel alignment as soon as possible.
- ✅ Recheck lug nut torque after 25-50 miles.
💰 DIY vs Shop Cost
Shop Cost: $800-$1,700 including parts, labor, and alignment
DIY Cost: $250-$850 parts only, depending on which rear arms are replaced
You Save: $500-$900+ by doing it yourself!
Shop labor rates vary but typically run $100-$150/hour. This repair takes a shop approximately 3-5 hours plus alignment time.
🎯 Ready to get started?
HowToo makes it easy: same-day/2-day shipping on every part, plus all the tools and specialty tools you need! Check out the parts and tools sections below to add everything to your cart.