









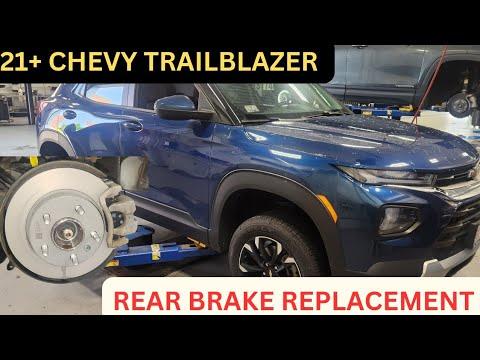







How to Replace Rear Brake Pads & Rotors on a 2021-2022 Chevrolet Trailblazer (EPB Service Mode)
Step-by-step rear brake job with required tools/parts, EPB service mode tips, safety checks, and torque spec notes
How to Replace Rear Brake Pads & Rotors on a 2021-2022 Chevrolet Trailblazer (EPB Service Mode)
Step-by-step rear brake job with required tools/parts, EPB service mode tips, safety checks, and torque spec notes for 2021, 2022


🔧 Trailblazer - Rear Brake Pads & Rotor Replacement
You’ll be removing the rear wheels, replacing the rear brake pads, and swapping the rear rotors on your Trailblazer. The key “gotcha” on many Trailblazers is the electronic parking brake (EPB), which must be put into service mode before pushing the rear caliper pistons back in.
Difficulty Level: Intermediate | Estimated Time: 2-4 hours
⚠️ Safety & Precautions
- Work on level ground and support the vehicle with jack stands before going under or removing wheels.
- Do not press the brake pedal while a caliper is removed; the piston can pop out and leak brake fluid.
- If your Trailblazer has electronic parking brake (EPB), put it in service mode before retracting pistons.
- Brake dust is irritating—use brake cleaner, not compressed air.
- Keep grease off pad/rotor friction surfaces; contaminated parts can cause noise and poor braking.
🔧 Required Tools
You'll need the following tools for this repair:
- Floor jack (rated 3-ton minimum)
- Jack stands (rated 3-ton minimum)
- Wheel chocks
- Breaker bar 1/2"
- 1/2" drive torque wrench (20-200 ft-lbs)
- 3/8" drive ratchet
- 3/8" drive torque wrench (10-80 ft-lbs)
- Metric socket set 8mm-21mm (3/8" drive)
- Metric socket set 10mm-24mm (1/2" drive)
- Torx bit set (T20-T50)
- Hex bit set (4mm-10mm)
- Flat trim tool
- Brake caliper hanger hook
- Brake piston compressor tool (specialty)
- Wire brush
- Rubber mallet
- Micrometer or vernier caliper (specialty)
- Brake cleaner spray
- Nitrile gloves
- Safety glasses
- Scan tool with GM EPB service function (specialty)
🔩 Required Parts
HowToo sells all the parts you need for this repair:
- Rear brake pad set - Qty: 1
- Rear brake rotors - Qty: 2 Replace in pairs
- Rear pad hardware/abutment clip kit - Qty: 1
- Brake caliper slide pin boots (if damaged) - Qty: 1
- High-temp silicone brake lubricant - Qty: 1
- Medium-strength threadlocker - Qty: 1
- Brake cleaner - Qty: 2 cans
📋 Before You Begin
- Confirm whether your Trailblazer has an EPB switch (button) or a mechanical parking brake. If it’s a button, you must use EPB service mode before compressing the pistons.
- Park on level ground, shift to P, and chock the front wheels.
- Loosen rear wheel lug nuts slightly using a breaker bar and the correct socket before lifting.
- Open the hood and locate the brake fluid reservoir; you may need to remove a little fluid if it overflows when pistons are pushed back. Use a clean syringe or turkey baster (keep it clean).
🔨 Step-by-Step Instructions
Follow these steps in order:
Step 1: Put the EPB into service mode (if equipped)
- If your Trailblazer has an EPB switch, connect a scan tool with GM EPB service function (specialty).
- Use the scan tool to command Rear EPB > Service/Pad Replacement Mode (wording varies by tool).
- Verify you can hear/feel the EPB motors retract before continuing.
- If no EPB: skip this step.
Step 2: Lift and secure the rear
- Lift the rear with a floor jack (rated 3-ton minimum) at the proper rear lifting point.
- Set the vehicle down onto jack stands (rated 3-ton minimum) and confirm it’s stable.
- Remove the rear wheels using a metric socket and breaker bar 1/2".
Step 3: Remove the rear caliper
- Turn the steering slightly if needed for access (rear access is usually straight-on).
- Remove the caliper slide/guide pin bolts using the appropriate metric socket or hex bit (fastener type varies).
- Lift the caliper off the bracket and hang it with a brake caliper hanger hook.
- Never let the caliper hang by the hose.
Step 4: Remove old pads and inspect hardware
- Remove the inner and outer pads by hand (use a flat trim tool if they’re stuck).
- Remove pad abutment clips/hardware from the bracket using a flat trim tool.
- Clean the bracket pad lands with brake cleaner spray and a wire brush.
Step 5: Remove the caliper bracket
- Remove the caliper bracket bolts using a metric socket and breaker bar 1/2".
- Set the bracket aside.
- Reinstall later with threadlocker and Torque to factory specification using a 1/2" drive torque wrench (20-200 ft-lbs).
Step 6: Remove the rotor
- If equipped with a rotor retaining screw, remove it using the correct Torx bit.
- Remove the rotor. If it’s seized, tap the hat area with a rubber mallet and apply brake cleaner spray to reduce dust.
- Clean the hub face with a wire brush so the new rotor sits flat.
Step 7: Install the new rotor
- Clean both sides of the new rotor with brake cleaner spray to remove packaging oil.
- Install the rotor onto the hub.
- If your rotor uses a retaining screw, reinstall it using the correct Torx bit and Torque to factory specification with a 3/8" drive torque wrench (10-80 ft-lbs).
Step 8: Service slide pins and reinstall bracket
- Remove the slide pins (if applicable) and inspect boots; replace torn boots using your parts kit.
- Apply a thin coat of high-temp silicone brake lubricant to slide pins and pad contact points (not the pad/rotor friction faces).
- Install the bracket and tighten bolts using a metric socket.
- Apply medium-strength threadlocker if your replacement bolts or service info call for it.
- Torque to factory specification using a 1/2" drive torque wrench (20-200 ft-lbs).
Step 9: Compress the rear caliper piston
- Position the old pad against the piston face to protect it.
- Use a brake piston compressor tool (specialty) to push the piston straight back into the caliper.
- If the piston will not retract and you have an EPB, stop and re-check that EPB service mode is active with the scan tool.
- Go slowly to avoid reservoir overflow.
Step 10: Install new pads and reinstall caliper
- Install new abutment clips/hardware by hand (use a flat trim tool if needed).
- Install the new pads into the bracket.
- Slide the caliper over the pads and align the guide pin holes.
- Install and tighten the caliper guide/slide bolts using the correct metric socket or hex bit.
- Torque to factory specification using a 3/8" drive torque wrench (10-80 ft-lbs).
Step 11: Reinstall wheels
- Reinstall wheels and hand-thread lug nuts.
- Lower the vehicle and tighten lug nuts in a star pattern using a 1/2" drive torque wrench (20-200 ft-lbs).
- Torque to factory specification (wheel lug torque is critical).
✅ After Repair
- Before driving, pump the brake pedal 10–15 times until it feels firm.
- Check brake fluid level at the reservoir and top off only if needed.
- If equipped with EPB, use the scan tool to exit service mode and run any “close/apply” EPB function it prompts.
- Do a cautious test drive: verify normal braking, no pulling, and no grinding noises.
- Pad bedding: perform several moderate stops from city speeds, allowing cool-down between stops. Avoid hard stops for 200 miles.
💰 DIY vs Shop Cost
Shop Cost: $450-$850 (parts + labor)
DIY Cost: $160-$380 (parts only)
You Save: $290-$470 by doing it yourself!
Shop labor rates vary but typically run $100-$150/hour. This repair takes a shop approximately 1.5-2.5 hours.
🎯 Ready to get started?
HowToo makes it easy: same-day/2-day shipping on every part, plus all the tools and specialty tools you need! Check out the parts and tools sections below to add everything to your cart.
Guide for Disc Brake Pad Set replace for these Chevrolet vehicles
| Year Make Model | Sub Model | Engine | Body Style |
|---|---|---|---|
| 2022 Chevrolet Trailblazer | - | - | - |
| 2021 Chevrolet Trailblazer | - | - | - |