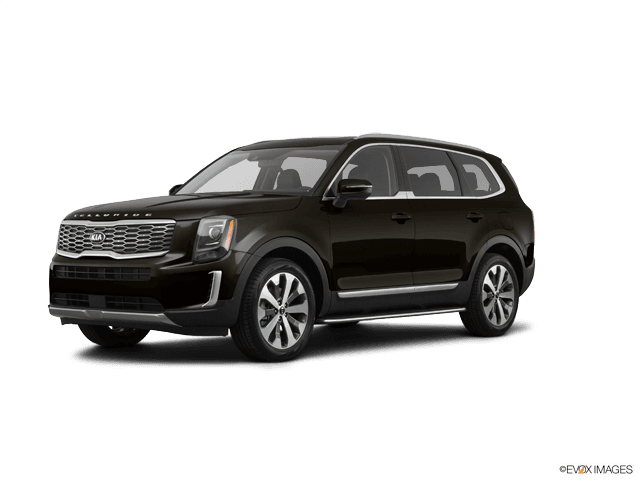


How to Replace Rear Brake Pads & Rotors on a 2020-2025 Kia Telluride (EPB Service Mode)
Step-by-step rear brake job with required tools/parts, EPB retraction tips, and key torque specs
How to Replace Rear Brake Pads & Rotors on a 2020-2025 Kia Telluride (EPB Service Mode)
Step-by-step rear brake job with required tools/parts, EPB retraction tips, and key torque specs for 2020, 2021, 2022, 2023, 2024, 2025
🔧 Telluride - Rear Brake Pads & Rotor Replacement
Rear brake pad and rotor replacement on your Telluride can be straightforward, but the exact procedure depends on whether your rear calipers have an Electronic Parking Brake (EPB) motor. If EPB is fitted, the parking brake must be put into a service mode (or retracted) before you push the pistons back, or you can damage the caliper.
Difficulty Level: Intermediate | Estimated Time: 2-4 hours
⚠️ Safety & Precautions
- 🛑 Support the Telluride on jack stands; never rely on a jack.
- 🛑 Do not press the brake pedal with a caliper removed.
- 🛑 If equipped with EPB, do not force the piston back until EPB is in service mode.
- 🛑 Brake dust is harmful; wear a mask and use brake cleaner (don’t blow dust with air).
🔧 Required Tools
You'll need the following tools for this repair:
- Floor jack (rated 3-ton minimum)
- Jack stands (rated 3-ton minimum)
- Wheel chocks
- Lug nut socket (21mm)
- Breaker bar (1/2-inch drive)
- Torque wrench (10-200 ft-lbs range)
- Ratchet (3/8-inch drive)
- Ratchet (1/2-inch drive)
- Socket set (10mm-21mm)
- Wrench set (10mm-21mm)
- C-clamp brake piston compressor (specialty)
- Caliper hanger hook (specialty)
- Flat trim tool
- Wire brush
- Brake cleaner
- High-temp silicone brake grease
- Safety glasses
- Nitrile gloves
- Dust mask
🔩 Required Parts
HowToo sells all the parts you need for this repair:
- Rear brake pad set - Qty: 1
- Rear brake rotors - Qty: 2 (Replace in pairs)
- Rear pad hardware/clip kit - Qty: 1 (If not included with pads)
- Brake caliper slide pin boots - Qty: 1 set (If torn/damaged)
- Brake fluid (DOT 3/DOT 4 per cap label) - Qty: 1 quart (Only if topping off needed)
📋 Before You Begin
- Park on level ground and set the parking brake.
- Chock the front wheels with wheel chocks.
- Open the hood and locate the brake fluid reservoir so you can watch the fluid level during piston compression.
- Please confirm one detail before you start: Do your rear calipers have an EPB motor (a small electric motor bolted to the caliper with an electrical connector), and do you have an EPB service mode option available (scan tool or vehicle procedure)?
🔨 Step-by-Step Instructions
Follow these steps in order:
Step 1: Confirm EPB type (required)
- Look behind each rear caliper for a small electric motor with a wiring plug (that’s the Electronic Parking Brake actuator).
- If you tell me “EPB motor present” or “no EPB motor”, I’ll give you the exact correct retraction method and the correct torque specs for your Telluride.
Step 2: Lift and secure the rear
- Use a 21mm lug nut socket and breaker bar to crack the rear lug nuts loose 1/4 turn while on the ground.
- Use a floor jack to lift at the rear jacking point, then set the vehicle onto jack stands.
- Remove the rear wheels using the 21mm lug nut socket and ratchet.
- Torque note: I’ll provide the exact Telluride lug nut torque after you confirm EPB type.
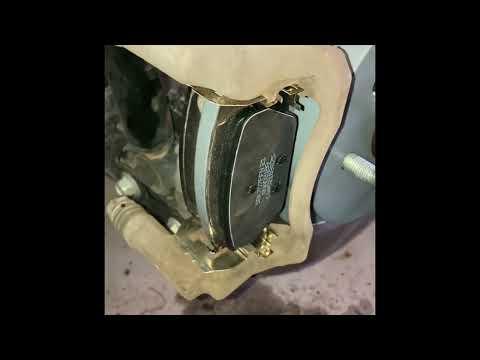
Step 3: Remove the caliper (pads come out here)
- Use the correct-size socket and ratchet to remove the two caliper slide bolts.
- Lift the caliper off the bracket and hang it with a caliper hanger hook. Never hang by the hose.
- Remove the pads and any pad clips/hardware with a flat trim tool.
- Torque note: I’ll provide the exact Telluride slide bolt torque after you confirm EPB type.
Step 4: Remove the caliper bracket and rotor
- Use a breaker bar and correct-size socket to remove the caliper bracket bolts (these are usually tight).
- Remove the rotor. If it’s stuck, spray the hub-to-rotor area with brake cleaner and tap the rotor hat evenly (do not hit wheel studs).
- Clean the hub face with a wire brush so the new rotor sits flat.
- Torque note: I’ll provide the exact Telluride bracket bolt torque after you confirm EPB type.
Step 5: Compress the piston (method depends on EPB)
- Use a C-clamp brake piston compressor (specialty) to slowly push the piston back while watching the reservoir level.
- If EPB motor is present: do not proceed until EPB is in service mode (this is the part that changes based on your setup).
Step 6: Install rotor, bracket, pads, and caliper
- Install the new rotor onto the hub.
- Reinstall the caliper bracket using the correct-size socket and torque wrench.
- Install new pad hardware (if provided) and apply a thin layer of high-temp silicone brake grease to pad contact points (not the friction surface).
- Reinstall the caliper over the pads and tighten slide bolts using a torque wrench.
Step 7: Reinstall wheels
- Reinstall the wheels and hand-thread lug nuts.
- Lower the Telluride, then tighten lug nuts in a star pattern using a torque wrench.
✅ After Repair
- With the vehicle on the ground, pump the brake pedal slowly until it feels firm.
- Check the brake fluid level and top off only if needed (use the correct DOT rating per reservoir cap).
- If EPB-equipped, apply/release EPB and confirm no warning lights.
- Do a cautious road test and bed-in the pads with gentle stops (avoid hard braking for the first 200 miles).
💰 DIY vs Shop Cost
Shop Cost: $650-$1,050 (parts + labor)
DIY Cost: $220-$520 (parts only)
You Save: $430-$530 by doing it yourself!
Shop labor rates vary but typically run $100-$150/hour. This repair takes a shop approximately 2-3 hours.
🎯 Ready to get started?
HowToo makes it easy: same-day/2-day shipping on every part, plus all the tools and specialty tools you need! Check out the parts and tools sections below to add everything to your cart.
Quick question (so I can give you the exact EPB steps + torque specs):
- 🔎 Do your rear calipers have an EPB motor on them (yes/no)?
- 🔎 Do you have a scan tool that can put the EPB into service mode (yes/no)?
Guide for Disc Brake Pad Set replace for these Kia vehicles
| Year Make Model | Sub Model | Engine | Body Style |
|---|---|---|---|
| 2025 Kia Telluride | - | - | - |
| 2024 Kia Telluride | - | - | - |
| 2023 Kia Telluride | - | - | - |
| 2022 Kia Telluride | - | - | - |
| 2021 Kia Telluride | - | - | - |
| 2020 Kia Telluride | - | - | - |