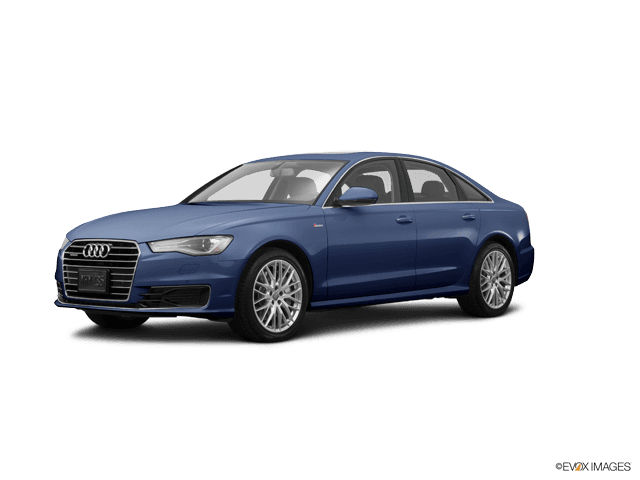









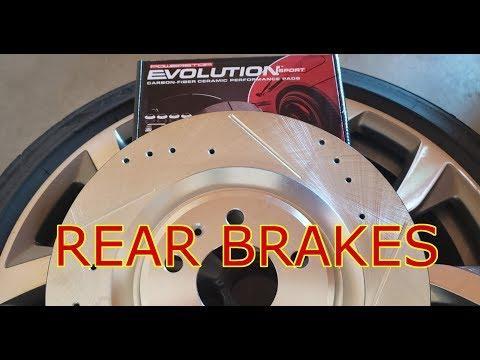







How to Replace Rear Brake Pads & Rotors on a 2014-2016 Audi A6 (EPB Service Mode)
Step-by-step DIY guide with required tools/parts, EPB service mode steps, and key torque specs
How to Replace Rear Brake Pads & Rotors on a 2014-2016 Audi A6 (EPB Service Mode)
Step-by-step DIY guide with required tools/parts, EPB service mode steps, and key torque specs for 2014, 2015, 2016


🔧 A6 - Rear Brake Pads & Rotor Replacement
You’ll remove the rear wheels, retract the electronic parking brake motors (EPB), replace the rear brake pads, and swap the rear rotors. On your A6, the EPB must be put into “service mode” before pushing the rear caliper pistons back, or you can damage the EPB mechanism.
Difficulty Level: Intermediate | Estimated Time: 2.0-3.5 hours
⚠️ Safety & Precautions
- ⚠️ Support the car with jack stands before working underneath.
- ⚠️ Use EPB service mode before compressing rear pistons.
- ⚠️ Do not press the brake pedal with a caliper removed.
- ⚠️ Brake dust is hazardous—use brake cleaner, not compressed air.
- ⚠️ Keep brake fluid off paint; wipe spills immediately.
- 🔋 Battery disconnect is not required, but keep a charger on the car if your battery is weak (EPB motors draw power).
🔧 Required Tools
You'll need the following tools for this repair:
- Floor jack (rated 3-ton minimum)
- Jack stands (rated 3-ton minimum)
- Wheel chocks
- 17mm wheel bolt socket
- Torque wrench (20-200 Nm range)
- Ratchet (3/8" drive)
- Ratchet (1/2" drive)
- Breaker bar (1/2" drive)
- Socket set (10mm-21mm)
- 13mm socket
- 15mm wrench
- 16mm socket
- 18mm socket
- 7mm hex bit socket
- 8mm hex bit socket
- Torx T30 bit
- Flathead screwdriver
- Pry bar
- Brake caliper piston compressor tool (specialty)
- OBD scan tool with Audi EPB service mode function (specialty)
- Wire hook or bungee cord
- Wire brush
- Brake cleaner spray
- Nitrile gloves
- Safety glasses
🔩 Required Parts
HowToo sells all the parts you need for this repair:
- Rear brake pad set - Qty: 1
- Rear brake rotors - Qty: 2
- Rear pad hardware kit - Qty: 1
- Brake caliper slide pin bolt set - Qty: 1
- Rear caliper carrier bolt set - Qty: 1
- Brake lubricant (silicone-based) - Qty: 1
- Brake parts cleaner - Qty: 1
- DOT 4 brake fluid - Qty: 1 quart
📋 Before You Begin
- 🅿️ Park on level ground, steering straight, and chock the front wheels.
- 🛑 Release the parking brake before lifting the car.
- 🧰 Plan for EPB service mode: this is a scan-tool command that retracts the parking brake motors so the pistons can be pushed back safely.
- 🧪 Open the hood and locate the brake fluid reservoir. Don’t remove fluid yet, but watch the level while compressing pistons (it can rise).
- Assumption: Your rear fasteners may be 13mm/15mm or 7mm hex style—tools above cover both.
🔨 Step-by-Step Instructions
Follow these steps in order:
Step 1: Put the EPB into service mode
- Connect your OBD scan tool with Audi EPB service mode function (specialty).
- Run the function for Rear Parking Brake > Service Mode / Open / Retract (wording varies by tool).
- Wait until the tool confirms the rear parking brake is fully retracted.
- EPB motors must retract before piston compression.
Step 2: Lift the rear and remove the wheels
- Break the wheel bolts loose using a 17mm wheel bolt socket and breaker bar (1/2" drive).
- Lift the rear using a floor jack (rated 3-ton minimum) and support with jack stands (rated 3-ton minimum).
- Remove the wheel bolts with the 17mm wheel bolt socket and remove both rear wheels.
- During reassembly: Torque to 120 Nm (89 ft-lbs) (wheel bolts).
Step 3: Remove the rear caliper
- Locate the two caliper slide fasteners on the back side of the caliper.
- Remove them using either a 7mm hex bit socket (common style) or a 13mm socket while holding the guide with a 15mm wrench (alternate style).
- Lift the caliper off the bracket. Hang it with a wire hook or bungee cord—do not let it hang by the brake hose.
- If equipped, unplug the pad wear connector using a flathead screwdriver to release the tab.
Step 4: Remove old pads and compress the piston
- Pull the pads out of the carrier by hand. If stuck, use a flathead screwdriver gently.
- Compress the caliper piston using a brake caliper piston compressor tool (specialty) until the piston is fully seated.
- Watch the brake fluid reservoir level while compressing; remove a little fluid only if it’s about to overflow.
- Go slow to avoid tearing the piston seal.
Step 5: Remove the caliper carrier (bracket)
- Remove the two carrier bolts using a breaker bar (1/2" drive) and either a 16mm socket or 18mm socket (varies by brake package).
- Set the carrier aside and keep track of hardware.
- Reassembly target: Torque to 90 Nm (66 ft-lbs) + 90° (carrier bolts). If your replacement bolts are not torque-to-yield, follow the bolt kit instructions.
Step 6: Remove the rotor
- Remove the rotor retaining screw using a Torx T30 bit.
- If the rotor is stuck to the hub, spray around the hub center with brake cleaner spray, then use a pry bar carefully to break it free.
- Clean the hub face with a wire brush so the new rotor sits flat (prevents brake pedal pulsation).
- Reassembly target: Torque to 4 Nm (35 in-lbs) (rotor retaining screw—snug only).
Step 7: Install the new rotor
- Clean the new rotor with brake cleaner spray to remove protective oil.
- Install the rotor onto the hub and install the retaining screw with the Torx T30 bit.
- Torque to 4 Nm (35 in-lbs).
Step 8: Reinstall the carrier and install new pads
- Reinstall the carrier using the correct socket (16mm socket or 18mm socket) and a torque wrench.
- Torque to 90 Nm (66 ft-lbs) + 90°.
- Install any new pad hardware from the rear pad hardware kit.
- Apply a thin film of brake lubricant (silicone-based) to pad ears where they slide in the carrier (do not get lube on pad friction material or rotor).
- Install the new pads into the carrier.
Step 9: Reinstall the caliper
- Slide the caliper over the new pads.
- Install the slide bolts using the appropriate tool for your setup: 7mm hex bit socket or 13mm socket with 15mm wrench as a counter-hold.
- Torque to 35 Nm (26 ft-lbs) (typical rear guide pin spec on this platform).
- Reconnect the pad wear connector (if equipped).
Step 10: Exit EPB service mode
- Use the OBD scan tool with Audi EPB service mode function (specialty) to run Rear Parking Brake > Close / End Service Mode.
- Confirm the scan tool reports the EPB is initialized/closed.
Step 11: Reinstall wheels and lower the car
- Install wheels and hand-thread all wheel bolts.
- Lower the car, then use a torque wrench and 17mm wheel bolt socket to Torque to 120 Nm (89 ft-lbs) in a star pattern.
Step 12: Pump the brake pedal and check fluid
- With the engine off, press the brake pedal 10–15 times until it feels firm (this seats the pads against the rotors).
- Check brake fluid level and top off with DOT 4 brake fluid if needed.
✅ After Repair
- 🧪 Start the engine and confirm a firm pedal (it may drop slightly with brake boost—should still feel solid).
- 🅿️ Apply and release the parking brake several times to confirm normal EPB operation.
- 🔎 Test drive at low speed first. Listen for grinding or pulling.
- 🛑 Bed-in the pads: do 6–10 moderate stops from ~35 mph down to ~5 mph, with light driving between stops to cool. Avoid hard stops for the first 150–200 miles.
- 🧰 If any brake/EPB warnings appear, scan for codes with your scan tool and clear only after the issue is corrected.
💰 DIY vs Shop Cost
Shop Cost: $550-$950 (parts + labor)
DIY Cost: $180-$450 (parts only)
You Save: $370-$500 by doing it yourself!
Shop labor rates vary but typically run $100-$150/hour. This repair takes a shop approximately 2-3 hours.
🎯 Ready to get started?
HowToo makes it easy: same-day/2-day shipping on every part, plus all the tools and specialty tools you need! Check out the parts and tools sections below to add everything to your cart.
Guide for Disc Brake Pad Set replace for these Audi vehicles
| Year Make Model | Sub Model | Engine | Body Style |
|---|---|---|---|
| 2016 Audi A6 | - | - | - |
| 2015 Audi A6 | - | - | - |
| 2014 Audi A6 | - | - | - |