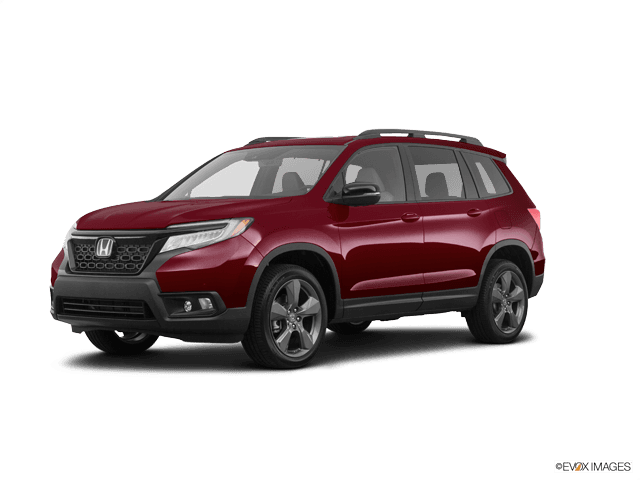









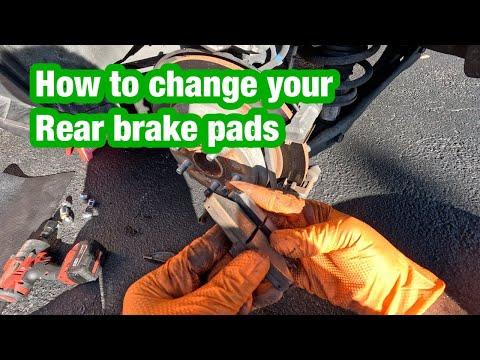







How to Replace Rear Brake Pads on a 2021 Honda Passport (EPB Service Mode Guide)
Step-by-step instructions with required tools/parts, EPB maintenance mode steps, and key torque specs for 2019, 2020, 2021, 2022
How to Replace Rear Brake Pads on a 2021 Honda Passport (EPB Service Mode Guide)
Step-by-step instructions with required tools/parts, EPB maintenance mode steps, and key torque specs for 2019, 2020, 2021, 2022


🔧 Passport - Rear Brake Pad Replacement
On your Passport, the rear brakes use an electronic parking brake (EPB) system, so the rear caliper pistons must be retracted using an EPB “maintenance/service” mode before you push the pistons back. Once in service mode, you’ll remove the rear caliper, swap pads/hardware, compress the piston, and reinstall everything with proper torque.
Difficulty Level: Intermediate | Estimated Time: 1.5-3.0 hours
⚠️ Safety & Precautions
- ⚠️ Never work under a vehicle supported only by a jack—use jack stands.
- ⚠️ Do not press the brake pedal while a caliper is off the rotor; the piston can pop out.
- ⚠️ EPB warning: do not force/rotate the rear piston without putting the EPB in service mode first.
- ⚠️ Let brakes cool before starting; hot rotors and pads can burn you.
- ⚠️ If you use a scan tool, keep the ignition on as instructed to avoid EPB faults.
🔧 Required Tools
You'll need the following tools for this repair:
- Floor jack (rated 3-ton minimum)
- Jack stands (rated 3-ton minimum)
- Wheel chocks
- 19mm socket
- 1/2" drive breaker bar
- 1/2" drive torque wrench (20-200 ft-lbs range)
- 3/8" drive ratchet
- 3/8" drive torque wrench (10-80 ft-lbs range)
- 12mm socket
- 17mm socket
- Flat trim/pry tool
- Brake caliper hanger hook
- Brake caliper piston press tool (specialty)
- OBD2 scan tool with EPB service mode (specialty)
- Wire brush
- Shop rags
- Nitrile gloves
- Safety glasses
🔩 Required Parts
HowToo sells all the parts you need for this repair:
- Rear brake pad set - Qty: 1
- Rear brake pad hardware/clip kit - Qty: 1
- Brake caliper grease (silicone brake lubricant) - Qty: 1
- Brake cleaner spray - Qty: 1
📋 Before You Begin
- Park on level ground, set the transmission to Park, and place wheel chocks at the front wheels.
- Loosen the rear lug nuts 1/2 turn before lifting the vehicle.
- Open the hood and remove the brake fluid reservoir cap (just set it on top). This helps the pistons push back easier. Don’t spill brake fluid on paint.
- Question (so I give the exact best path): Do you have a scan tool that can put the EPB into service/maintenance mode?
🔨 Step-by-Step Instructions
Follow these steps in order:
Step 1: Put the EPB into service/maintenance mode
- Connect your OBD2 scan tool with EPB service mode (specialty) to the OBD port under the dash.
- Turn ignition ON (engine OFF).
- Use the scan tool menu to run the EPB Maintenance/Service Mode function (wording varies by tool).
- Wait for the scan tool to confirm the EPB is retracted/maintenance mode is active.
Step 2: Lift the rear and remove the wheels
- Use a floor jack to lift the rear at the proper rear jacking point.
- Support the vehicle on jack stands at the rear support points.
- Remove the rear wheels using a 19mm socket and breaker bar.
Step 3: Remove the rear caliper (pad access)
- Turn the steering slightly if it helps access (you’re working at the rear, so space is usually fine).
- Remove the lower and upper caliper slide pin bolts using a 12mm socket.
- Lift the caliper off the bracket and hang it with a brake caliper hanger hook (do not let it hang by the brake hose).
Step 4: Remove old pads and hardware
- Pull the inner and outer pads out by hand.
- Remove the stainless pad clips/hardware from the bracket using a flat trim/pry tool.
- Clean the bracket pad “rails” (where the clips sit) using brake cleaner spray, shop rags, and a wire brush.
Step 5: Compress the caliper piston
- Make sure EPB service mode is active (from Step 1).
- Use a brake caliper piston press tool (specialty) to slowly push the piston straight back into the caliper.
- Watch the brake fluid reservoir while compressing. If it rises near the top, stop and remove a little fluid with a suitable siphon (don’t overflow).
Step 6: Install new hardware and pads
- Install the new stainless clips from the rear brake pad hardware/clip kit onto the bracket by hand.
- Apply a thin film of brake caliper grease where the pads slide on the clips (metal-to-metal contact points only). Keep grease off pad friction surfaces.
- Install the new inner and outer pads into the bracket.
Step 7: Reinstall the caliper
- Lower the caliper over the new pads.
- Reinstall the caliper slide pin bolts using a 12mm socket.
- Torque to 34 Nm (25 ft-lbs).
Step 8: Repeat on the other rear wheel
- Repeat Steps 3–7 on the opposite rear side.
- Always replace rear pads as an axle set.
Step 9: Reinstall wheels and torque lug nuts
- Reinstall both rear wheels hand-tight.
- Lower the vehicle off the jack stands using the floor jack.
- Torque the lug nuts in a star pattern using a 19mm socket and torque wrench.
- Torque to 127 Nm (94 ft-lbs).
Step 10: Exit EPB service mode
- Use the OBD2 scan tool with EPB service mode (specialty) to command EPB back to normal mode.
- Clear any EPB-related codes if your scan tool shows them.
✅ After Repair
- Before moving the vehicle, pump the brake pedal 10–15 times until it feels firm.
- Re-check brake fluid level and top off if needed (use the correct DOT brake fluid specified on the reservoir cap).
- Apply and release the parking brake a few times to confirm normal operation.
- Test drive at low speed first. Verify no grinding, pulling, or warning lights.
- If pads are new, do a gentle break-in: several easy stops from 25–40 mph, letting brakes cool between stops.
💰 DIY vs Shop Cost
Shop Cost: $350-$650 (parts + labor)
DIY Cost: $60-$180 (parts only)
You Save: $290-$470 by doing it yourself!
Shop labor rates vary but typically run $100-$150/hour. This repair takes a shop approximately 1.5-2.5 hours.
🎯 Ready to get started?
HowToo makes it easy: same-day/2-day shipping on every part, plus all the tools and specialty tools you need! Check out the parts and tools sections below to add everything to your cart.