


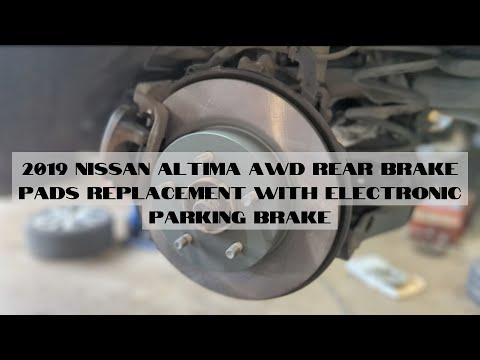


How to Replace Rear Brake Pads on a 2019 Nissan Altima (EPB)
Step-by-step DIY rear brake pad change with tools, parts list, EPB service mode, torque specs, and safety tips for 2019, 2020
How to Replace Rear Brake Pads on a 2019 Nissan Altima (EPB)
Step-by-step DIY rear brake pad change with tools, parts list, EPB service mode, torque specs, and safety tips for 2019, 2020
🔧 Altima - Rear Brake Pad Replacement
You’ll be removing the rear wheels, retracting the electronic parking brake, sliding the calipers off, and installing new pads and hardware. This guide is written for a first-time DIYer, with simple language and safety checks along the way.
Difficulty Level: Intermediate | Estimated Time: 2–3 hours
⚠️ Safety & Precautions
- ⚠️ Always support the car with jack stands; never rely on a floor jack alone.
- ⚠️ Your Altima uses an electronic parking brake (EPB) on the rear. The caliper pistons must be retracted using a scan tool EPB service mode to avoid damage.
- ⚠️ Work on a cool brake system. Hot rotors and calipers can burn you.
- ⚠️ Wear safety glasses and gloves. Brake dust and cleaner are harmful to eyes and skin.
- ⚠️ Do one side at a time so you can look at the other side as a reference.
- ⚠️ Do not press the brake pedal with a caliper removed; you can push the piston out.
- ⚠️ Battery remains connected, but ignition must be OFF when working around the EPB wiring.
🔧 Required Tools
You'll need the following tools for this repair:
- Floor jack (rated 3-ton minimum)
- Jack stands (rated 3-ton minimum, Qty: 2–4)
- Wheel chocks
- 21mm socket
- 1/2" drive breaker bar
- 1/2" drive torque wrench (10–150 ft-lbs range)
- 14mm socket
- 17mm socket
- 3/8" drive ratchet
- 3/8" drive extension (3"–6")
- C-clamp (6" or larger)
- Disc brake caliper compression tool (specialty)
- EPB-capable scan tool (electronic parking brake service mode) (specialty)
- Flathead screwdriver (medium)
- Needle-nose pliers
- Wire brush (small, steel bristle)
- Bungee cord or mechanics wire
- Shop rags
- Brake cleaner spray
- Nitrile gloves
- Safety glasses
🔩 Required Parts
HowToo sells all the parts you need for this repair:
- Rear brake pad set - Qty: 1 (serves both rear wheels, replace in pairs)
- Rear brake pad hardware kit (anti-rattle clips/shims) - Qty: 1 set
- High-temperature brake grease - Qty: 1 small tube
- Brake cleaner - Qty: 1–2 cans
- Caliper bracket bolts (rear, optional replacement) - Qty: 4
📋 Before You Begin
- Park the Altima on level ground, shift to Park, and set the parking brake, then turn ignition OFF.
- Loosen (do not remove) rear wheel lug nuts one turn using the 21mm socket and breaker bar while the car is still on the ground.
- Position wheel chocks in front of and behind at least one front wheel.
- Have your EPB-capable scan tool ready. It will be used to put the electronic parking brake into service/maintenance mode before removing the rear calipers.
🔨 Step-by-Step Instructions
Follow these steps in order:
Step 1: Raise and support the rear of the car
- Use the floor jack at the rear center jacking point (just ahead of the rear axle area, on the reinforced pinch weld/crossmember).
- Lift until both rear wheels are off the ground.
- Place jack stands under the rear pinch welds or approved support points, then slowly lower the car onto the stands.
- Verify stability by gently shaking the car; it should not move.
Step 2: Put the electronic parking brake in service mode
- Turn ignition to ON (engine not started).
- Connect the EPB-capable scan tool to the OBD-II port under the dash.
- Using the scan tool, navigate to Brakes > EPB > Service / Maintenance Mode or similar menu.
- Command the rear calipers into service mode; the tool will retract the EPB motors so the pistons can be pushed back.
- Turn ignition OFF when the scan tool confirms service mode is active. Do not apply parking brake now.
Step 3: Remove the rear wheels
- Use the 21mm socket and ratchet to remove all rear lug nuts.
- Remove both rear wheels and set them aside.
Step 4: Inspect caliper and rotor area
- Look at how the pads, clips, and anti-rattle springs are installed on one side. Take a quick phone photo.
- Check for torn rubber boots on the caliper slide pins or fluid leaks. If you see leaks, the caliper may need replacement, not just pads.
Step 5: Remove the rear caliper (first side)
- Locate the two caliper slide pin bolts on the back of the caliper.
- Use the 14mm socket and 3/8" ratchet to remove the upper and lower slide pin bolts.
- Carefully pull the caliper off the bracket. If it’s stuck, gently pry with a flathead screwdriver between pad and rotor.
- Support the caliper with a bungee cord hooked to the suspension so it does not hang by the brake hose.
Step 6: Remove old pads and hardware
- Slide the inner and outer pads out of the caliper bracket by hand.
- Use needle-nose pliers if needed to pull the old metal pad clips (hardware) out of the bracket.
- Spray the bracket area with brake cleaner and scrub the pad contact points with a wire brush until clean, bare metal shows.
Step 7: Retract the caliper piston
- Confirm EPB is already in service mode from Step 2.
- Position the old inner pad against the piston face.
- Use a C-clamp or disc brake caliper compression tool to slowly push the piston back into the caliper until it bottoms out.
- Stop if you feel sudden hard resistance or see fluid leaking; do not force it.
Step 8: Install new hardware and prepare pads
- Clip the new metal pad clips (hardware) into the cleaned caliper bracket by hand.
- Apply a very thin layer of high-temperature brake grease on the spots where the pad ears will slide in the clips.
- Apply a thin film of grease to the backing plate tabs of each new pad (not on the friction surface).
Step 9: Install new rear pads (first side)
- Slide the inner pad into the inner side of the bracket, making sure the ears sit inside the new clips.
- Install the outer pad on the opposite side of the rotor, again making sure it is fully seated in the clips.
- Check that both pads can move slightly in the bracket; they should not be jammed.
Step 10: Reinstall the caliper (first side)
- Lower the supported caliper over the new pads and rotor.
- Align the caliper with the bracket and thread the slide pin bolts in by hand.
- Use the 14mm socket and 3/8" ratchet to snug both slide pin bolts.
- Torque each slide pin bolt to 34 Nm (25 ft-lbs) using the torque wrench and 14mm socket.
Step 11: Check and lube slide pins (optional but recommended)
- If you want to go further, remove each slide pin completely with the 14mm socket, wipe it with a shop rag, and apply fresh brake grease to the pin body.
- Reinsert the pins and torque again to 34 Nm (25 ft-lbs).
Step 12: Repeat on the other rear side
- Repeat Steps 5–11 on the opposite rear wheel.
- Make sure pad orientation and hardware match the first side.
Step 13: Reinstall wheels
- Place the rear wheel back on the hub.
- Thread lug nuts by hand to avoid cross-threading.
- Use the 21mm socket and ratchet to snug lug nuts in a star pattern.
Step 14: Lower the car and torque the wheels
- Use the floor jack to lift the rear slightly and remove the jack stands.
- Lower the car fully to the ground.
- Use the torque wrench and 21mm socket to torque each rear lug nut to 113 Nm (83 ft-lbs) in a star pattern.
Step 15: Take EPB out of service mode
- Turn ignition to ON (engine not started).
- Reconnect your EPB-capable scan tool if needed and go to Brakes > EPB > Exit Service Mode / Initialize.
- Command the EPB to return to normal mode; wait for the scan tool confirmation.
- Turn ignition OFF after the process completes.
Step 16: Pump the brake pedal
- Sit in the driver’s seat and, with engine OFF, press the brake pedal slowly 10–15 times until it becomes firm. This seats the pads.
Step 17: Test the EPB
- Turn ignition to ON, then apply the electronic parking brake using the switch.
- Listen and feel for the EPB motors engaging at the rear.
- Release the EPB and confirm there are no warning lights on the dash.
✅ After Repair
- Start the engine and gently press the brake pedal to confirm it feels firm and consistent.
- With the car in gear and EPB off, roll slowly in a safe area and test the brakes at low speed.
- Perform several gentle stops from 20–30 km/h to help the pads “bed in.”
- For the first 300–500 km, avoid very hard stops unless necessary to allow proper pad and rotor break-in.
- Check around the rear wheels for any unusual smells, noises, or brake warning lights after your first drive.
💰 DIY vs Shop Cost
Shop Cost: $280–$420 (parts + labor)
DIY Cost: $80–$150 (parts only, assuming you rent/borrow an EPB-capable scan tool)
You Save: $200–$300 by doing it yourself!
Shop labor rates vary but typically run $100–$150/hour. This repair takes a shop approximately 1.5–2.0 hours.
🎯 Ready to get started?
HowToo makes it easy: same-day/2-day shipping on every part, plus all the tools and specialty tools you need! Check out the parts and tools sections above to add everything to your cart.
