









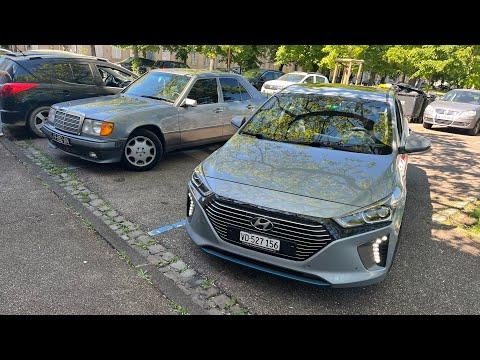







How to Replace Rear Brake Pads on a 2018 Hyundai Ioniq (EPB Service Mode Guide)
Step-by-step instructions with required tools/parts, EPB retract procedure, and torque specs for 2017, 2018, 2019
How to Replace Rear Brake Pads on a 2018 Hyundai Ioniq (EPB Service Mode Guide)
Step-by-step instructions with required tools/parts, EPB retract procedure, and torque specs for 2017, 2018, 2019


🔧 Ioniq - Rear Brake Pad Replacement
Replacing the rear brake pads on your Ioniq means removing the rear wheels, swinging the caliper out of the way, swapping pads/hardware, and compressing the caliper piston so everything fits back together. The only “big” variable is whether your Ioniq has an electronic parking brake (EPB) or a mechanical (cable/foot pedal) parking brake, because EPB systems must be put into service mode before pushing the piston in.
Difficulty Level: Intermediate | Estimated Time: 1.5-3.0 hours
⚠️ Safety & Precautions
- 🧯 Support the car on jack stands; never rely on a jack alone.
- 🧤 Brake dust is dirty—wear gloves and safety glasses; avoid breathing dust.
- 🔥 Brakes can be hot—let them cool before starting.
- ⚠️ If equipped with EPB, do not push the rear piston in until EPB is in service mode (or you can damage the EPB motor/gears).
- 🔌 Keep the key fob away and don’t press the brake pedal while a caliper is removed.
🔧 Required Tools
You'll need the following tools for this repair:
- Wheel chocks
- Floor jack (rated 3-ton minimum)
- Jack stands (rated 3-ton minimum)
- 21mm socket
- Ratchet
- Breaker bar
- 14mm socket
- 17mm socket
- Torque wrench (10–200 Nm range)
- Flat trim tool
- Brake caliper hanger hook
- C-clamp
- Brake piston compressor tool (specialty)
- Wire brush
- Brake cleaner spray
- Shop rags
- Nitrile gloves
- Safety glasses
- Scan tool with EPB service function (specialty)
🔩 Required Parts
HowToo sells all the parts you need for this repair:
- Rear brake pad set - Qty: 1
- Rear pad hardware/clip kit - Qty: 1
- Brake caliper grease (silicone) - Qty: 1
- Brake cleaner - Qty: 1
📋 Before You Begin
- 🅿️ Park on level ground, shift to P, and chock the front wheels.
- 🛑 Release the parking brake before lifting the rear (EPB: release with switch; mechanical: release the pedal/lever).
- 🔑 Keep the key fob at least 10 feet away so the car can’t “wake up” unexpectedly.
- 🧰 If your Ioniq has EPB, connect your scan tool and get ready to command EPB Service Mode before compressing pistons.
🔨 Step-by-Step Instructions
Follow these steps in order:
Step 1: Confirm parking brake type (EPB vs mechanical)
- Look at the center console: an EPB has a small switch/button (often “P” in a circle).
- A mechanical system usually has a foot parking brake pedal or a hand lever.
- If unsure, tell me what you see.
Step 2: Loosen lug nuts and lift the rear
- Use a 21mm socket with a breaker bar to loosen the rear lug nuts 1/2 turn (do not remove yet).
- Use a floor jack to lift at the rear jacking point, then support with jack stands.
- Remove the lug nuts with the 21mm socket and take the wheels off.
Step 3: Put EPB into service mode (only if equipped)
- Connect a scan tool with EPB service function (specialty).
- Command the rear EPB into its pad service/retract mode (wording varies by scan tool).
- Verify you can freely turn the rear hub/rotor by hand before continuing.
Step 4: Remove the caliper (do not disconnect the brake hose)
- Turn the steering wheel doesn’t matter for rear; just position yourself comfortably.
- Use a 14mm socket and ratchet to remove the two caliper slide-pin bolts.
- Lift the caliper off the bracket and support it with a brake caliper hanger hook (never let it dangle by the hose).
Step 5: Remove old pads and hardware
- Pull the inner/outer pads out by hand. If they’re stuck, use a flat trim tool gently.
- Remove the stainless pad clips/hardware from the bracket.
- Clean the bracket pad “rails” with a wire brush and brake cleaner spray, then wipe with shop rags.
Step 6: Check slide pins (they must move smoothly)
- Slide each pin in/out by hand. If sticky, pull the pin out and wipe it clean with a shop rag.
- Apply a thin coat of brake caliper grease (silicone) to the smooth part of the pin (not on threads).
Step 7: Compress the rear caliper piston
- Place an old pad against the piston face.
- Use a C-clamp or brake piston compressor tool (specialty) to slowly push the piston fully back into the caliper.
- Go slow and keep it straight; if it cocks sideways, back off and re-center.
- Watch brake fluid level as you compress.
Step 8: Install new hardware and pads
- Install the new stainless hardware clips onto the bracket by hand.
- Add a very thin smear of brake caliper grease (silicone) where the pad ears touch the clips (do not get grease on pad friction material).
- Install the new inner and outer pads into the bracket.
Step 9: Reinstall caliper and torque fasteners
- Position the caliper over the new pads.
- Install the caliper slide-pin bolts by hand first to avoid cross-threading, then tighten with a 14mm socket.
- Torque to 28 Nm (21 ft-lbs) using a torque wrench.
- If you removed the caliper bracket: tighten bracket bolts with a 17mm socket and torque wrench, Torque to 75 Nm (55 ft-lbs).
Step 10: Repeat on the other rear side
- Do the same steps on the other rear wheel so braking stays even.
Step 11: Reinstall wheels and torque lug nuts
- Reinstall wheels and hand-thread all lug nuts.
- Lower the car to the ground using the floor jack.
- Tighten lug nuts in a star pattern with a torque wrench: Torque to 90–110 Nm (66–81 ft-lbs).
Step 12: Exit EPB service mode (only if equipped)
- Use the scan tool with EPB service function (specialty) to command EPB back to normal mode.
- Apply and release the parking brake switch a couple times to confirm normal operation.
✅ After Repair
- 🦶 With the car still in Park, press the brake pedal slowly 10–15 times until it feels firm (this seats the pads).
- 🧪 Do a slow test drive and confirm no grinding, pulling, or warning lights.
- 🔍 Check brake fluid level and top off only if needed (use the cap label fluid type).
- 🛑 New pads need gentle stops for the first 150–200 miles; avoid hard braking unless necessary.
💰 DIY vs Shop Cost
Shop Cost: $250-$450 (parts + labor)
DIY Cost: $60-$180 (parts only)
You Save: $190-$270 by doing it yourself!
Shop labor rates vary but typically run $100-$150/hour. This repair takes a shop approximately 1.0-1.5 hours.
🎯 Ready to get started?
HowToo makes it easy: same-day/2-day shipping on every part, plus all the tools and specialty tools you need! Check out the parts and tools sections below to add everything to your cart.