


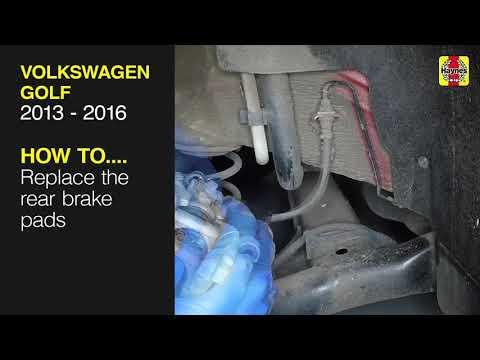


How to Replace Rear Brake Pads on a 2016 Volkswagen Golf
Step-by-step instructions with tools, torque specs, EPB service mode, and safety tips for 2015, 2016, 2017, 2018, 2019, 2020, 2021
How to Replace Rear Brake Pads on a 2016 Volkswagen Golf
Step-by-step instructions with tools, torque specs, EPB service mode, and safety tips for 2015, 2016, 2017, 2018, 2019, 2020, 2021
🔧 Rear Brake Pads - Replacement
Rear pads on your Golf are replaced by removing the rear caliper, swapping the pads, and resetting the caliper piston before reassembly. I’m including both rear brake setups: manual parking brake and electronic parking brake (EPB), since the procedure changes depending on which one is on the car.
Difficulty Level: Intermediate | Estimated Time: 1.5-3 hours
⚠️ Safety & Precautions
- Park on level ground and chock the front wheels.
- Never work under a car supported only by a jack; use jack stands.
- Rear calipers must be compressed correctly to avoid seal damage.
- If your Golf has EPB, put the parking brake in service mode before starting.
- Do not press the brake pedal with a caliper removed.
- Let the brakes cool if the car was just driven.
🔧 Required Tools
You'll need the following tools for this repair:
- Floor jack (rated 3-ton minimum)
- Jack stands (rated 3-ton minimum)
- Wheel chocks
- Safety glasses
- Nitrile gloves
- 17mm lug wrench or socket
- 13mm socket
- 15mm socket
- Ratchet
- Torque wrench
- Flat-head screwdriver
- Brake caliper compression tool (specialty)
- Brake cleaner
- Bungee cord or mechanic's wire
- Scan tool with EPB service mode (specialty)
🔩 Required Parts
HowToo sells all the parts you need for this repair:
- Rear brake pad set - Qty: 1
- Brake pad hardware kit - Qty: 1
- Brake caliper slide pin grease - Qty: 1
- Brake cleaner - Qty: 1 can
📋 Before You Begin
- Park on level ground, set the parking brake, and chock the front wheels.
- Break the rear lug bolts loose before lifting the car.
- If your Golf has EPB: use scan tool > service functions > rear brake pad replacement/EPB service mode before removing the calipers.
- If your Golf has a manual parking brake: make sure the parking brake is fully released before starting.
🔨 Step-by-Step Instructions
Follow these steps in order:
Step 1: Lift and secure the rear of the car
- Use a floor jack to lift the rear of your Golf at the proper jacking point.
- Support it with jack stands on both sides.
- Remove both rear wheels with a 17mm lug wrench or socket.
Step 2: Access the caliper
- Turn the rear wheel hub by hand if needed for access.
- Inspect the caliper, bracket, and pads before disassembly.
- Take a quick photo first.
Step 3: Remove the caliper bolts
- Use a 13mm socket or 15mm socket to remove the caliper guide pin bolts, depending on what is installed on your Golf.
- Lift the caliper off the bracket carefully.
- Support the caliper with a bungee cord or mechanic's wire so it does not hang by the hose.
Step 4: Remove the old pads and hardware
- Slide the old pads out of the bracket.
- Remove the pad clips and hardware with a flat-head screwdriver if they are stuck.
- Clean the bracket contact points with brake cleaner.
Step 5: Retract the rear caliper piston
- If manual parking brake: use a brake caliper compression tool to push the piston straight back in.
- If EPB: make sure the EPB is in service mode, then use the brake caliper compression tool to retract the piston.
- Turn slowly and keep pressure even.
Step 6: Install the new pad hardware and pads
- Install the new hardware clips from the rear brake pad set or hardware kit.
- Apply a light coat of brake pad grease to the pad ears and contact points.
- Install the new pads into the bracket.
Step 7: Reinstall the caliper
- Slide the caliper over the new pads.
- Install the guide pin bolts by hand first, then tighten with a torque wrench.
- Torque to 30 Nm (22 ft-lbs) for the rear caliper guide pin bolts unless your caliper marking specifies otherwise.
Step 8: Reinstall the wheel
- Put the wheel back on and hand-tighten the lug bolts with a 17mm lug wrench or socket.
- Lower the car and finish tightening with a torque wrench.
- Torque to 120 Nm (89 ft-lbs) for the wheel bolts.
Step 9: Restore brake operation
- Press the brake pedal slowly several times until it becomes firm.
- If EPB: exit service mode with the scan tool and cycle the parking brake on and off.
✅ After Repair
- Check brake fluid level before driving.
- Make sure the pedal feels firm.
- Test the brakes at low speed in a safe area.
- Listen for rubbing or clicking sounds.
- For new pads, do several medium stops to help bed them in.
💰 DIY vs Shop Cost
Shop Cost: $280-$520 (parts + labor)
DIY Cost: $70-$160 (parts only)
You Save: $210-$360 by doing it yourself!
Shop labor rates vary but typically run $100-$150/hour. This repair takes a shop approximately 1.5-3 hours.
🎯 Ready to get started?
HowToo makes it easy: same-day/2-day shipping on every part, plus all the tools and specialty tools you need! Check out the parts and tools sections below to add everything to your cart.
