








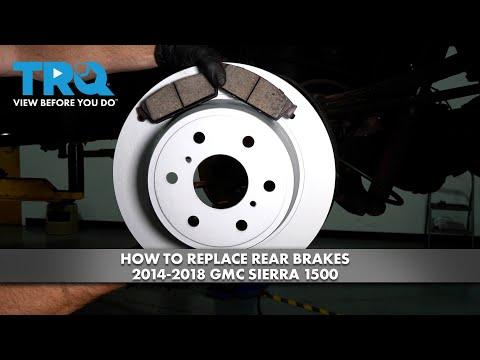






How to Replace Rear Brake Pads on a 2014-2018 GMC Sierra 1500
Step-by-step rear brake pad replacement with tools, parts, torque specs, and safety tips
How to Replace Rear Brake Pads on a 2014-2018 GMC Sierra 1500
Step-by-step rear brake pad replacement with tools, parts, torque specs, and safety tips for 2014, 2015, 2016, 2017, 2018


🔧 Rear Brake Pads - Pad Replacement
Replacing the rear brake pads on your Sierra means removing the rear wheel, taking off the caliper, swapping the pads, then compressing the caliper piston before reassembly. This is a straightforward brake job, but you need to work cleanly and torque everything correctly for safe braking.
Difficulty Level: Intermediate | Estimated Time: 1.5-2.5 hours
⚠️ Safety & Precautions
- Work on a flat surface and chock the front wheels before lifting the truck.
- Use jack stands. Never rely on a floor jack alone.
- Brake dust can be harmful. Do not blow it off with compressed air.
- Keep brake fluid off painted surfaces. It can damage the finish.
- Do not press the brake pedal with the caliper removed.
- Your Sierra does not use electronic parking brake rear service for this setup, but make sure the parking brake is fully released before brake disassembly.
🔧 Required Tools
You'll need the following tools for this repair:
- Floor jack (rated 3-ton minimum)
- Jack stands (rated for truck weight)
- Wheel chocks
- 19mm lug wrench or socket
- 21mm socket
- 13mm socket
- Ratchet
- Breaker bar
- Torque wrench
- C-clamp or brake caliper compression tool (specialty)
- Bungee cord or caliper hanger
- Flat-blade screwdriver
- Wire brush
- Brake cleaner
- Safety glasses
- Nitrile gloves
🔩 Required Parts
HowToo sells all the parts you need for this repair:
- Rear brake pad set - Qty: 1
- Brake hardware kit - Qty: 1
- Brake caliper slide pin grease - Qty: 1
📋 Before You Begin
- Park on level ground and set the parking brake before lifting.
- Loosen the rear wheel lug nuts slightly before raising the truck.
- Open the brake fluid reservoir and check the level. If it is already near the top, watch for overflow when compressing the piston.
- If one rear pad is worn much more than the other, inspect the caliper slide pins and caliper condition before installing new pads.
🔨 Step-by-Step Instructions
Follow these steps in order:
Step 1: Raise and secure the truck
- Use a floor jack to lift the rear of the truck at a safe lift point.
- Place jack stands under the frame and lower the truck onto them.
- Remove the rear wheel with a 19mm lug wrench or socket.
- Keep the wheel under the truck as extra backup.
Step 2: Remove the caliper
- Use a 13mm socket to remove the caliper guide pin bolts.
- Lift the caliper off the rotor and hang it with a bungee cord or caliper hanger.
- Do not let the caliper hang by the brake hose.
Step 3: Remove the old pads and hardware
- Pull the old brake pads out of the bracket by hand.
- Remove the pad clips and hardware from the bracket.
- Use a wire brush to clean rust and debris from the pad contact points.
- Spray the area with brake cleaner and let it dry.
Step 4: Service the caliper slide pins
- Remove the slide pins if they are dry or sticky.
- Clean the pins and boots, then apply fresh brake caliper slide pin grease.
- Make sure the pins move smoothly before reassembly.
- Smooth slide pins help prevent uneven wear.
Step 5: Compress the caliper piston
- Use a C-clamp or brake caliper compression tool (specialty) to slowly push the piston fully into the caliper.
- Watch the brake fluid reservoir while compressing the piston.
- If fluid rises too high, remove a small amount before continuing.
Step 6: Install the new pads and hardware
- Install the new pad clips from the rear brake pad set hardware kit.
- Place the new pads into the bracket in the same position as the old ones.
- Make sure the wear indicator, if equipped, is installed in the correct location.
Step 7: Reinstall the caliper
- Slide the caliper back over the new pads and rotor.
- Use a 13mm socket to reinstall the guide pin bolts.
- Torque to 35 Nm (26 ft-lbs).
Step 8: Reinstall the wheel
- Reinstall the wheel and hand-tighten the lug nuts with a 19mm lug wrench or socket.
- Lower the truck to the ground.
- Use a torque wrench to tighten the lug nuts in a star pattern.
- Torque to 190 Nm (140 ft-lbs).
✅ After Repair
- Press the brake pedal several times before moving the truck. The pedal should feel firm.
- Check the brake fluid level and top off if needed.
- Test the brakes at low speed in a safe area first.
- Listen for dragging, rubbing, or clunking sounds.
- For the first 200 miles, avoid hard braking when possible to help the new pads seat properly.
💰 DIY vs Shop Cost
Shop Cost: $250-$450 (parts + labor)
DIY Cost: $60-$140 (parts only)
You Save: $190-$310 by doing it yourself!
Shop labor rates vary but typically run $100-$150/hour. This repair takes a shop approximately 1.0-1.5 hours.
🎯 Ready to get started?
HowToo makes it easy: same-day/2-day shipping on every part, plus all the tools and specialty tools you need! Check out the parts and tools sections below to add everything to your cart.
Guide for Disc Brake Pad Set replace for these GMC vehicles
| Year Make Model | Sub Model | Engine | Body Style |
|---|---|---|---|
| 2018 GMC Sierra 1500 | - | - | - |
| 2017 GMC Sierra 1500 | - | - | - |
| 2016 GMC Sierra 1500 | - | - | - |
| 2015 GMC Sierra 1500 | - | - | - |
| 2014 GMC Sierra 1500 | - | - | - |