


How to Replace Rear Brake Pads and Rotors on a 2021 Toyota Corolla
Step-by-step DIY rear brake service with tools, parts list, torque specs, safety tips, and cost savings
How to Replace Rear Brake Pads and Rotors on a 2021 Toyota Corolla
Step-by-step DIY rear brake service with tools, parts list, torque specs, safety tips, and cost savings


🔧 Corolla - Rear Brake Pads & Rotors Replacement
You’ll be replacing the rear brake pads and brake rotors on your Corolla. This restores stopping power, prevents grinding, and helps avoid damage to the calipers.
Difficulty Level: Intermediate | Estimated Time: 2–3 hours
⚠️ Safety & Precautions
- 🛑 Always support the car with jack stands; never work under a car held only by a jack.
- 🧯 Work on a flat, solid surface with the transmission in Park and the parking brake off when removing the rear brakes.
- 🔥 Brakes can get very hot; let them cool completely before starting.
- 😷 Brake dust is harmful; avoid breathing it in and do not blow it with compressed air.
- 🔋 Battery disconnection is not required on this Corolla for rear brake work.
- 📏 Do one side at a time so you can look at the other side as a reference.
🔧 Required Tools
You'll need the following tools for this repair:
- 🧰 Floor jack (rated 3-ton minimum)
- 🧰 Jack stands (rated 3-ton minimum)
- 🧰 Wheel chocks
- 🧰 21mm socket
- 🧰 14mm socket
- 🧰 17mm socket
- 🧰 3/8" drive ratchet
- 🧰 1/2" drive ratchet or breaker bar
- 🧰 3/8" drive torque wrench (5–80 ft-lbs range)
- 🧰 1/2" drive torque wrench (50–150 ft-lbs range)
- 🧰 C-clamp or disc brake caliper compressor tool
- 🧰 Flathead screwdriver (medium size)
- 🧰 Small wire brush
- 🧰 Bungee cord or strong wire
- 🧰 Shop rags or paper towels
- 🧰 Brake cleaner spray
- 🧰 Anti-seize compound
- 🧰 High-temperature brake grease
- 🧰 M8 x 1.25 bolts (rotor removal, optional)
- 🧰 Work gloves
- 🧰 Safety glasses
- 🧰 Disposable mask or respirator
🔩 Required Parts
HowToo sells all the parts you need for this repair:
- 🔩 Rear brake pad set - Qty: 1 set (replace both sides together)
- 🔩 Rear brake rotors - Qty: 2 (replace in pairs)
- 🔩 Rear brake hardware kit (pad clips/shims) - Qty: 1 (recommended)
- 🔩 Brake cleaner - Qty: 1–2 cans
- 🔩 High-temperature brake grease - Qty: 1 small tube
- 🔩 Anti-seize compound - Qty: 1 small tube
- 🔩 Shop towels - Qty: 1 pack
📋 Before You Begin
- 🚗 Park your Corolla on level ground, place the transmission in Park, and switch off the engine.
- 🧱 Place wheel chocks in front of and behind at least one front wheel.
- ⛔ Release the parking brake before you remove the rear calipers, otherwise the rear brakes will be clamped.
- 📦 Lay out your new pads and rotors so you know which parts go where before you start.
🔨 Step-by-Step Instructions
Follow these steps in order:
Step 1: Loosen rear wheel lug nuts
- Use the 21mm socket and 1/2" drive breaker bar to slightly loosen (crack loose) all five lug nuts on both rear wheels, but do not remove them yet.
- Just break them loose while the car is on the ground.
Step 2: Lift and support the rear of the car
- Place the floor jack under the rear center jack point (under the rear subframe crossmember, near the center).
- Raise the rear of the car high enough so both rear wheels are off the ground.
- Position jack stands under the rear pinch welds or designated support points on both sides and slowly lower the car onto the stands using the floor jack.
- Gently rock the car by hand to confirm it is stable on the jack stands.
Step 3: Remove rear wheels
- Use the 21mm socket and 1/2" drive ratchet to remove the loosened lug nuts from one rear wheel.
- Remove the wheel and set it aside; repeat for the other rear wheel.
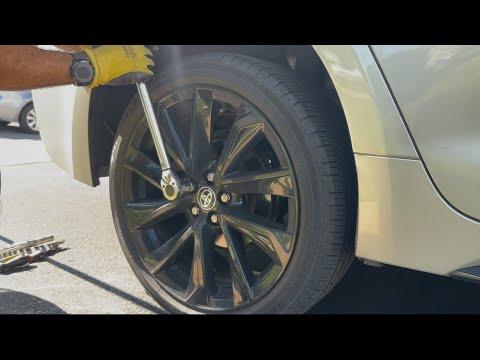
Step 4: Inspect the rear brake assembly
- Look at the rear brake: you will see the caliper (the part that squeezes the pads), the bracket that holds the caliper, the pads between the bracket and rotor, and the rotor (the disc).
- Note how pads sit in the bracket; you’ll copy this later.
Step 5: Remove the caliper (first side)
- On the back of the caliper, find the two smaller slider bolts (top and bottom).
- Use a 14mm socket and 3/8" drive ratchet to remove the lower caliper bolt, then the upper caliper bolt.
- Carefully slide the caliper off the bracket and pads. If it is stuck, gently pry with a flathead screwdriver between the pad and rotor.
- Hang the caliper from the suspension spring using a bungee cord or wire so it is not hanging by the brake hose.
Step 6: Remove the old brake pads and hardware
- Slide the old pads out of the caliper bracket by hand.
- Remove the metal clips (hardware) from the caliper bracket if your new pads come with new clips.
- Use the wire brush to clean the areas of the bracket where the clips sit, removing rust and debris.
- Lightly spray brake cleaner on the bracket and wipe with shop rags.
Step 7: Remove the caliper bracket
- Locate the two larger bolts that hold the caliper bracket to the hub carrier (behind the rotor).
- Use a 17mm socket and 1/2" drive ratchet or breaker bar to remove both bracket bolts; they may be tight.
- Remove the caliper bracket and set it aside on a clean surface.
Step 8: Remove the old rotor
- Try to pull the rotor straight off the hub by hand.
- If it is stuck due to rust, check for two threaded holes on the rotor face.
- Thread two M8 x 1.25 bolts into these holes and tighten them evenly with a 14mm socket until the rotor pushes off the hub.
- If needed, tap the rotor hat (not the braking surface) with a rubber mallet to help loosen it.
Step 9: Prepare and install the new rotor
- Clean the hub face with the wire brush to remove rust and ensure the new rotor sits flat.
- Apply a very thin film of anti-seize compound on the hub face to prevent future rust (avoid wheel studs).
- Spray the new rotor (both sides) with brake cleaner to remove the protective oil, then wipe dry with shop rags.
- Place the new rotor onto the hub, lining up the lug stud holes.
- Temporarily install one lug nut by hand using the 21mm socket to hold the rotor snug against the hub while you work.
Step 10: Reinstall the caliper bracket
- Position the caliper bracket over the new rotor.
- Install the two bracket bolts by hand to avoid cross-threading.
- Use the 17mm socket and 1/2" drive torque wrench to tighten both bolts to 88 Nm (65 ft-lbs).
Step 11: Install new hardware and prepare new pads
- Snap the new metal hardware clips into the caliper bracket where the pads slide.
- Apply a very thin layer of high-temperature brake grease to the areas of the clips where the pad ears (ends) will contact. Do not get grease on pad friction surfaces or rotor.
- If your pads have shims, make sure they are properly attached to the back of each pad.
Step 12: Compress the caliper piston
- Place an old brake pad over the caliper piston face inside the caliper.
- Use a C-clamp or caliper compressor tool to slowly push the piston straight back into the caliper until it is fully seated.
- Watch the brake fluid reservoir under the hood to ensure it does not overflow; if it gets very full, remove a little fluid with a clean syringe or turkey baster.
- Compress slowly to avoid damaging seals.
Step 13: Install new brake pads
- Slide the new inner and outer pads into the caliper bracket, matching the original positions (inner pad usually has a wear indicator tab if present).
- Make sure the pads move smoothly in the clips, not loose but not tight.
Step 14: Reinstall the caliper over the new pads
- Remove the temporary lug nut holding the rotor if it interferes with caliper installation, then hold the rotor by hand if needed.
- Lower the caliper over the new pads and onto the bracket.
- Align the caliper slider bolt holes.
- Install the upper and lower caliper slider bolts by hand first.
- Use the 14mm socket and 3/8" drive torque wrench to tighten both slider bolts to 27 Nm (20 ft-lbs).
Step 15: Repeat for the other rear side
- Follow Steps 5 through 14 on the other rear wheel.
- Doing both sides ensures even braking and wear.
Step 16: Reinstall rear wheels
- Place the rear wheel back on the hub and install all five lug nuts by hand.
- Use the 21mm socket and 1/2" drive ratchet to snug the lug nuts in a star pattern while the car is still on jack stands (do not fully torque yet).
Step 17: Lower the car and torque lug nuts
- Use the floor jack to lift the rear of the car slightly and remove the jack stands, then lower the car fully to the ground.
- Use the 21mm socket and 1/2" drive torque wrench to tighten all rear wheel lug nuts in a star pattern to 103 Nm (76 ft-lbs).
Step 18: Pump the brake pedal
- Before driving, sit in the driver’s seat and press the brake pedal slowly 10–15 times until it becomes firm.
- This moves the pistons out to contact the new pads against the rotors.
✅ After Repair
- 🧪 With the engine running and in Park, press the brake pedal several times to confirm a firm feel.
- 🚗 Test the brakes at low speed in a safe area, checking for noises, vibration, or pulling to one side.
- 🛢 Check the brake fluid level in the master cylinder; adjust if needed to the MAX line using the correct brake fluid type (DOT 3 or as specified on the cap).
- 🛞 Re-check the rear wheel lug nut torque after about 50–100 km of driving.
- 🔥 Bed-in the new pads: make 5–8 smooth stops from about 40–50 km/h down to 10 km/h with gentle-to-medium braking, allowing some cool-down between stops. Avoid hard braking for the first 200–300 km if possible.
💰 DIY vs Shop Cost
Shop Cost: $350–$550 (parts + labor)
DIY Cost: $120–$220 (parts only)
You Save: $230–$330 by doing it yourself!
Shop labor rates vary but typically run $100–$150/hour. This repair takes a shop approximately 1.5–2.0 hours.
🎯 Ready to get started?
HowToo makes it easy: same-day/2-day shipping on every part, plus all the tools and specialty tools you need! Check out the parts and tools sections above to add everything to your cart.
